background image


Assembly Instructions


14X30X12 Round Utility  


V2.3 

Please Do NOT Return Assembly to Dealer or Store. For All Assembly Questions or Shortages Please Call MDM Products directly 

Customer Service 800-447-7079 or 203-877-7070 

5


Step 8

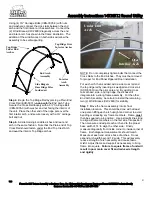
.  Once frame is square and properly supported, 

tighten carriage bolts on all frame members, except for 
End Arch members to Cross Rails along base, side, and 
top.  Support End Arch feet with patio blocks or bricks as 
needed if ground is soft and will not support weight well. 
After hardware is tightened, insert plastic end plugs  1-
5/8” EP-1000 & 1” EP-1001 into all open ends of frame 
members.  
 
When the unit frame is square, put all the anchors in 
before putting on the fabric parts.  By putting the anchors 
in on the inside of the unit frame, the anchors will 
prevent the frame from spreading out over time.  A frame 
that spreads out will put undue stress on the zippers of 
the doors, possibly causing failures. 


ANCHORING FRAME TO GROUND 
 

Once frame is square and properly supported, tighten 
carriage bolts on all frame members, except for End 
Arch members to Cross Rails along base, side, and top.  
Do not over tighten or oval tubing.  After hardware is 
tightened, insert plastic end plugs #14 (2 3/8”) & #15 (1 
1/8”) into all open ends of frame members. 

 
NOTE: Frame must be anchored before 
installing any doors or cover. 

 
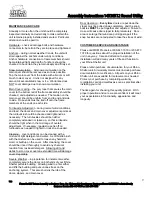
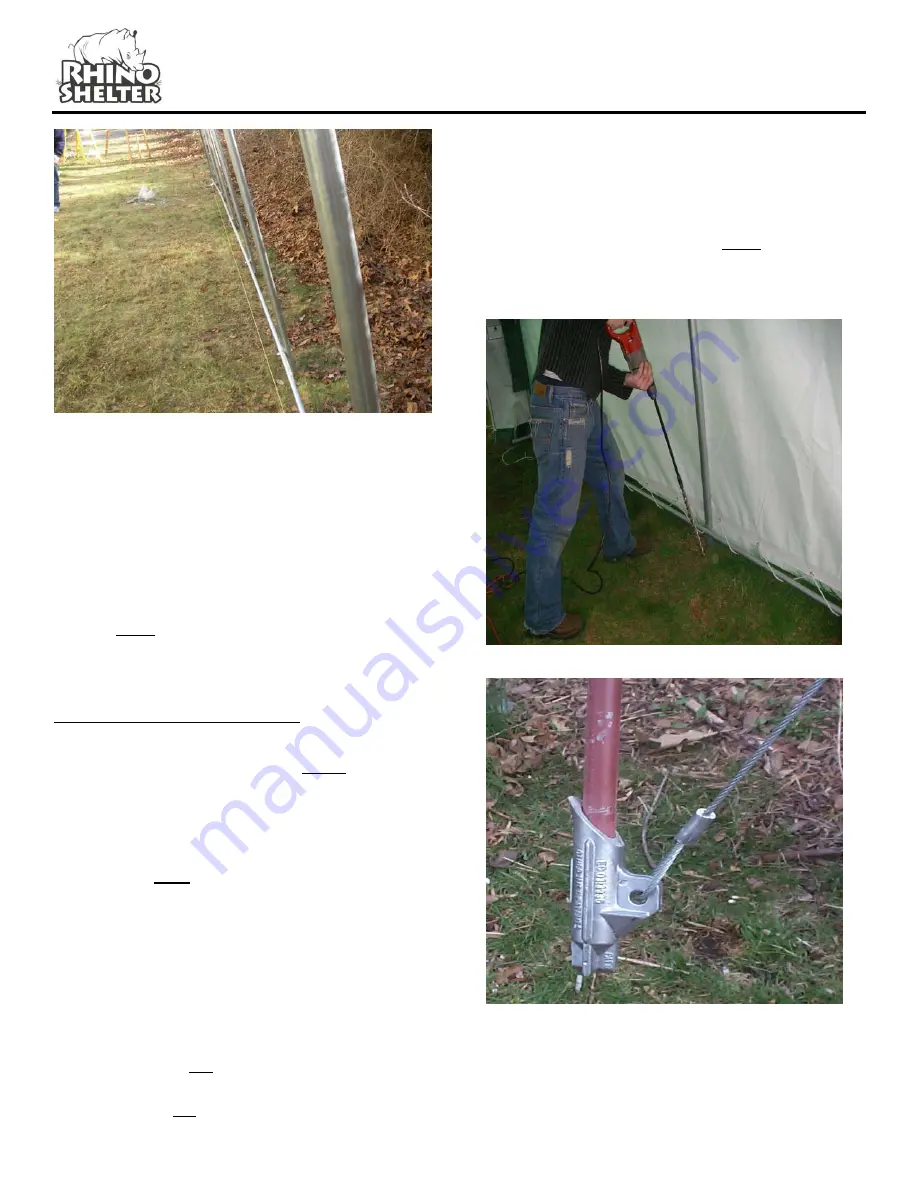
Each Rhino Shelter 14x30x12 building comes with 14 
EARTH CABLE ANCHORS with U-bolts and nuts.  
These versatile anchors allow the frame to be secured to 
almost any surface. In addition you have also been 
provided with a 36” Drive Rod used to drive the anchor 
heads into the earth. 
 
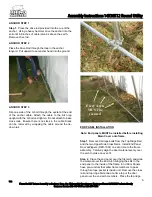
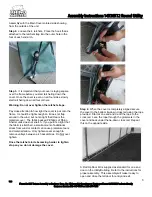
If the location where you are placing the building has 
very hard ground or any rock in it, pre-drill the holes 

before inserting anchors.  Hammer drills can be rented 
at most home improvement or rent-all centers.  Hitting 
the anchors into rock will cause the drive rod end to 
mushroom inside the anchor head, and prevent the drive 
rod from coming out of the hole.   
 
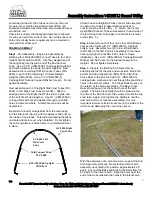
Anchor placement should be made inside the frame at 
the interior corners of the unit, and midway along the 
sides of the frames.  Anchors secure the building to the 
ground, as well as prevent spread of the frame over 
time.   

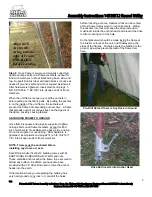
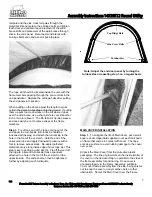
Align each 
Arch with 
string to make 
edge of Frame 
STRAIGHT 
before securing 


    Pre-Drill Holes if there is Any Rock In Ground 


Drive Rod inserts into Anchor Head 


Summary of Contents for PB143012RGN

Page 1: ...d be inspected upon delivery from carrier and any evident damages should be noted on the bill of lading before signing If upon opening the cartons hidden damage is noted contact carrier or its agent immediately Claims for shipping damage MUST be made with the shipping company An inspection of the goods will most likely be required Do not discard packing or any components before the freight company...

Page 2: ...47 7079 or 203 877 7070 2 Base Cross Rail Poles Side Ridge Cross Rail Poles Center Straight Uprights Mid Connect Tube Note All Side and Base Ridge Poles MUST be on Inside of Arch Frame Members Top Ridge Poles MUST be on Outside of Arch Frame members except at Ends See Frame P u a Interior Arches End Arch with Foot Top Ridge Poles Wind Brace SITE PREPARATION Select a level or as close to level as p...

Page 3: ...completely until the frame is completed and set in place Attach one end upright mid tube connect sub assembly to each end of a pair to assembled crest tubes to construct each end arch Qty 2 Attach one Center Upright Mid Connect Tube sub assembly to each side of the remaining Crest Tube pairs to construct the interior arches Qty 5 Step 2 Assemble each of four 4 Corner Wind Braces from section A B w...

Page 4: ...hten bolts that connect the Cross Rails to the End Arches They must be removed for proper for End Panel Zippered Door installation For each arch that is added add a side cross rail and the top ridge rail by inserting a swedged end cross rail SCR 5030 into the prior pole end By adding cross rails at base side and top ridge the arches will integrate into a strong frame assembly For the other End Arc...

Page 5: ...bers to Cross Rails along base side and top Do not over tighten or oval tubing After hardware is tightened insert plastic end plugs 14 2 3 8 15 1 1 8 into all open ends of frame members NOTE Frame must be anchored before installing any doors or cover Each Rhino Shelter 14x30x12 building comes with 14 EARTH CABLE ANCHORS with U bolts and nuts These versatile anchors allow the frame to be secured to...

Page 6: ... tighten Do not attach to base cross rails Ensure there is no slack in the cable Slack can be removed by wrapping the cable around the tie down rail Every Arch MUST be secured END PANEL INSTALLATION Note End panels MUST be installed before installing Main Cover onto frame Step1 Remove Carriage bolts from the Top Ridge Rail and the two Upper Side Cross Rails Install End Panel Door w Zippers DZD 700...

Page 7: ...rnbuckle turn buckle should be loosened all the way and attach the turnbuckle to the hole in the foot of the end arch Hold the end of the unsecured rope and apply downward pressure with a foot to remove excess slack Re adjust gathered material evenly along inside edge of door rope slot This step is key to getting a good door fit Tie off the end off the rope to a second turnbuckle fully expanded at...

Page 8: ...not flap around in the wind but not so tight that it tears the material cover The fabric backed PE fabric of Rhino Shelter units does not stretch If you pull it so tight that the fabric is stretched a small amount of additional stress from wind or contact can cause premature tears and material failure Only tighten cover enough to remove valleys between arch assemblies Do Not over tighten Once the ...

Page 9: ...rall adjustment If necessary readjust rope tie off on turnbuckle as needed to tighten or loosen as needed Cleaning cover and doors can be cleaned with a mixture of light detergent and water A soft bristle brush with the mixture can be used to loosen any hard dirt mold or buildup on the cover After cleansing the cover should be rinsed thoroughly to avoid any chemical reaction from residual detergen...

Reviews: