background image

12 

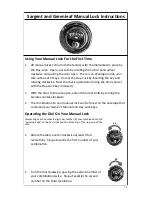
Operating The Lock


 

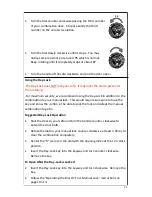
Enter the existing six digit code. The lock comes from the factory set to  
1-2-3-4-5-6. Each key press is confirmed with an audio and visual (LED 
flash) signal.  

 

The lock will indicate a valid code entry with a double signal.  

 

Within 6 seconds, turn the ring around the keypad clockwise until it 
stops.  Then turn the handle on your safe clockwise and pull the door 
open. 

 

To lock the safe, turn the handle on your safe counter-clockwise until it 
stops.  Then turn the ring around the keypad counter-clockwise.  The lock 
will beep twice when it has re-engaged. 

Wrong Try Penalty


 

Every invalid code entry is indicated by a triple signal.  Entering 5 
consecutive invalid codes starts a 3 minute delay period. (LED will flash at 
5 or 10  second intervals.) 


 

During the delay period, pressing any key will extend the delay period a 
few seconds.


Changing Your Code 

Before changing your code, open the door and extend the door bolts.  Always 

leave the door open when changing your combination. 

 

Press “0” (zero) six times. 

 

Enter your existing six digit code once. 

 

Enter the NEW six digit code twice. 

 

Enter the NEW code one more time to unlock the safe. 

If a mistake is made, wait ten seconds and repeat steps 1-4. 

-Always test the lock several times with the door still open.  

-If you just changed your combination for the first time, always check to make 
sure that 1-2-3-4-5-6 (factory default) will no longer open the lock. 

-When creating new combinations, avoid using personal data such as birth 
dates, street numbers or phone numbers to keep your valuables as secure as 
possible. 

Always keep a copy of your combination in a secure location 

outside of your safe. 

Summary of Contents for Bighorn series

Page 1: ...SAFE OWNER S MANUAL MODEL NO _________________________________ SERIAL NO __________________________________...

Page 2: ...lieve our ultimate responsibility is to provide a quality product that creates peace of mind and unmatched value for our customers We are thankful you chose Rhino Metals Inc to help protect your valua...

Page 3: ...Combination ___________________________________________ Purchased From ___________________________________________ Date ___________________________________________ Rhino Metals Inc Makers of Bighorn...

Page 4: ...ping Feet on Rhino Safes 5 Bolting Down Your Rhino Safe 6 Getting To Know Your Safe 7 8 LaGard and SecuRam Electronic Lock Instructions 9 10 Sargent and Greenleaf Electronic Lock Instructions 11 12 Sa...

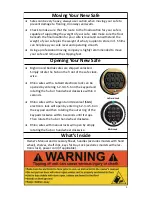
Page 5: ...Bighorn and Kodiak safes are shipped unlocked Simply rotate the hub on the front of the safe clock wise Rhino safes with a LaGard electronic lock can be opened by entering 1 2 3 4 5 6 on the keypad a...

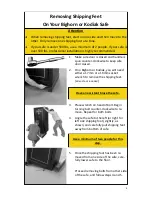
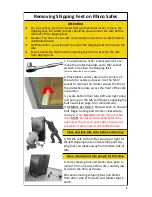
Page 6: ...et wrench to remove the shipping feet Wrench not included 3 Place wrench on head of bolt Begin turning bolt counter clockwise to re move Repeat for both bolts 4 Angle the safe to the left or right for...

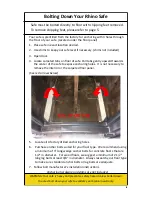
Page 7: ...or holes 4 Purchase anchor bolts suited for your floor type We recommend using a minimum of 3 long wedge anchor bolts for concrete floors that are 1 2 in diameter For wood floors we suggest a minimum...

Page 8: ...s are removed the door MUST be closed and locked before the next step The door of your safe is heavy and presents a safety hazard until bolted down 5 Tilt the safe to the left as shown or right for th...

Page 9: ...d anchoring holes 6 Purchase anchor bolts suited for your floor type We recommend using a minimum of 3 long wedge anchor bolts for concrete floors that are 1 2 in diameter For wood floors we suggest a...

Page 10: ...in purchasing an extended warran ty you have 30 days from the purchase of your safe to do so For more infor mation see the Accessory Sheet included in your safe visit www rhinosafe com or contact a lo...

Page 11: ...h and relieve any stresses from the mechanism we recommend adding a small amount of grease to the door bolts With the door open and the handle rotated counter clockwise to extend the door bolts wipe a...

Page 12: ...and discard if replacing Plug a new 9 volt battery into the terminals and tuck the battery and wires back into the battery cavity Slide the keypad back down onto the shoulder screws Be careful not to...

Page 13: ...riod Removing the battery during the delay period will reset the 5 minute timer Changing Your Code Before changing your code open the door and extend the door bolts Always leave the door open when cha...

Page 14: ...ing Plug a new 9 volt battery into the terminals and tuck the battery and wires back into the battery cavity Push the keypad ring back towards the safe and rotate the ring clockwise The ring will slid...

Page 15: ...ll flash at 5 or 10 second intervals During the delay period pressing any key will extend the delay period a few seconds Changing Your Code Before changing your code open the door and extend the door...

Page 16: ...door bolts by turning the handle counter clockwise The combination to your manual lock can be found on the envelope that contained your Owner s Manual and Day Lock keys Operating the Dial On Your Manu...

Page 17: ...mbination to your manual lock This would require someone to have the key and know the combo or be able to pick the lock and defeat the manual combination to get in Suggested Day Lock Operation Shut th...

Page 18: ...d you will see a small hole drilled in the steel in one of the lower corners on the backside of the safe You ll need to back drill through the fire lining and upholstery to be able to feed the wire fo...

Page 19: ...ing to unlock the safe rotate the handle counter clockwise while you enter your combination Once you hear the two beeps wait for 2 seconds and then rotate clockwise to open If you are attempting to lo...

Page 20: ...treme or unusual environments Failure to bolt down the safe using factory pre drilled holes voids this warranty Any modifying or tampering with the safe which alters or affects the safe s use or opera...

Reviews: