OPERATION
TW120 01/11
Operation Section 4-31
© 2011 Alamo Group Inc.
OPERA
T
ION
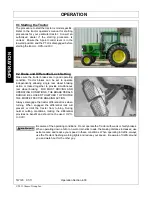
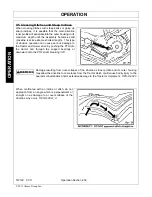
9.3 Raising the Mower
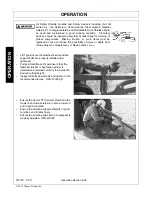
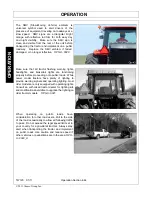
Using the tractor 3-point hitch control lever-lift type
or hydraulic remote lever-pull and semi-mount
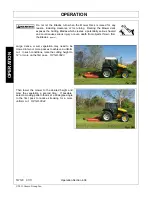
type, raise the mower high enough to clear all
ground obstacles. When raising the mower, make
sure all connection points are securely attached
and at least 1” clearance is maintained between the
driveline and the deck. If necessary, place an
upper lift stop on the 3-point hitch control lever to
limit the height the mower can be raised to avoid
driveline damage.
OPS-R-0042_A
9.4 Driving the Tractor and Mower
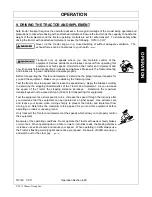
Start off driving at a slow speed and gradually increase your speed while maintaining complete control of the
tractor and mower. Moving slowly at first will also prevent the tractor from rearing up and loss of steering
control. The tractor should never be operated at speeds that cannot be safely handled or which will prevent
the operator from stopping quickly during an emergency. If the power steering or engine ceases operating,
stop the tractor immediately as the tractor will be difficult to control.
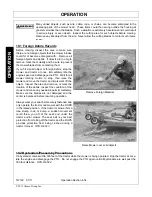
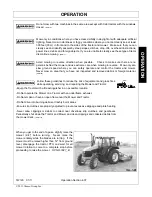
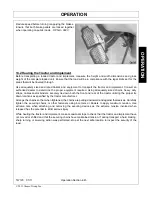
Perform turns with the tractor and mower at slow
speeds to determine how the tractor with an
attached mower handles a turn. Determine the
safe speed to maintain proper control of the tractor
when making turns. When turning with a towed
implement, the overall working length of the unit is
increased. Allow additional clearance for the
mower when turning.
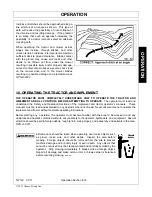
To avoid overturns, drive the tractor with care and
at safe speeds, especially when operating over
rough ground, crossing ditches or slopes, and
turning corners. Tractor wheel tread spacing
should be increased when working on inclines or
rough ground to reduce the possibility of tipping.
Use extreme caution when operating on steep
slopes. Keep the tractor in a low gear when going
downhill. DO NOT coast or free-wheel downhill.
OPS-R-0019
Summary of Contents for TW120
Page 9: ...Safety Section 1 1 2011 Alamo Group Inc SAFETY SECTION...
Page 28: ...SAFETY TW120 01 11 Safety Section 1 20 2011 Alamo Group Inc SAFETY Decal Description...
Page 29: ...SAFETY TW120 01 11 Safety Section 1 21 2011 Alamo Group Inc SAFETY...
Page 30: ...SAFETY TW120 01 11 Safety Section 1 22 2011 Alamo Group Inc SAFETY...
Page 31: ...SAFETY TW120 01 11 Safety Section 1 23 2011 Alamo Group Inc SAFETY...
Page 32: ...SAFETY TW120 01 11 Safety Section 1 24 2011 Alamo Group Inc SAFETY...
Page 33: ...SAFETY TW120 01 11 Safety Section 1 25 2011 Alamo Group Inc SAFETY...
Page 34: ...SAFETY TW120 01 11 Safety Section 1 26 2011 Alamo Group Inc SAFETY...
Page 35: ...SAFETY TW120 01 11 Safety Section 1 27 2011 Alamo Group Inc SAFETY...
Page 36: ...SAFETY TW120 01 11 Safety Section 1 28 2011 Alamo Group Inc SAFETY...
Page 38: ......
Page 39: ......
Page 65: ......
Page 91: ...Introduction Section 2 1 2011 Alamo Group Inc INTRODUCTION SECTION...
Page 96: ......
Page 97: ...Assembly Section 3 1 2011 Alamo Group Inc ASSEMBLY SECTION...
Page 109: ...Operation Section 4 1 2011 Alamo Group Inc OPERATION SECTION...
Page 156: ......
Page 157: ...Maintenance Section 5 1 2011 Alamo Group MAINTENANCE SECTION...
Page 160: ...MAINTENANCE TW120 01 11 Maintenance Section 5 4 2011 Alamo Group MAINTENANCE...
Page 161: ...MAINTENANCE TW120 01 11 Maintenance Section 5 5 2011 Alamo Group MAINTENANCE...
Page 174: ...MAINTENANCE TW120 01 11 Maintenance Section 5 18 2011 Alamo Group MAINTENANCE...
Page 188: ...Secci n de Seguridad 1 1 2011 Alamo Group Inc SECCI N DE SEGURIDAD...
Page 189: ......

