EN
6
• Remove the counter flange (3, Fig. 2) and
blade (2, Fig. 2) and push the new blade on
the flange (1, Fig. 2). Consider the rotation
direction indicated on the blade. Attach the
counter flange (3, Fig. 2).
• Tighten the fixing nut (4, Fig. 2) and the splash
guard.
• Ensure you do not leave any tools lying on the
splash guard.
5. Service & maintenance
Make sure that the machine is not live
when carrying out maintenance work on
the motor.
The machines have been designed to operate
over a long period of time with a minimum of
maintenance. Continuous satisfactory operation
depends upon proper machine care and regular
cleaning.
Cleaning
Keep the ventilation slots of the machine clean to
prevent overheating of the engine.
Regularly clean the machine housing with a
soft cloth, preferably after each use. Keep the
ventilation slots free from dust and dirt.
If the dirt does not come off use a soft cloth
moistened with soapy water. Never use solvents
such as petrol, alcohol, ammonia water, etc.
These solvents may damage the plastic parts.
Please clean the tool immediately after use.
Disconnect the plug from the socket.
• Remove the water tray from the machine and
drain the dirty water.
• Unscrew the splash guard and clean it.
• Loosen the star-shaped knob, fold up the
table, and polish the entire machine.
The machine complies with all current safety
regulations. Repairs may only be carried out by an
approved company, because repair attempts by
unqualified people may cause injuries to the user
and bystanders. Regularly check the plug and
the cable and if they are damaged they should
be replaced by an approved company. Also
check any extension cables. Damaged safety
guards and switches must be replaced before the
machine is used again.
Lubrication
The machine requiers no additional lubrication.
Faults
Should a fault occur, e.g. after wear of a part,
please contact the service address on the
warranty card. In the back of this manual you find
an exploded view showing the parts that can be
ordered.
Environment
To prevent damage during transport, the
appliance is delivered in a solid packaging which
consists largely of reusable material. Therefore
please make use of options for recycling the
packaging.
Faulty and/or discarded electrical or
electronic apparatus have to be
collected at the appropriate recycling
locations.
Warranty
The guarantee conditions can be found on the
separately enclosed guarantee card.
Summary of Contents for TCM4005
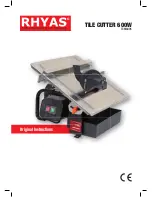
Page 1: ...TILE CUTTER 600W TCM4005 Original Instructions...
Page 2: ...2 4 5 3 2 1 Fig 2 Fig 1 7 5 4 3 9 11 13 12 10 1 2 8...
Page 7: ...EN 7...
Page 9: ...EN 9...
Page 12: ...1405 02...


