G
B
26
26
B
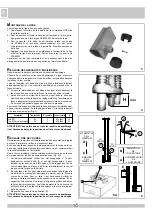
OOM ARM ASSEMBLING
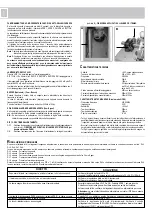
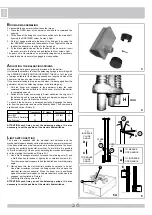
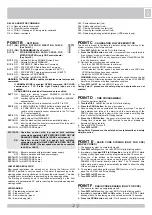
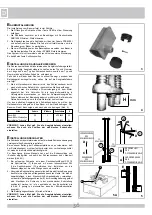
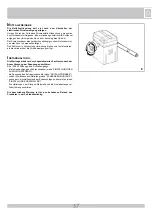
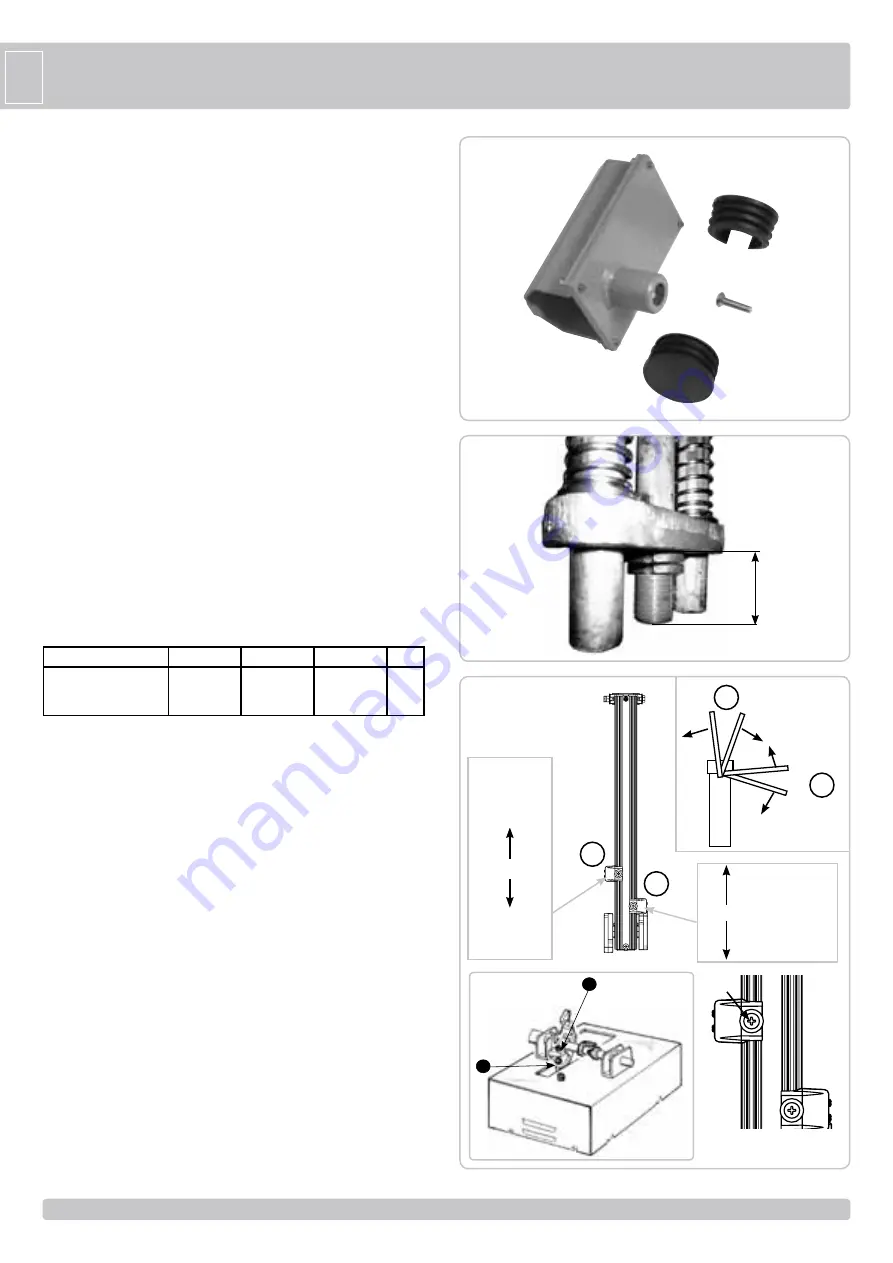
To assemble the boom arm follow these four steps:
1 - Press the OPEN input of the barrier control board to command the
opening.
2 - Fit the base of the fixing hub in vertical position onto the main shaft,
by using the DSB10X45I screw. Fasten it tight.
3 - Fix the U shape profile onto the base of the fixing hub, by using the
four DTB8X20I screws and their washers. Do not tighten the screws
to allow the boom arm to slide into the fixing hub.
4 - Fit the black plastic caps at the both ends of the boom arm. Insert
the boom arm into the fixing hub and fasten the four screws tight.
The gear unit is irreversible so no external locking device is necessary
to keep the barrier in securely engaged in close position.
A
DJUSTING THE BALANCING SPRINGS
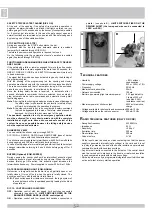
No balancing springs are generally provided with the barrier.
It is therefore necessary to order the balancing springs in according with
the SPRINGS CHOICE AND ADJUSTMENT TABLE. In fact, the kind
of springs suitable for the balancing depends on length and kind of the
boom arm, kind and number of accessories installed.
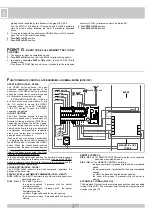
If the boom arm tends to drop too quickly when it is disengaged from the
gearmotor, adjust the balancing springs in the following way:
1 - With the boom arm engaged to the gearmotor, press the open
command of the control board to lift the boom arm until the barrier
is completely opened.
2 - Switch off the motor power supply. Screw clockwise the ring nut of
the balancing-unit to increase the spring compression degree. Use
the second ring nut to block the first one.
To check if the boom arm is balanced perfectly, disengage the boom
arm from the gearmotor and move the boom by hand. The boom should
slightly tend to rise (Picture 4).
ATTENTION: each time you set the balancing springs, it is also
necessary to set the position of the electric limit switches.
L
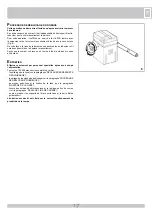
IMIT SWITCH SETTING
The barrier is supplied with the electrical limit switches and the
mechanical stoppers already set to allow optimum boom arm movement.
If the base plate cannot be cemented on a horizontal plane, the boom
might be not perfectly horizontal or vertical. To avoid this, it is possible
to trim the trajectory of the boom by adjusting the mechanical stoppers
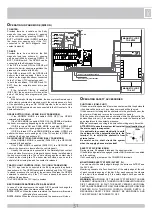
and the electrical limit switches (Picture 5A):
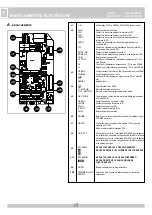
1 - Use a No.19 hexagonal wrench to loosen the retaining nuts (F) and
a No.8 allen key to loosen or tighten the countersunk screws (G).
Trim the mechanical stoppers to find the desired boom arm trajectory
angle.
2 - Having done this, the electrical limit switches now have to be set.
Use a star screwdriver to loose the fixing screws (E) and move the
electrical limit switch supports. When the boom arm is positioned
against it mechanical stopper, its own electrical limit switch has to be
engaged, as illustrated in Picture 5.
3 - Fasten tight the fixing screws (E).
ATTENTION: each time you set the balancing springs, it is also
necessary to set the position of the electric limit switches.
3
H
mm
4
Ø 4
3
ACG8640
20
Ø 4
3
ACG8640
20
List
Type springs
N° springs
Code springs
H
Boom Ø 80
Boom Ø 80 with Photoelectric
strip “Fotocosta”
F
G
5
5A
CLOSE
LS
D
C
OPEN
LS
TO
INCREASE
CLOSE
ANGLE
D
C
TO REDUCE
CLOSE
ANGLE
B
E
A
B
A
TO INCREASE
OPEN ANGLE
TO REDUCE
OPEN ANGLE
1
1
2
2
Summary of Contents for AA50037K
Page 55: ...55 55 NOTES ...

