Page
32
/
60
4.2.1- For log splitter 8T - PREHLS7T/V / 042091
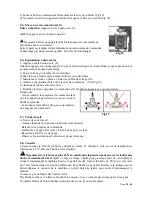
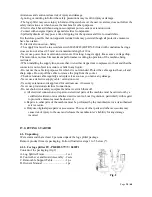
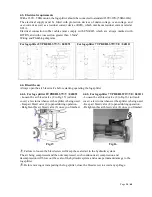
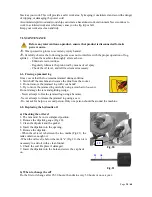
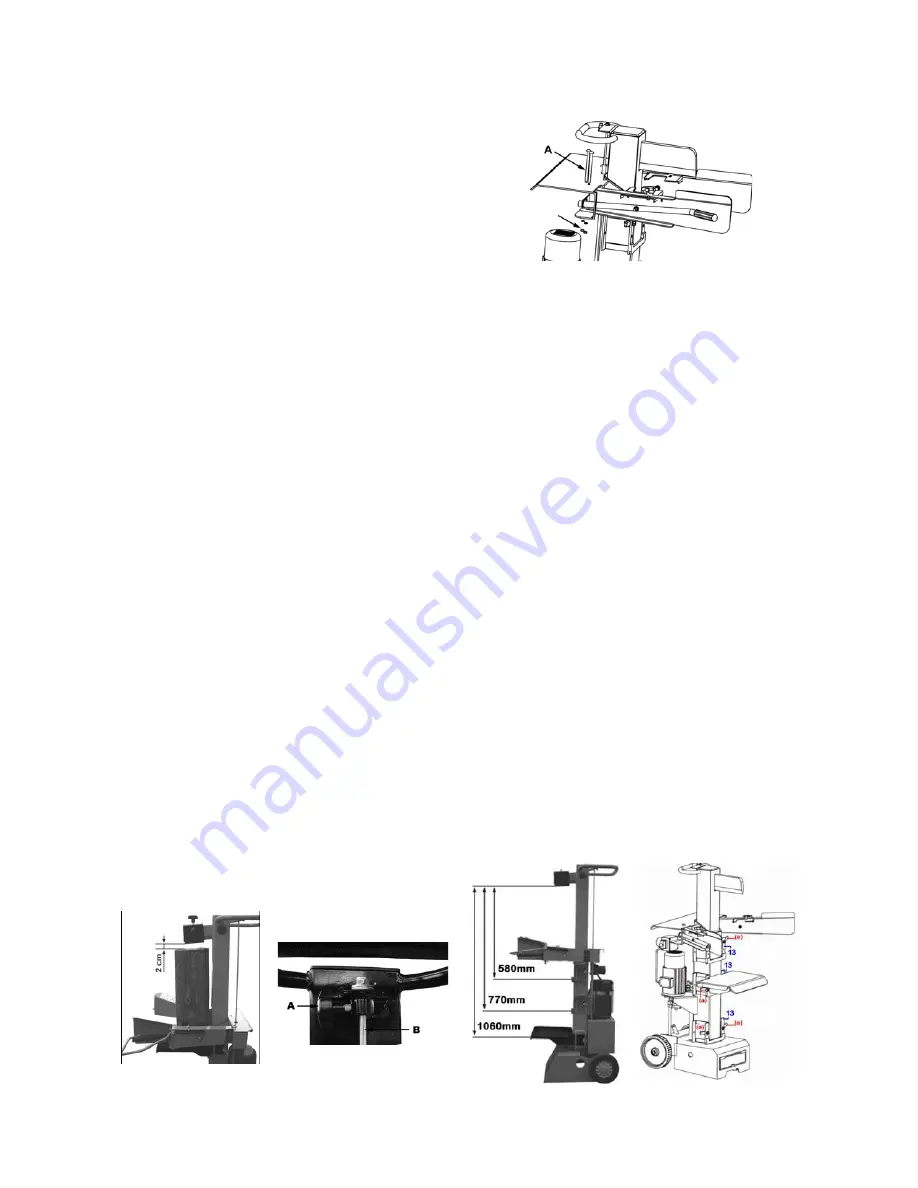
4.2.1.1- Control lever assembly (Fig.5)
- Put arm in its position: insert arm’s tube into the bracket.
- Insert long bolt (A)
- Fix bolt (A) on its lower side with the washer and nut.
- Make sure to tighten all screws after control lever
assembly.
Fig.5
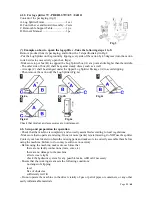
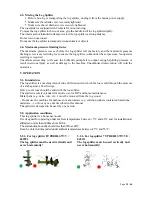
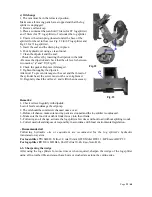
4.2.1.2- Adjusting the ram travel (Fig.6&7)
Should your logs be much shorter, the machine working capacity can be increased by to adjusting the
ram stroke accordingly. The ram stoke adjustment is possible at all times.
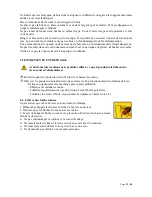
1. Place a log on the working table and let the ram slide down until the wedge is about 2cm from the
log (Fig.6).
2. Disengage one of the control levers in order to prevent the ram from returning back to its upper
start position.
3. Switch off and unplug machine from its power supply.
4. Release the second control lever handle.
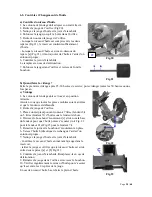
5. (a) Release the knob (A in Fig.7) on the rear
(b) Pull up the control rod (B in Fig.7) as much as possible, until desired length is set.
(c) Once the rod is pulled sufficiently up to obtain the desired ram stroke, tight the knob back to
the original torque.
The ram travel is now shorter than the original full-stroke.
The ram travel adjustments to the original full-stroke length can be repeated at all times by simply
releasing the knob, pushing the rod back and tightening the knob again
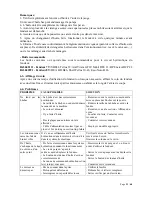
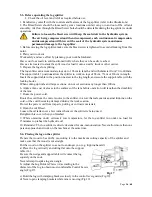
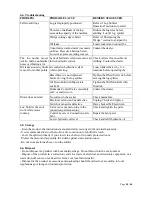
4.2.1.3- Table height adjustment (Fig.8)
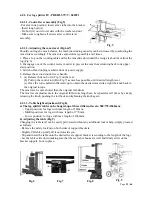
a) The log splitter table can be hanged-up at three different levels: 580/770/1060mm
- Upper position: for logs with max length of 580mm.
- Middle position: for logs with max length of 770mm.
- Lower position: for logs with max length of 1060mm.
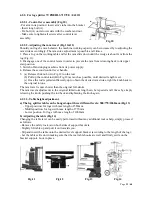
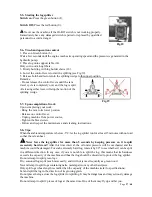
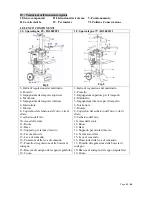
b) Adjusting the table (Fig.9)
Changing the table level can be easily performed without any additional tool or help, simply proceed
as follows:
- Remove the safety lock (a) on both sides of support brackets.
- Slightly lift table up and pull it out towards you.
- Slip and insert the table onto the desired level support bracket (according to the length of the log),
- Let the table settle down making sure that the rear table hooks are well and firmly settle on the
bracket support. Lock in place.
Fig.6
Fig.7
Fig.8
Fig.9

