background image

III. SAFETY INSTRUCTIONS

Before using this product, carefully read and understand all the safety 
recommendations and instructions for safe operation.
Keep this manual handy so that you may refer to it later whenever any questions arise. 
Always be sure to include this manual when selling, lending, or otherwise transferring 
the ownership of this product.
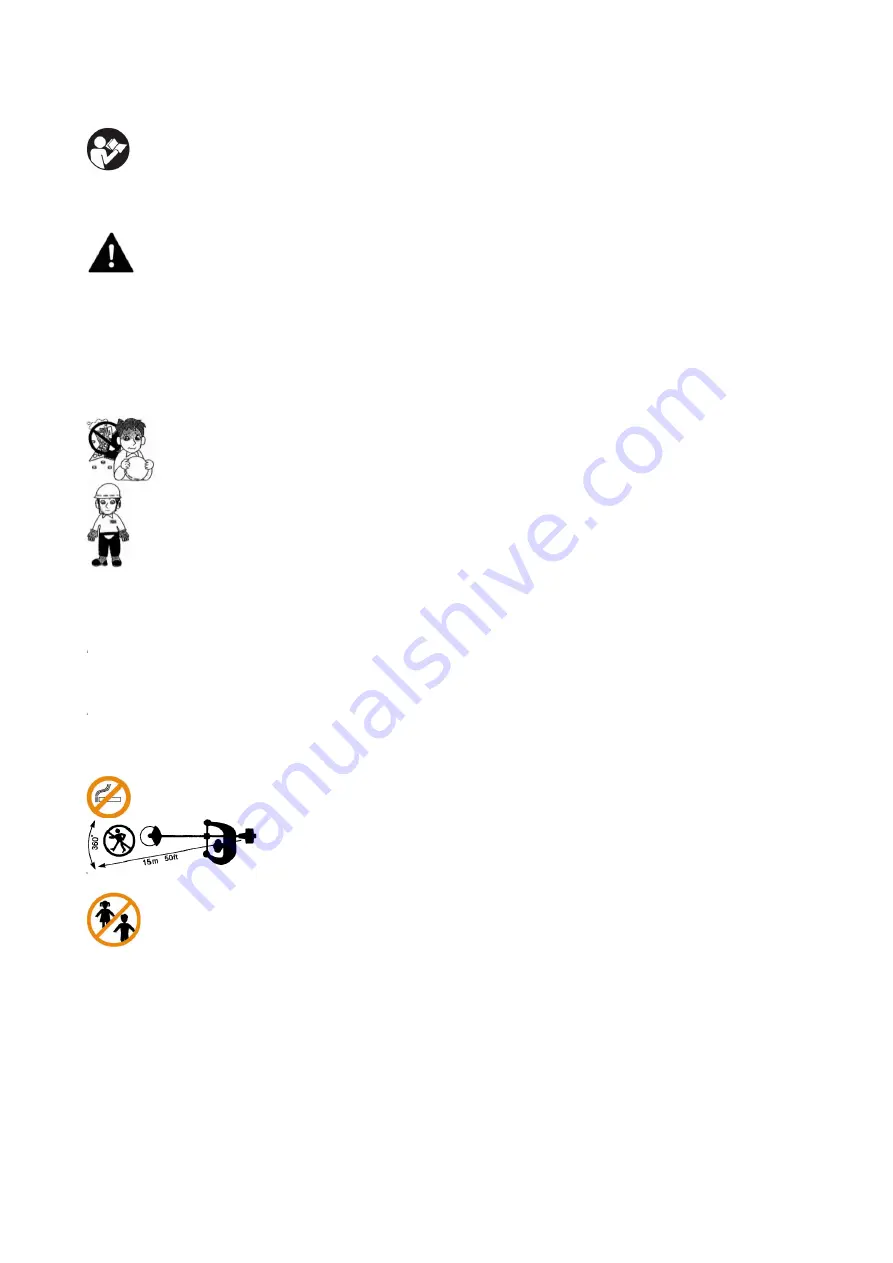
WARNING

! This product should only be used by trained users, who have thoroughly 

read this instruction manual.
Only well-instructed adults should operate the product.  This product is not intended 
for use by persons (including children) with reduced physical, sensory or mental 
capabilities, or lack of experience and knowledge, unless they have been given 
supervision or instruction or training concerning the use of the product by a person 
responsible for their safety.

3.1- For safe operation

1. Never operate this product when you are fatigued, ill, or upset, or
under the influence of medication that may make you drowsy, or if
you are under the influence of alcohol or drugs.
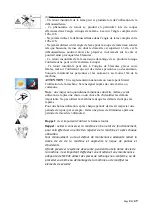
2. Wear personnel protective equipment: gloves; safety footwear, snug
fitting clothing, goggles or face protection, hearing and head 
protection devices. 
Use vibration-proof gloves.
3. Keep the product and cutting element well maintained. 
4. Continual and regular users should monitor closely the condition of
their hands and fingers. If any symptoms appear (e.g. carpal tunnel
syndrome…), seek medical advice immediately.
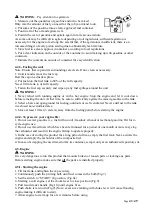
5. Always use caution when handling fuel. 
Wipe up all spills and then move the product at least 3m from the 
fueling point before starting the engine.
6. Eliminate all sources of sparks or flame (i.e. smoking, open flames,
or   tools   that   can   cause   sparks)   in   the   areas   where   fuel   is   mixed,
poured, or stored.
7. Do not smoke while handling fuel or while operating the product.

8. Do not allow other persons to be near the product when starting or 
cutting. 
Keep bystanders (esp. children) and animals out of the work area.
Children, pets and bystanders should be a minimum of 15m away 
when you start or operate the product
Keep children away:
The use of this product by children is forbidden. 
Keep the product away from children or from their environment. 
Never allow children to operate the appliance. Children should be 
supervised to ensure that they do not play with the product.
Never leave the product unattended.
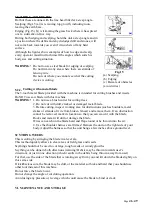
9. Never start cutting until you have a clear work area, secure footing,
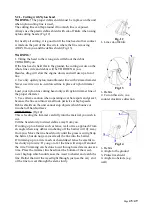
10. Always hold the product firmly with both hands when the engine 
is running. 
Use a firm grip with thumb and fingers encircling the product 
handles.
11. Keep all parts of your body away from the cutting elements when

Page 

36

 / 

49

Summary of Contents for GTB5202R

Page 1: ...struzioni e di manutenzione FR D BROUSSAILLEUSE THERMIQUE Manuel d instructions et d utilisation EN GASOLINE BRUSH CUTTER User and maintenance manual R f Art Nr PRDEBT521 IT Imp da Ribimex Italia s r...

Page 2: ...ENT Lire et assimiler ce manuel avant d assembler ou d utiliser ce produit Une utilisation incorrecte du produit pourrait causer de graves blessures et des dommages Conserver ce manuel pour pouvoir le...

Page 3: ...di aggancio per cinghia 14 Impugnatura 15 Cinghia Fig 1 II CARATTERISTICHE Descrizione Decespugliatore a scoppio 52cc Articolo PRDEBT521 IT Modello GTB5202R Motore TT1E44F 5 monocilindrico 2 tempi Ci...

Page 4: ...Livello di potenza sonora LWA 99 4 dB A K 3dB A Livello di vibrazione Max 9 666m s2 K 1 5m s2 Peso ca 7 20 Kg Page 4 49...

Page 5: ...eteil prodotto incluso il dispositivo di taglio sempre in buone condizioni 4 Si raccomanda pertanto a chi fa un uso prolungato di questa macchina di controllare periodicamente la condizione delle mani...

Page 6: ...mitta lontana da voi 17 Prima del lavoro controllate che il prodotto non sia lento danneggiato o consumato Non usate mai un prodotto che sia danneggiato aggiustato in maniera impropria o non completam...

Page 7: ...che possono prodursi L utente e o l operatore devono utilizzare il prodotto con buono senso e prudenza in particolare in ci che riguarda ci che non indicato in questo manuale 3 2 Precauzioni durante...

Page 8: ...ore di lavoro al minimo e fate pause a tempo debito Per un uso corretto dopo ogni periodo di lavoro si recommenda di prendere un periodo di riposo per es prendere un periodo di riposo per 10 minuti do...

Page 9: ...15 metri dalla macchina Tenere tutti persone esp i bambini eventuali spettatori ed aiutanti ad una distanza di 15 metri dalla macchina e dell area di lavoro Lavorate solo in ambienti bene aerati Non u...

Page 10: ...ione della protezzione Fig 4 Fig 4 a Vite b Staffa di serraggio 4 Protezzione 5 Tubo Installare lo schermo protettivo 4 sul collare b sul tubo 5 con le viti a 4 3 4 Installazione de la testa di taglio...

Page 11: ...rimenti il motore pu grippare a causa del sovraccarico 4 4 Carburante ATTENZIONE 1 La benzina estremamente infiammabile Evitate di fumare o avvicinare fiamme libere o scintille al carburante 2 Spegnet...

Page 12: ...serbatoio e la sua circonferenza sono propri Pulire se necessit 1 Svitate e togliete il tappo del carburante Appoggiatelo su una superficie priva di polvere 2 Versate il carburante nel serbatoio fino...

Page 13: ...avviarsi Se il serbatoio del carburante si era esaurito dopo il rifornimento ripetere i passi da 3 a 7 della procedura Avviamento del motore freddo non utilizzare la valvola dell aria Fig 7 Fig 8 a In...

Page 14: ...plastica con lama troncatrice Fig 12 Fig 12 1 Lama troncatrice a sinistra Per quasi tutti i tipi di taglio bene inclinare la testa di filo in modo da ottenere il contatto sulla parte del cerchio dove...

Page 15: ...re l erba all indietro laddove questa si diffusa lungo un marciapiede o un viale Durante la bordatura o la scotennatura tenere fortemente inclinata l unit e in posizione tale per cui i detriti ed even...

Page 16: ...ifica un contraccolpo potrebbe darsi che la lama smussata o che il materiale talmente spesso e duro da richiedere altri attrezzi al posto di questa macchina Non sforzare la lama per il taglio Non vari...

Page 17: ...aver arrestato il motore la marmitta ancora calda Mai toccare le parti roventi ad esempio la marmitta Verificare che non vi siano perdite di carburante dal serbatoio AVVERTENZA Applicare sempre la pro...

Page 18: ...Eseguire lo smaltimento dei detriti attrezzature accessori ed imballaggio in conformit alla normativa vigente in materia di protezione dell ambientale Page 18 49...

Page 19: ...ercle du filtre air 12 R servoir essence 13 Support pour harnais 14 Poign e 15 Harnais Fig 1 II CARACT RISTIQUES Description D broussailleuse thermique 52CC R f rence PRDEBT521 IT Mod le Type GTB5202R...

Page 20: ...2 4mm x 2 5m Lame m tal 255mm Niveau de pression acoustique LPA 88 1 dB A K 3dB A Niveau de puissance acoustique LWA 99 4 dB A K 3dB A Niveau de vibrations Max 9 666m s2 K 1 5m s2 Poids net env 7 20...

Page 21: ...de s curit et un casque anti bruit Porter les gants anti vibrations 3 Maintenir le produit y compris les l ments de coupe bien entretenu 4 Les personnes qui utilisent de mani re r guli re et r p titiv...

Page 22: ...moteur 17 Avant de se servir du produit toujours contr ler l tat du produit et v rifier qu il n y a pas de trace d usure de pi ces desserr es ou de endommag es Ne jamais utiliser un produit endommag...

Page 23: ...essoire autre que ceux recommand s dans les instructions peut pr senter un risque de blessures des personnes et animaux et de dommages aux biens L utilisateur et ou l op rateur de l outil sont seuls r...

Page 24: ...ementation nationale ou locale peut limiter l utilisation de la machine Se renseigner aupr s de votre mairie ou commune Note une inspection quotidienne minutieuse doit tre r alis e avant utilisation e...

Page 25: ...et animaux loign s de la machine et de la zone de travail une distance de 15m minimum Attention Les gaz d chappement sont dangereux car ils contiennent du monoxyde de carbone Utiliser le produit uniq...

Page 26: ...ssemblage du capot protecteur Fig 4 a Vis b Collier de support partie sup rieure 4 Capot de protection 5 Tube Installer la protection 4 sur le collier b du tube 5 l aide des vis a 4 3 4 Assemblage de...

Page 27: ...ncelles proximit de l endroit o est entrepos e l essence o est fait le plein 2 Arr ter le moteur puis le laisser refroidir un peu avant de remplir le r servoir 3 Remplir le r servoir l ext rieur sur u...

Page 28: ...er si besoin 1 D visser puis retirer le bouchon de carburant D poser le bouchon sur une surface non poussi reuse 2 Remplir le r servoir de carburant 80 de sa capacit totale Ne pas remplir le r servoir...

Page 29: ...r devrait red marrer Si le r servoir s est vid faire le plein puis r p ter les tapes 3 7 ci dessus SANS utiliser le starter Note Toujours laisser le moteur se r chauffer avant utilisation en appuyant...

Page 30: ...our une utilisation avec fil Nylon Le fil de coupe peut fouetter s il est trop long Toujours utiliser le capot protecteur avec la lame coupe fil Fig 12 Fig 12 1 Lame coupe fil Pour la plupart des coup...

Page 31: ...l 3 Capot protecteur 4 Angle par rapport a l obstacle ex mur DEGAZONNER et DELIGNER Fig 15 Ces deux actions sont faites avec la t te fortement inclin e D gazonner Fig 15 a est le fait de d couper la v...

Page 32: ...ation vitez toute forme de pression ou force qui pourrait tordre ou casser la lame VI ENTRETIEN ET ENTREPOSAGE AVERTISSEMENT Avant toute intervention de nettoyage d inspection ou de d montage arr ter...

Page 33: ...ponge abrasive ni d objets tranchants ou pointus Ne jamais plonger l appareil dans l eau ou un quelconque liquide Nettoyer les ouies de ventilation l aide d une brosse souple ou d un pinceau 6 4 Entr...

Page 34: ...uffler 11 Air Cleaner Cover 12 Fuel tank 13 Harness hooking point 14 Handle 15 Harness Fig 1 II CHARACT RISTICS Description Brush cutter 52cc Reference PRDEBT521 IT Model GTB5202R Engine TT1E44F 5 mon...

Page 35: ...mm Nylon spool 2 fils 2 4mm x 2 5m Metal blade 255mm Sound Pressure Level 88 1 dB A K 3dB A Sound Power Level 99 4 dB A K 3dB A Vibrations level Max 9 666m s2 K 1 5m s2 Dry weight Unit only 7 20 Kg Pa...

Page 36: ...uct and cutting element well maintained 4 Continual and regular users should monitor closely the condition of their hands and fingers If any symptoms appear e g carpal tunnel syndrome seek medical adv...

Page 37: ...element is no longer rotating when you put the product 20 Do NOT expose to and do not use during bad weather conditions Never cut in high wind bad weather e g rain storm snow when visibility is poor o...

Page 38: ...Make certain that the area in which you are cutting is free from obstructions Remove any obstruction which could be hit while you are operating the product 4 Cut at high engine speeds 5 Do not overrea...

Page 39: ...increases the risk of breakdowns and accidents To preserve the security system throughout the life of the machine it is important to perform maintenance and proper cleaning DO NOT use non compliant re...

Page 40: ...hine to rain or leave the machine outside under the rain Do not use the product in bad weather in the rain or during inclement weather strong winds during cold or hot weather or fog or other condition...

Page 41: ...lar 4 protective shield 5 tube Install the protective shield 4 to the collar b on the tube 5 with screws a 4 3 4 Installing the Nylon line Nylon cutter head Fig 5 a Key b collar ring c gear case 1 nyl...

Page 42: ...stop the engine and allow it cool before refueling the unit 3 Select outdoor bare and open ground for fueling and move at least 3 m 10 ft away from the fueling point before starting the engine 4 Use...

Page 43: ...re to sufficiently agitate the mixed gasoline in the tank 2 Select a bare and open ground for fueling outdoors or well ventilated Never add fuel to the tank in a closed non ventilated area 3 Move at l...

Page 44: ...clear of surrounding objects Note When restarting the engine immediately after stopping it put choke lever in open position 4 5 3 Adjusting the carburettor The carburetor is adjusted in factory before...

Page 45: ...n operating over bare spots and gravel because the line can throw small rock particles at high speeds Debris shields on the unit cannot stop objects which bounce or ricochet off hard surfaces Fig 13 1...

Page 46: ...Before cutting inspect working area for obstructions such as boulders metal stakes or strands of wire from broken fences and remove them If an obstruction cannot be removed mark its location so that...

Page 47: ...ties in engine performance When filter is dirty replace the filter 4 When the inside of the fuel tank is dirty it can be cleaned by rinsing the tank with gasoline Fig 17 1 Fuel filter 6 1 3 Spark plug...

Page 48: ...the gutter Dispose of the mixture in a collection center or check with your local authority Cutting debris Do not throw cuttings with household garbage Dispose of debris into a dump or dispose of the...

Page 49: ...y with the relevant Union harmonisation legislation 6 Riferimento alle pertinenti norme armonizzate utilizzate compresa la data delle norme o riferimenti alle altre specifiche tecniche in relazione al...

Reviews: