Maintenance
©
Rice Lake Weighing Systems
●
All Rights Reserved
15
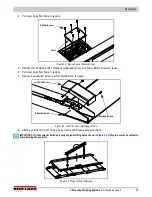
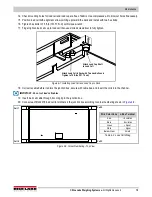
14. Check mounting holes for load cell and load cup are free of debris. Use compressed air to blow out holes if necessary.
15. Position load cell with alignment arrow pointing up toward the deck and install with two hex bolts.
16. Tighten hex bolts to 75 ft-lb (101.70 N-m) with torque wrench.
17. Finger tighten load cell cup to load cell then use slotted screwdriver to fully tighten.
Figure 4-7. Installing Load Cell and Load Cup to Deck
18. Coil extra cable before it enters the junction box, secure with cable ties, and insert the coils into the channel.
IMPORTANT: Do not cut load cell cables.
19. Insert load cell cable through its cord grip in the junction box.
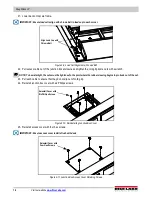
20. Connect each RL32018 load cell to terminals in the junction box according to corner numbering shown in
Figure 4-8. Corner Numbering - Top View
Attach Load Cell to Deck with Two Hex Bolts and
Tighten to 75 ft-lbs (101.70 nm)
Attach Load Cup Shaft
to Load Cell
Cell 1
Cell 2
Cell 4
Cell 3
Wire Color Code J-Box Terminal
Red
+ Excitation
Black
- Excitation
Green
+ Signal
White
- Signal
Bare or Clear
Shield
Table 4-2. Load Cell Wiring

