RP-II-CS8G [C]
18
Sheet 8 of 16
www.richards-mfg.com
Product Family
CS8
9
.4
Mounting CS8
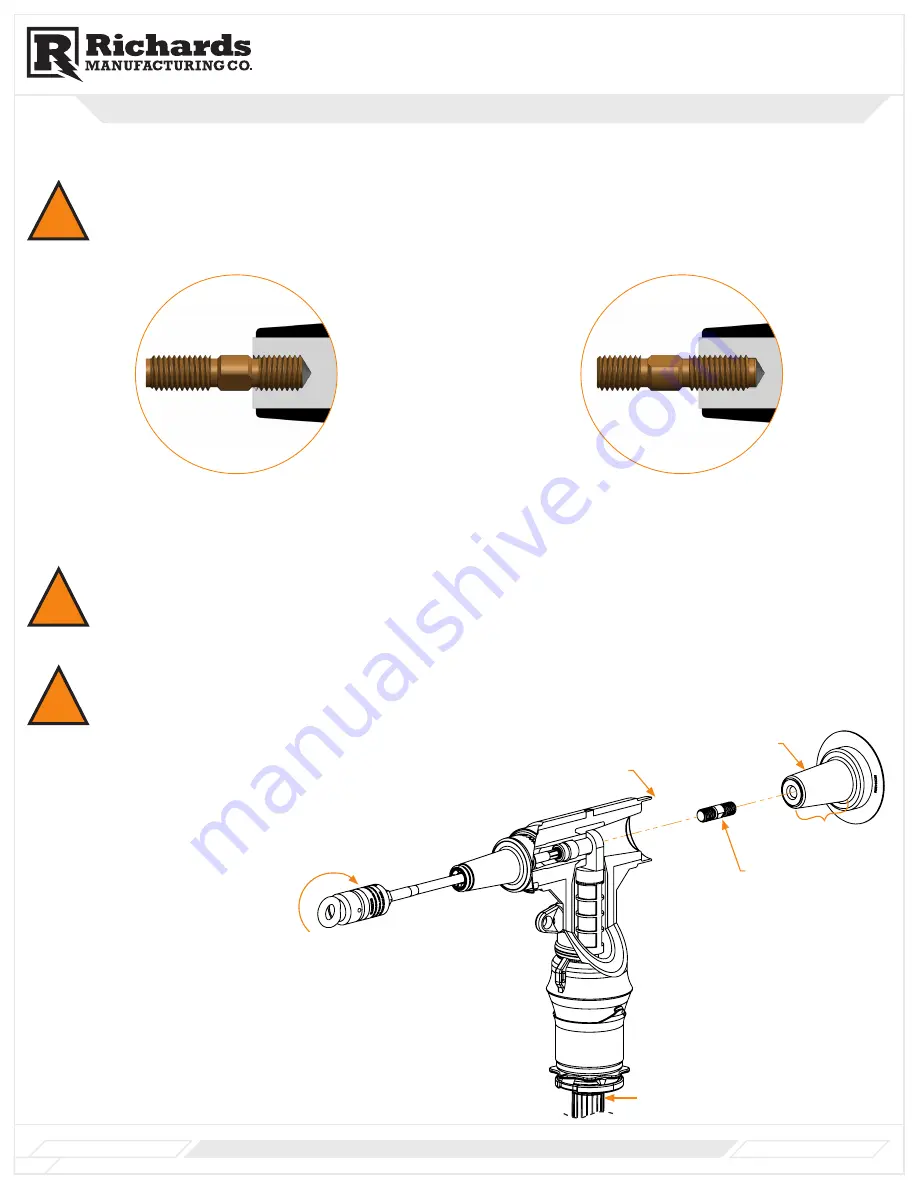
A. Hand-tighten stud into the appropriate mating part or bushing.
!
WARNING: A standard threaded stud is included in the kit. If the use of an asymmetrical threaded stud is approved, it MUST be installed
with longer threaded side facing AWAY from equipment as shown below.
Correct
Incorrect
✘
B. Clean and lubricate (using supplied or approved silicone grease) deadbreak interface of CS8 and interface of mating part or bushing.
C. Place one hand on the power cable directly below CS8 and one hand on the body of the CS8. Lifting together, push CS8 onto mating part, lining up the
hole in the lug with the stud on the mating part.
D. Insert Hex tool (P620AT or equivalent
5
/
16
" hex tool) into loadbreak interface and engage faster. Rotate tool 2-3 turns to start thread engagement.
!
CHECK: Tug on power cable to confirm stud is through hole in lug. Only a small amount of movement should be possible. If the cable
moves more than a small amount repeat steps above.
E. Continue rotating hex tool. Torque fastener to 20ft-lb (P620AT Tool has built in 20ft-lb torque limiter.)
!
CHECK: As a final check, tug on power cable. This should result in no movement at all.
STEP 15-Mating Deadbreak Interface
STEP 14- Inserting Hex Tool
Product Family
R800
Installation Instructions
Clean and Lubricate
(Internal Cavity)
Clean and
Lubricate
Mating Part or
Bushing
Stud
Torque
Grasp and lift
from here


