background image

1

This manual has been produced by Parker Products Ltd 

and should be kept with the product and referenced for 

operation, maintenance and troubleshooting purposes.

This manual contains an overall description of the 

product together with all the necessary information 

for using the product correctly and safely. It is 

highly recommended that this manual is read prior 

to any operation or maintenance of this product. 


The safety precautions and warnings are to ensure 

your safety and protect you from harm, or damage 

to the product. All photographs and drawings in this 

manual are supplied by Parker Products Ltd to help 

you with the operation and maintenance of the product.  


The information contained in this manual was accurate at 

the time of production, however Parker Products Ltd may 

make modifications without noification.

Contents List 

1

Specification  


2

Main Components   


3

Set-up 


4-5

Operation and adjustment   


6-9

Safety precautions    


10

Maintenance 


11

Trouble Shooting    


12

Wheel Assembly    


13

Illustrated Parts Diagram    


14-15

CONTENTS

Read the 

Manual


Read this manual carefully until you completely  


  understand all safety and operating instructions.

1

Summary of Contents for PAC-96-24

Page 1: ...RICHMOND OWNERS MANUAL Air Compressor PAC 96 24 PAC 96 50 ...

Page 2: ...fety and protect you from harm or damage to the product All photographs and drawings in this manual are supplied by Parker Products Ltd to help you with the operation and maintenance of the product The information contained in this manual was accurate at the time of production however Parker Products Ltd may make modifications without noification Contents List 1 Specification 2 Main Components 3 S...

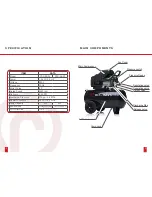
Page 3: ...2850 rpm Delivery 9 6 CFM Discharge Pressure 115 psi 0 8 MPa Restart Pressure 70 PSI 0 5 MPa Tank Capacity 24L 50L Dimensions 600x290x645 mm 770X330X730 mm Air Outlet Size 1 4 in Pressure switch Pressure Gauge Drain cock Air Tank resevoir Regulating valve Regulating valve Safetly valve Release valve Discharge Pipe Fan Cover Main Compressor 3 2 ...

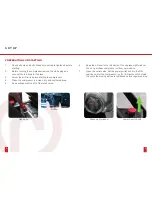
Page 4: ...e the compressor in a clean dry and ventilated area 5 Keep voltage within 4 of the rated value 6 Keep the oil level in the red circle of the oil glass sight window You can purchase compressor oil from our website 7 Open the outlet valve set the power switch knob to the ON position and let the compressor run for 10 minutes with no load to ensure the moving parts are lubricated before regular servic...

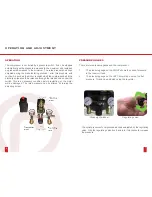
Page 5: ...elease valve under the switch This is a necessary condition before restarting or the motor will be damaged The rated pressure can be altered by turning the adjusting screw The outlet pressure of compressed air can be adjusted by the regulating valve Grip the regulating valve knob and turn it clockwise to increase the pressure PRESSURE GUAGES There are two pressure gauges on the compressor 1 The pr...

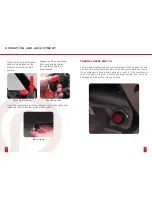
Page 6: ...or is vented remove any condensation from inside the tank by inscrewing the bleed nipple THERMAL RESET SWITCH There may be instances when your compressor will overheat If it cuts out this is the safety feature to protect you and your compressor Leave the compressor a good while before you reset it If the compressor turns off again on reset you should not keep running it as it may be damaged and th...

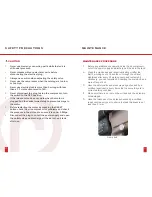
Page 7: ...o ensure it is under 0 8Mpa Disconnect the plug to cut off the power supply and open the outlet valve and discharge all the air in the air tank after use 1 Before any maintenance operation stop the air compressor cut off the power supply and discharge all the air in the tank 2 Clean the crank case and renew lubricating oil after the first10 working hours Check the oil through the oil level sightgl...

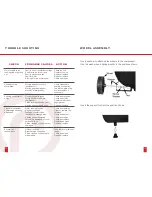
Page 8: ... moving parts seriously worn Check and retighten Check and clean Replace with thicker paper gasket Repair or replace Pressure insufficient or discharge capacity decreased Motor running too slow Air filter choked up Leakage of safety valve leakage of discharge pipe Sealing gasket damaged Valve plate damaged stuck or carbon build up Piston ring and cylinder worn or damaged Check and remedy Clean or ...

Page 9: ...tor cover 1 15 hex bolt M8x22 left 1 49 bolt M5x105 4 16 rubber gasket 1 50 fan 1 17 breath pipe 1 51 circlip 1 18 sealed ringφ13x2 5 2 52 bolt ST3 9x19 2 19 crank case cover 1 53 bolt M5x8 2 20 bolt M6x10 6 54 rotor 1 21 oil leveler gasket 1 55 brearing 6204 1 22 oil leveler 1 56 sealing ring 1 23 only way valve 1 57 capacitance 1 24 pressure switch 1 58 washer 8 1 25 pressure gauge 2 59 nut M8 1...

Page 10: ...www parkerbrand co uk RICHMOND ...

Reviews: