4
Basic Copy Features
1. To make a copy, press the
‘Copy’
button located on the left hand side of the control panel.
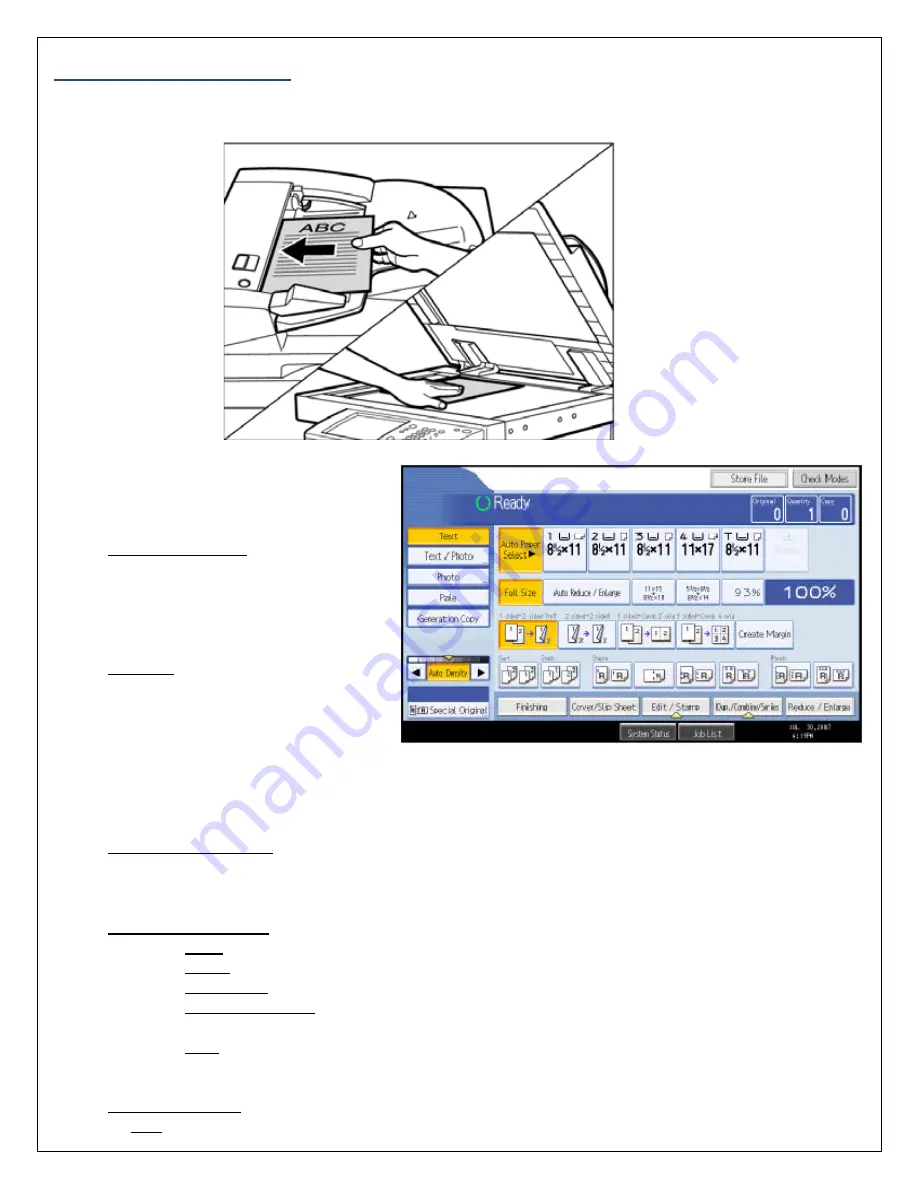
2. Place your originals on the glass or in the automatic document feeder.
Figure 1:
Document is placed
Face Up in the
Document Feeder
Figure 2:
Document is placed
Face Down on the
Platen Glass
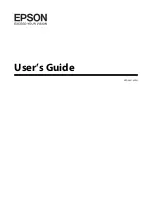
3. Make your desired setting selections
from the display screen.
A. Auto Paper Select –
Available paper options are:
Letter (8 ½ x 11), legal (8 ½ x 14),
or ledger (11 x 17)
B. Full Size – Enlarge/reduce the copy
size as a percentage of the original
document size. Set this to occur
automatically by selecting the
“Auto Reduce/Enlarge”
button.
Manual document enlargement/reduction can occur by selecting the appropriate document size
available on the screen:
‘11 x17 > 8 ½ x 11’
. Additional options can be accessed by selecting the
‘Reduce/Enlarge’
button located on the bottom right hand side of the screen.
C. 2 – Sided Documents – Copy documents that have text written on both sides. Select the
appropriate option for the document to be produced. Additional options are available and can be
accessed by selecting the
‘Dup./Combine/Series’
button located on the bottom of the screen.
D.
Original Type Setting – Select the original document type to ensure a cleaner copy is produced.
Text
– Original document contains text only
Photo
– Original document was produced on color copier or contains only photographs
Text/Photo
- Original document contains photographs and text
Generation Copy –
if the original document is a copy, this option can be used to produce
a clear and clean image.
Pale –
this option can be selected if the original document has pale lines or pencil marks
that can be difficult to view when copied.
E. Finishing Options – The stapling feature is included under this option.
Sort – Copies are assembled in sequential order


