1.
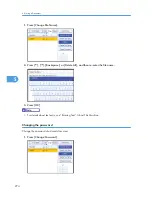
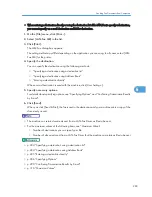
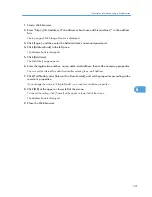
Click [Send Options].
The [Send Options] tab appears.
2.
Select the [2 sided printing] check box.
To display preview
Selecting the [Preview] check box allows you to check how the fax document will be output at the
destination.
1.
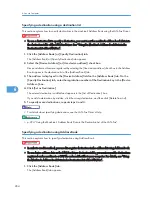
Click [Send Options].
The [Send Options] tab appears.
2.
Select the [Preview] check box.
3.
Click [Send], [Print], or [Send & Print].
The [Preview] window appears.
4.
Click [Next] or [Previous] to check the image.
To close the [Preview] window, click [Cancel].
Saving as files
You can save the fax document in TIFF format (TIFF-F).
1.
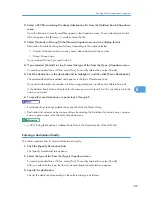
Click [Send Options].
The [Send Options] tab appears.
2.
Select the [Save as file] check box.
3.
Click [Save to...].
4.
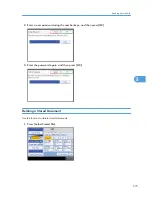
Select a folder on the folder tree.
5.
Select a method of file naming.
To enter a file name manually, select the [Specify file name when saving] check box. To have the file
assigned a name and saved automatically, select the [Automatically create a new file] check box.
6.
Click [OK].
7.
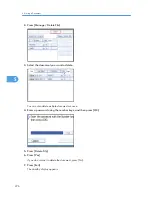
Click [Save] or [Save & Send].
If you select [Automatically create a new file], the image file is assigned a name and saved under the
specified folder.
The file name will be RicHHMMSS.tif (HH: hours, MM: minutes, SS: seconds).
8.
Enter a file name.
You can also change the folder in this step.
6. Fax via Computer
288
6
Summary of Contents for Aficio MP 4000
Page 46: ...1 Getting Started 46 1 ...
Page 50: ...2 Entering Text 50 2 ...
Page 99: ...MEMO 99 ...
Page 100: ...MEMO 100 EN USA D012 7754 ...
Page 138: ...2 Troubleshooting When Using the Copy Document Server Function 34 2 ...
Page 184: ...4 Troubleshooting When Using the Printer Function 80 4 ...
Page 217: ...BAZ035S Adding Staples 113 6 ...
Page 220: ...6 Adding Paper Toner and Staples 116 6 ...
Page 224: ...When C is displayed BBR030S When D is displayed BBR031S 7 Clearing Misfeeds 120 7 ...
Page 225: ...When P is displayed BBR040S Removing Jammed Paper 121 7 ...
Page 234: ...BAZ062S 7 Clearing Misfeeds 130 7 ...
Page 242: ...BBR022S Clean 1 and 2 8 Remarks 138 8 ...
Page 246: ...MEMO 142 ...
Page 247: ...MEMO 143 ...
Page 248: ...MEMO 144 EN USA D012 7804 ...
Page 284: ...1 Placing Originals 32 1 ...
Page 338: ...2 Basic Copying 86 2 ...
Page 396: ...3 Advanced Copying 144 3 ...
Page 420: ...4 Document Server 168 4 ...
Page 442: ...MEMO 190 ...
Page 443: ...MEMO 191 ...
Page 444: ...MEMO 192 EN USA D012 7652 ...
Page 478: ...2 After checking the settings on the display press Exit 1 Transmission 30 1 ...
Page 602: ...1 Transmission 154 1 ...
Page 608: ... p 131 Sender Settings 2 Other Transmission Features 160 2 ...
Page 626: ...2 Other Transmission Features 178 2 ...
Page 778: ...MEMO 330 ...
Page 779: ...MEMO 331 ...
Page 780: ...MEMO 332 EN USA D346 8515 ...
Page 808: ...24 ...
Page 858: ...2 Setting Up the Printer Driver 74 2 ...
Page 915: ...ftp ftp put path name file name Virtual Printer Name Using the Virtual Printer 131 3 ...
Page 916: ...3 Other Print Operations 132 3 ...
Page 928: ...5 Appendix 144 5 ...
Page 931: ...MEMO 147 ...
Page 932: ...MEMO 148 EN USA AE AE D381 ...
Page 933: ...Copyright 2007 ...
Page 934: ...Operating Instructions Printer Reference D381 7002 EN USA ...
Page 943: ...Specifications 174 INDEX 177 7 ...
Page 954: ...18 ...
Page 986: ...1 Sending Scan Files by E mail 50 1 ...
Page 1010: ...2 Sending Scan Files to Folders 74 2 ...
Page 1050: ...4 Delivering Scan Files 114 4 ...
Page 1098: ...Scan size Maximum resolution dpi A6 1200 7 Appendix 162 7 ...
Page 1112: ...7 Appendix 176 7 ...
Page 1118: ...Operating Instructions Scanner Reference D381 7102 EN USA ...

