Replacing the Maintenance Kit
127
6
D
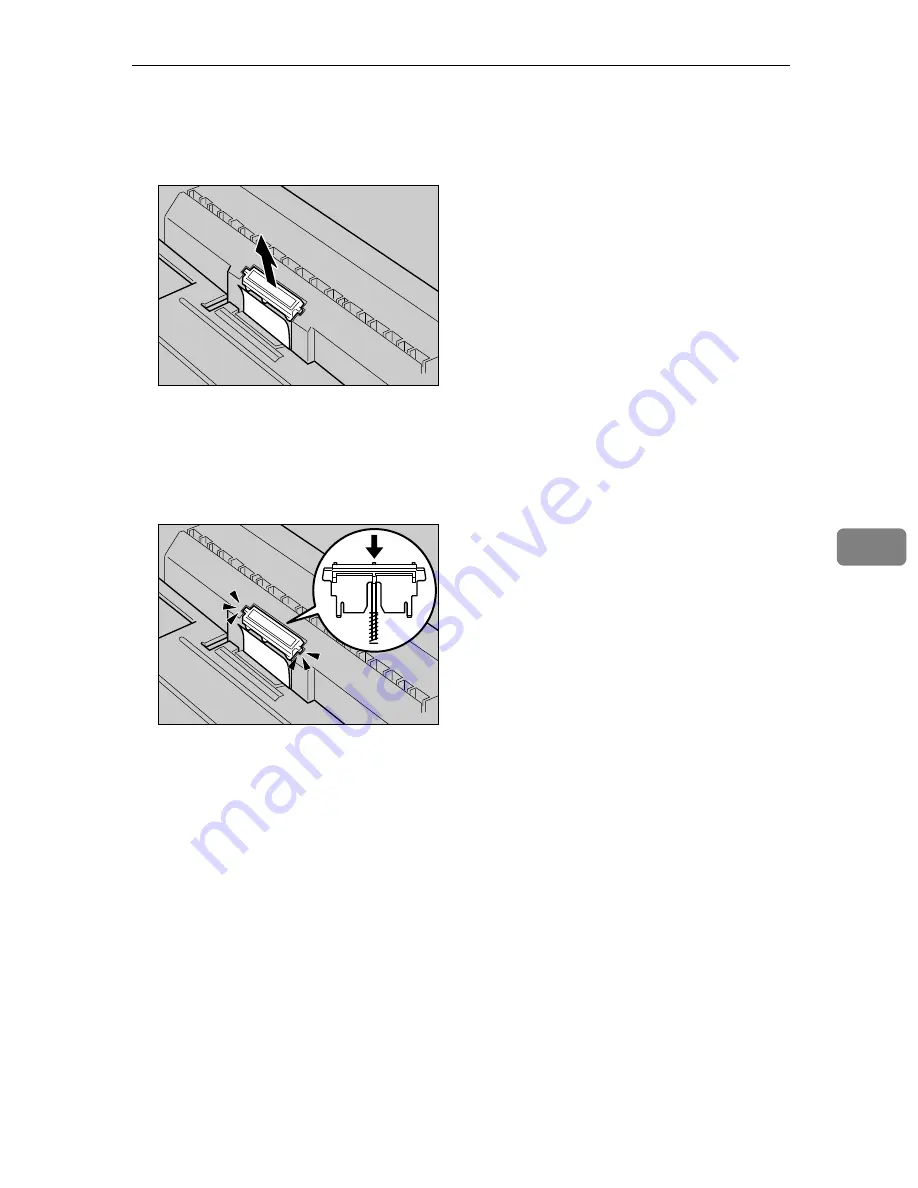
Turn the paper tray right way up, and remove the friction pad from the tray.
The friction pad spring may come loose. Be careful not to lose the friction pad
spring.
E
Insert the new friction pad in the paper tray.
Place the spring over the central prong of the new friction pad and align the
friction pad with the grooves of the paper tray. Then push down friction pad
(as shown in the illustration), until it clicks.
After pushing down the friction pad, check it is properly installed by pressing
it lightly. If it is properly installed, it will spring back up.
F
Follow the same procedure to replace optional Paper Feed Unit friction
pads.
AET200S
AET201S
Summary of Contents for Aficio SP C400DN
Page 10: ...10 MEMO...
Page 11: ...11 MEMO...
Page 12: ...12 Copyright 2007 Printed in China EN USA G158 8601...
Page 18: ......
Page 22: ...iv...
Page 30: ...8...
Page 86: ...Connecting the Printer 64 3...
Page 158: ...Replacing Consumables and Maintenance Kit 136 6...
Page 192: ...Troubleshooting 170 9...
Page 198: ...Removing Misfed Paper 176 10...
Page 213: ...Copyright 2007...
Page 214: ...Operating Instructions Hardware Guide Model Number SP C400DN Aficio SP C400DN EN USA G158 8611...
Page 224: ...viii...
Page 228: ...4...
Page 314: ...Setting Up the Printer Driver 90 2...
Page 358: ...Other Print Operations 134 3...
Page 414: ...Making Printer Settings Using the Control Panel 190 5...
Page 498: ...Monitoring and Configuring the Printer 274 6...
Page 516: ...Special Operations under Windows 292 8...
Page 558: ...Security Measures Provided by this Printer 334 10...
Page 582: ...358 EN USA G158 8614...
Page 583: ...Copyright 2007...
Page 584: ...Operating Instructions Software Guide Model Number SP C400DN Aficio SP C400DN EN USA G158 8614...


