Installing Options
56
4
JJJJ
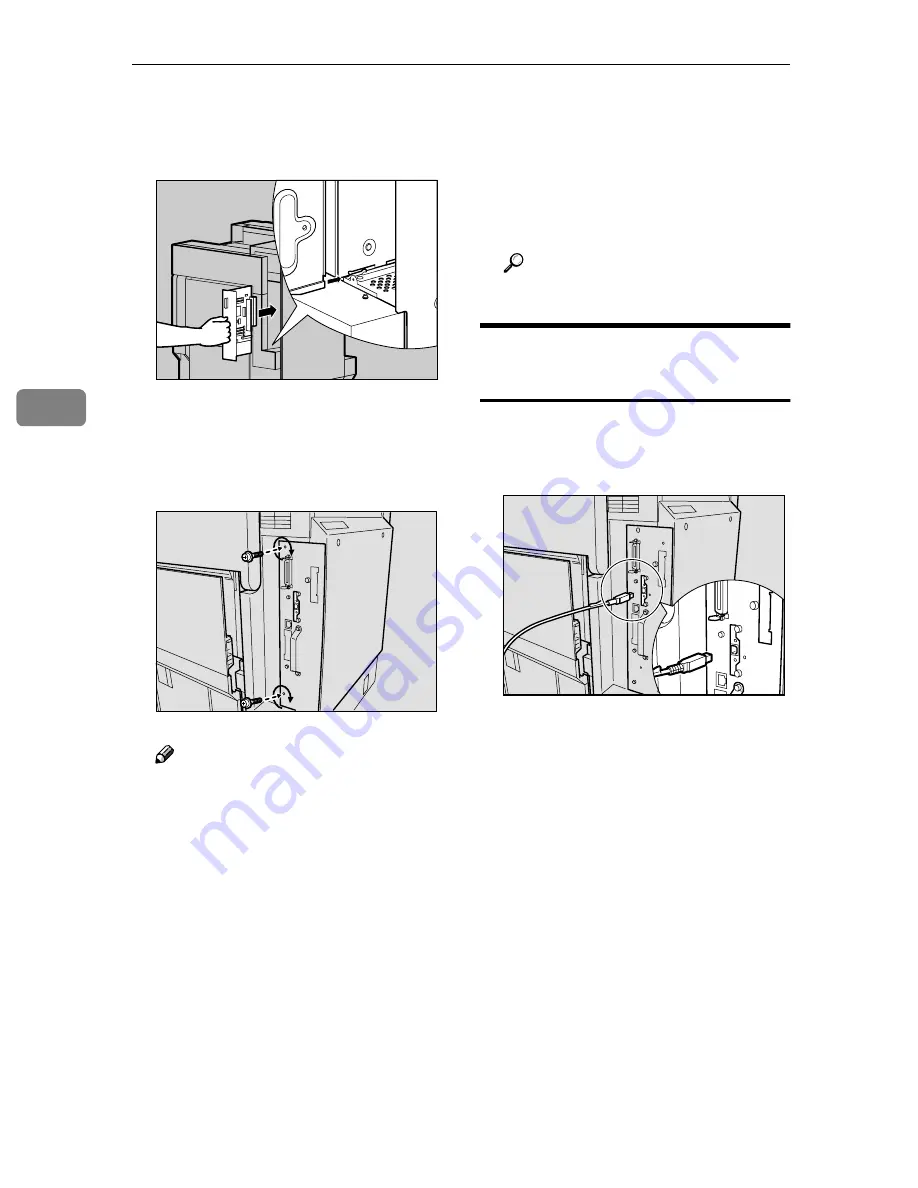
Insert the controller board into
the top and bottom rails, and then
slide it in slowly, until it stops.
KKKK
Tighten the two screws fastening
the controller board back into its
original position, using the pro-
vided screwdriver.
Note
❒
Be sure to return the provided
screwdriver to its original posi-
tion on the inside of the front
cover.
❒
After finishing the installation,
you can check the USB 2.0 inter-
face board is installed properly:
Print the configuration page
from the “List/Test Print”
menu, and then check the items
in “System Reference”. If it is in-
stalled properly, you will see
“USB” appear under “Control-
ler Option”.
❒
If the USB 2.0 interface board is
not installed properly, repeat
the procedure from step
A
. If
you cannot install it properly
even after reinstallation, contact
your sales or service representa-
tive.
Reference
p.23 “Test Printing”
Connecting the Cable to the
USB 2.0 Interface Board
AAAA
Connect the square-shaped con-
nector of the USB cable to the
USB 2.0 interface board.
BBBB
Connect the opposite end's flat
connector to devices such as the
USB interface of the computer, or
USB hub.
ZDJP030J
ZHXH881J
ZHXH880J
Summary of Contents for CL7000 - Aficio D Color Laser Printer
Page 12: ...x ...
Page 18: ...Guide to Printer Parts 6 1 ...
Page 36: ...Setting Up 24 2 ...
Page 44: ...Preparing to Print 32 3 ...
Page 106: ...EN USA G080 6900 ...


