Disassembling, Assembling & Adjustment
6-37
M M
L
0 0
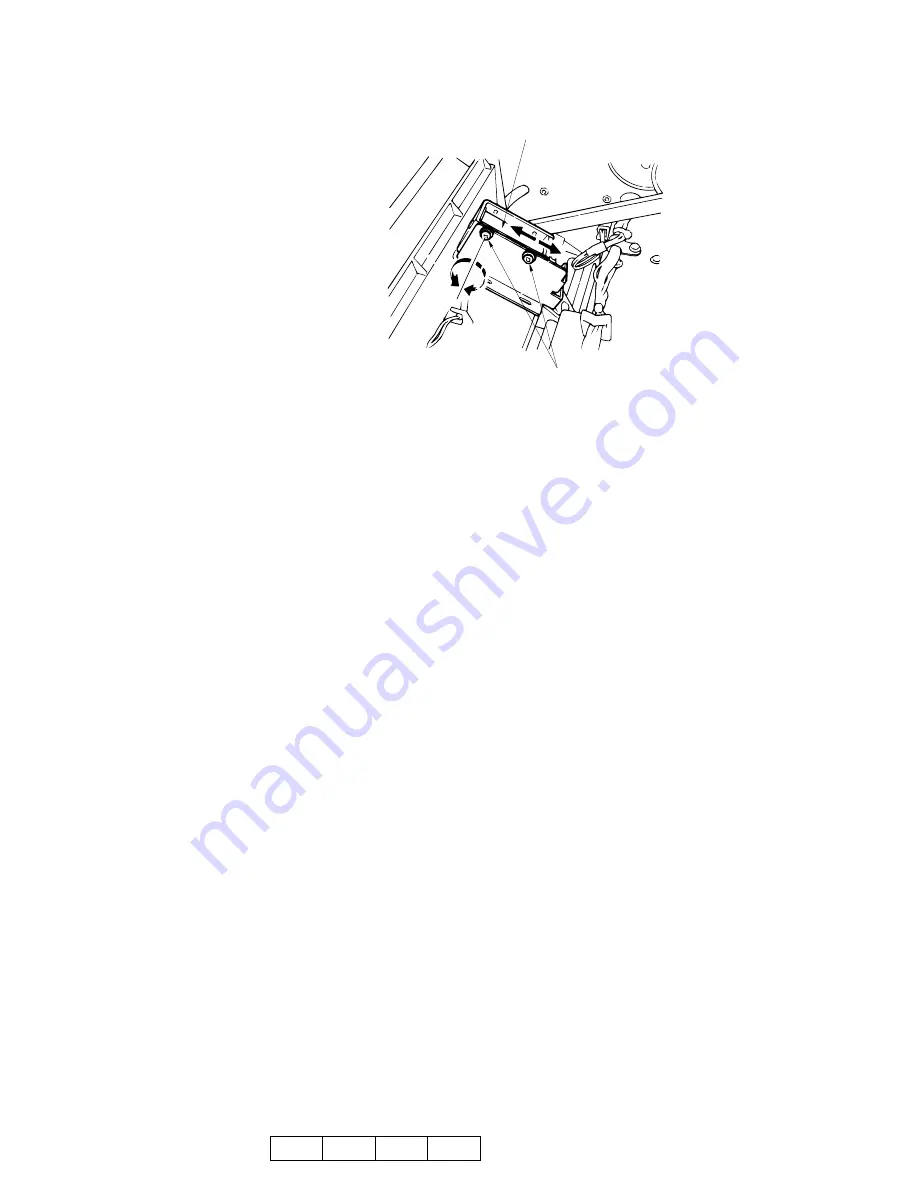
3. Loosen the two Solenoid Installation
⊕
screws then move and adjust the Sole-
noid.
Figure 6-63. Adjustment of the Paper Exit Opening Solenoid
4. Return the Solenoid to the original position and tighten the Solenoid Bracket
⊕
screws.
[Assembling Procedures]
1. Reinstall the Rear Cover and the Top Cover by reversing the procedure above.
SOLENOID
SOLENOID INSTALLATION
⊕
SCREWS
Summary of Contents for DDP70
Page 1: ...Standard Finisher Maintenance Manual 2005 Ricoh Printing Systems Ltd May 2005 N901402...
Page 4: ...i DDP70 Finisher Maintenance Manual Copyright 2005 Ricoh Printing Systems Ltd N901402...
Page 5: ...ii DDP70 Finisher Maintenance Manual...
Page 6: ...i Revisions Page Rev Machine Rev Page No Contents Date 00 First Edition May 2005...
Page 7: ...ii...
Page 8: ...Safety iii Safety Safety in Operation...
Page 9: ...iv DDP70 Finisher Maintenance Manual...
Page 13: ...iv DDP70 Finisher Maintenance Manual...
Page 17: ...1 4 DDP70 Finisher Maintenance Manual M M L 0 0...
Page 19: ...2 2 DDP70 Finisher Maintenance Manual M M L 0 0...
Page 49: ...4 20 DDP70 Finisher Maintenance Manual M M L 0 0...
Page 137: ...7 16 DDP70 Finisher Maintenance Manual M M L 0 0...


