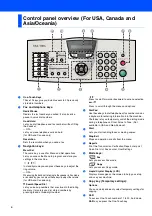
background image

9

4

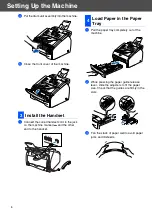
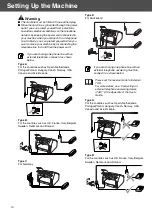
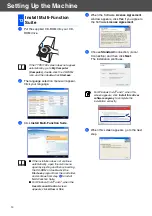
Put paper in the paper tray.
Check that the paper is flat in the tray and 
below the maximum paper mark.
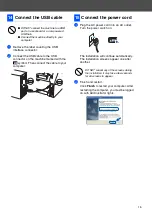
5

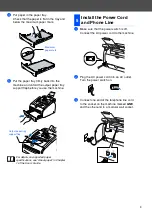
Put the paper tray firmly back into the 
machine and unfold the output paper tray 
support flap before you use the machine.
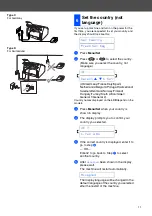
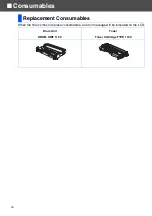
1

Make sure that the power switch is off.
Connect the AC power cord to the machine.
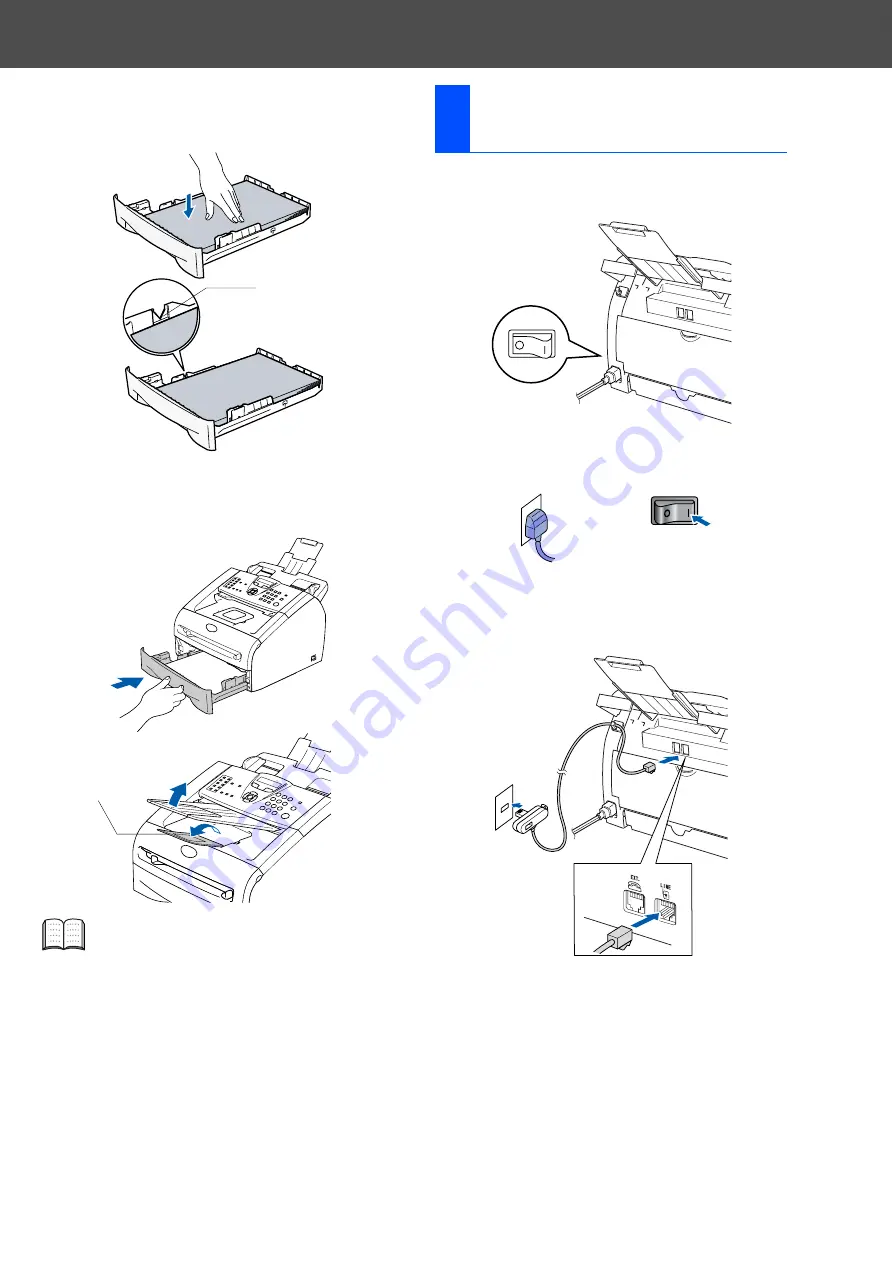
2

Plug the AC power cord into an AC outlet.
Turn the power switch on.

3

Connect one end of the telephone line cord 
to the socket on the machine marked 

LINE


and the other end to a modular wall socket.

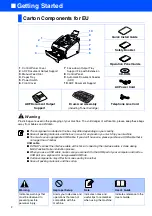
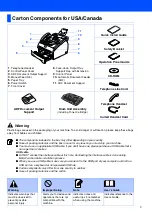
For details on supported paper 
specifications, see “About paper” in Chapter 
1 of the User’s Guide.

Maximum
paper mark

Output paper tray 
support flap

5

Install the Power Cord 
and Phone Line

Summary of Contents for FAX 1190L

Page 1: ...d User s Guide in a convenient place for quick and easy reference at all times Read this manual carefully before you use this product and keep it handy for future reference For safe and correct use pl...

Page 2: ...the interface cable is done during Multi Function Suite installation process When you use a USB cable make sure you connect it to the USB port of your computer and not to a USB port on a keyboard or n...

Page 3: ...Connecting the interface cable is done during Multi Function Suite installation process When you use a USB cable make sure you connect it to the USB port of your computer and not to a USB port on a k...

Page 4: ...onnecting the interface cable is done during Multi Function Suite installation process When you use a USB cable make sure you connect it to the USB port of your computer and not to a USB port on a key...

Page 5: ...arch Speed Dial Lets you look up numbers that are stored in the dialling memory It also lets you dial stored numbers by pressing and a three digit number Press to scroll forward or backward to a menu...

Page 6: ...up numbers that are stored in the dialling memory It also lets you dial stored numbers by pressing and a three digit number Press to scroll forward or backward to a menu selection or Press to scroll t...

Page 7: ...he control panel cover 1 Open the front cover of the machine 2 Unpack the drum unit assembly 3 Gently rock it from side to side several times to distribute the toner evenly inside the assembly 1 Attac...

Page 8: ...d the other end to the handset 1 Pull the paper tray completely out of the machine 2 While pressing the paper guide release lever slide the adjusters to fit the paper size Check that the guides are fi...

Page 9: ...the power switch is off Connect the AC power cord to the machine 2 Plug the AC power cord into an AC outlet Turn the power switch on 3 Connect one end of the telephone line cord to the socket on the m...

Page 10: ...ay USA Canada and Asia Oceania Type B For the countries such as UK France Italy Belgium Sweden Denmark and Finland Type C For Germany Type D For Switzerland Type A For the countries such as Spain Neth...

Page 11: ...ral 1 General 2 Country names displayed on the LCD depend on the models 3 Press Menu Set when your country is shown in display 4 The display prompts you to confirm your country you selected 5 If the c...

Page 12: ...ame and fax number to be printed on all fax pages that you send 1 Press Menu Set 2 Press 0 3 Press 3 4 Enter your fax number up to 20 digits on the dial pad and then press Menu Set 5 Enter your teleph...

Page 13: ...message function of your external telephone answering device Fax Only The machine automatically answers every call as a fax Do you want the machine to answer fax and telephone calls automatically Fax...

Page 14: ...Suite If the TYPE1190 screen does not appear automatically go to My Computer Computer double click the CD ROM icon and then double click Start exe If the installation does not continue automatically...

Page 15: ...omatically The installation screens appear one after another 2 Finish and restart Click Finish to restart your computer After restarting the computer you must be logged on with Administrator rights 14...

Page 16: ...16 When the time comes to replace consumables an error message will be indicated on the LCD Replacement Consumables Drum Unit Toner DRUM UNIT 1190 Toner Cartridge TYPE 1190 Consumables...

Page 17: ...Trademarks All brand and product names mentioned in this manual are registered trademarks of their respective companies Copyright 2010 Ricoh Co Ltd All Rights Reserved...

Page 18: ...H558 6030 GB...

Reviews: