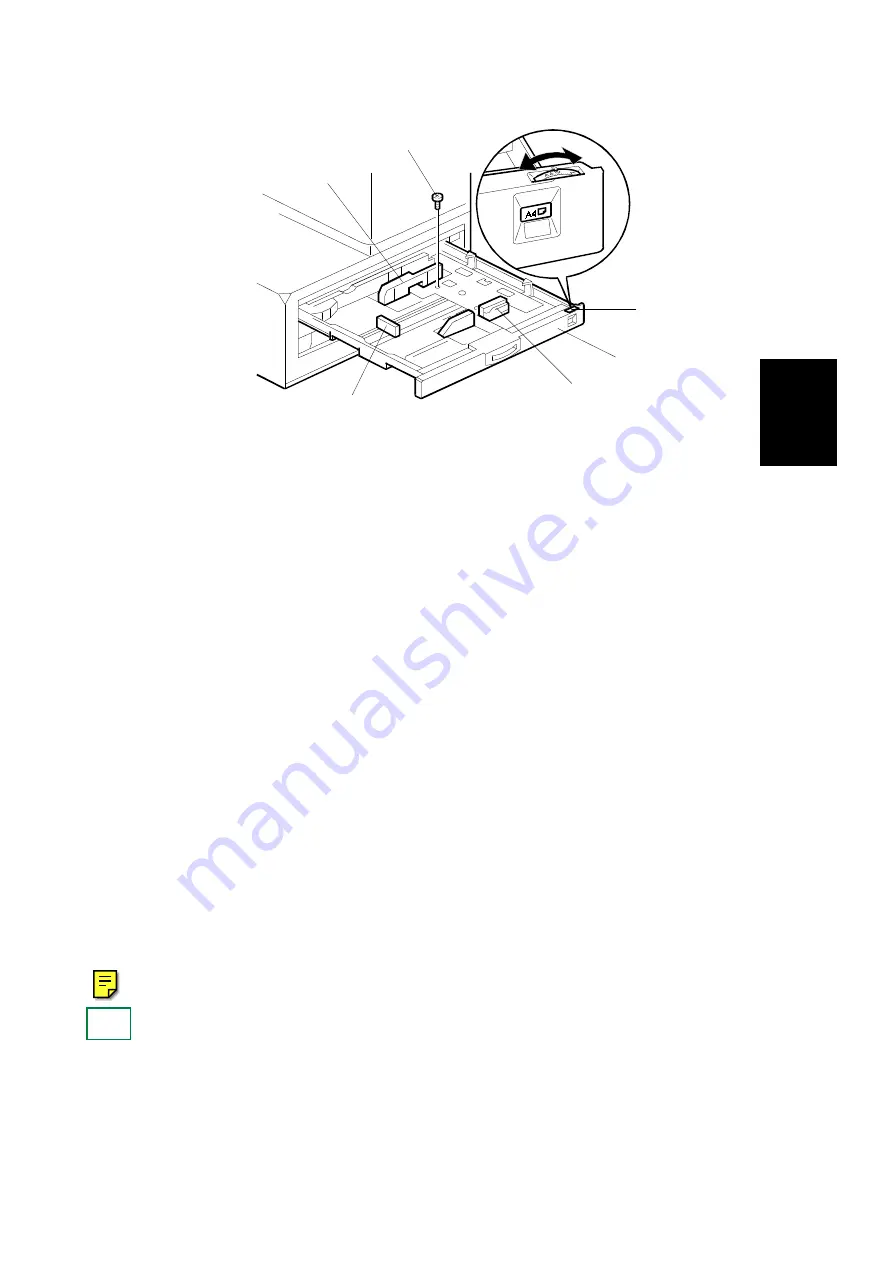
13. Pull the paper tray [A] out and turn the paper size dial [B] to select the
appropriate size. Adjust the side guides [C] and the end guide [D] to
match the paper size.
NOTE: 1) Make sure the stack of paper is aligned, and that there is no
space between the side guides and the paper stack.
2) Always push the paper tray in gently.
14. Plug in the copier and turn on the main switch. Wait until it warms up. (It
takes about 45 seconds.)
15. Enter the SP mode as follows:
1) Press the
key.
2) Enter "107" using the numeric keys.
3) Hold down the
key for more than 3 seconds.
16. Perform the TD sensor initial setting as follows:
1) Enter "66" using the numeric keys.
2) Press the "Auto Image Density" key.
NOTE: The machine will automatically stop when completed. (It takes
about 1 minute.)
17. Turn the main switch off and on to exit SP mode.
18. Check the copy quality and machine operation.
19. Inform the customer of the notes in step 13 concerning the paper tray.
Also find out if the customer changes paper sizes frequently. If not, inform
the customer that the side guides can be fixed with a screw [E] to achieve
better paper feed quality (use tapping screw M3 x 8).
[D]
[C]
[B]
[A]
[E]
[C]
A219I505.wmf
Installat
ion
20 December 1996
COPIER (A219)
3-7
Summary of Contents for FT 4015
Page 2: ...SECTION 1 OVERALL MACHINE INFORMATION...
Page 14: ...SECTION 2 DETAILED DESCRIPTIONS...
Page 71: ...SECTION 3 INSTALLATION...
Page 90: ...SECTION 4 SERVICE TABLES...
Page 118: ...SECTION 5 PREVENTIVE MAINTENANCE...
Page 126: ...SECTION 6 REPLACEMENT AND ADJUSTMENT...
Page 190: ...SECTION 7 TROUBLESHOOTING...
Page 222: ...SECTION 8 OPTIONS...
Page 223: ...SECTION 9 APPENDIX TIMING CHART...
Page 225: ...COPIER A219 ELECTRICAL COMPONENT LAYOUT 4 2 3 1 5 6 A219S500 wmf...
Page 226: ...10 15 14 13 12 11 9 8 7 18 17 16 A219S501 wmf...
Page 227: ...24 40 23 28 27 26 25 19 20 21 22 29 39 31 32 33 34 35 36 38 37 30 A219S502 wmf...


