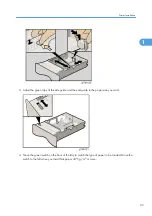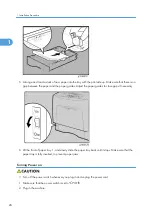
5. Arrange and load a stack of new paper into the tray with the print side up. Make sure that there is no
gap between the paper and the paper guides. Adjust the paper guides to close gaps if necessary.
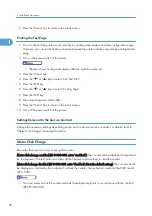
6. Lift the front of paper tray 1, and slowly slide the paper tray back until it stops. Make sure that the
paper tray is fully inserted, to prevent paper jams.
Turning Power on
• Turn off the power switch whenever you plug in and unplug the power cord.
1. Make sure that the power switch is set to "
" (Off).
2. Plug in the machine.
1. Installation Procedure
26
1
Summary of Contents for G-P3
Page 1: ...Model G P3 Machine Code G190 SERVICE MANUAL January 2008 Subject to change...
Page 11: ...10...
Page 77: ...11 Harness guide C x 2 12 Drive unit D x 6 x 16 3 Replacement and Adjustment 76 3...
Page 91: ...3 Replacement and Adjustment 90 3...
Page 137: ...LEDs No LEDs are used for this model except for the Network Interface 4 Troubleshooting 136 4...
Page 337: ...5 Service Tables 336 5...
Page 411: ...MEMO 410...
Page 412: ...MEMO 411...
Page 413: ...MEMO 412...


