Test Inspection Procedure
Function Inspection
General
All OSD functions must be checked for functionality. When the OSD menu is displayed, there shall
be no visible peaking, ringing, streaking, or smearing artifacts on the screen.
Factory Default
The factory settings (with appropriate centering, size, geometry distortion, etc.) must be displayed
when “Factory Reset” is selected. (page 103 "Factory Reset")
Display Size
All preset modes must expand to full screen size using OSD Horizontal and Vertical Size controls.
Acoustics
High-pitched sound from the cooling fan and filter wheel is unacceptable.
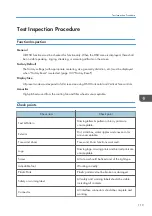
Check points
Check item
Check point
Text & Pattern
Missing letters & pattern or blurry prints are
unacceptable.
Exterior
Dirt, scratches, water ripples and uneven color
are unacceptable.
Focus and Zoom
Focus and Zoom functions work well.
Logo
Missing logo, missing prints and blurred prints are
unacceptable
Screw
All screws should be fixed and of the right type.
Adjustable foot
Working correctly
Plastic Parts
Plastic parts must not be broken or damaged.
Safety or warning label
All safety and warning labels should be visible,
including all contents.
Connector
All interface connectors should be complete and
working.
Test Inspection Procedure
119
Summary of Contents for LU6000
Page 2: ......
Page 10: ...Projection Light 145 Light 145 8 ...
Page 28: ...Block Diagram 1 Product Information 26 ...
Page 29: ...Block Diagram 27 ...
Page 30: ...1 Product Information 28 ...
Page 44: ...4 Front Cover A x6 5 Front IR Sensor A 2 hooks 3 Replacement 42 ...
Page 46: ...4 Left Cover A x6 Right Cover 1 Top Cover page 38 Top Cover 3 Replacement 44 ...
Page 51: ...3 LAN Board A x3 x2 There are 2 connectors A at the back side Part Replacement 49 ...
Page 69: ...4 Fan Bracket A x3 5 Fan 4 A x2 Fan 5 1 Right Cover page 44 Right Cover Part Replacement 67 ...
Page 78: ...3 Replacement 76 ...
Page 100: ...When the calibration has finished a message appears 4 Adjustment 98 ...
Page 104: ...2 Select OPTION Information 3 Check the serial number 4 Adjustment 102 ...
Page 106: ...2 Select Factory Reset 3 Select Yes and then press the Enter key 4 Adjustment 104 ...
Page 116: ...5 Troubleshooting 114 ...
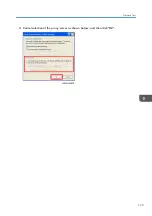
Page 127: ...3 Cancel selection of the proxy server as shown below and then click OK Network Test 125 ...
Page 128: ...6 Test Inspection 126 ...
Page 146: ...Cooling System Location of fans 8 Detailed Description 144 ...
Page 149: ...MEMO 147 ...
Page 150: ...MEMO 148 EN ...

