Displaying the Printing Preferences Dialog Box
To change the default settings of the printer driver, configure settings in the [Printing Preferences] dialog
box.
To change the default settings of all applications, open the [Printing Preferences] dialog box from the
OS. For details, see page 85 "Displaying the Printing Preferences Dialog Box from the [Start] Menu".
To change the default settings of a specific application, open the [Printing Preferences] dialog box from
that application. For details, see page 85 "Displaying the Printing Preferences Dialog Box in an
Application".
Displaying the Printing Preferences Dialog Box from the [Start] Menu
This section explains how to open the [Printing Preferences] dialog box from [Devices and Printers].
• When the printer driver is distributed from the print server, the setting values specified by the server
are displayed as the default for [Printing Defaults...].
• You cannot configure different print settings for each user. The settings configured in this dialog box
are used as the default.
1.
On the [Start] menu, click [Control Panel] under [Windows System].
2.
Click [View devices and printers].
3.
Right-click the icon of the printer you want to use.
4.
Click [Printing preferences].
Displaying the Printing Preferences Dialog Box in an Application
You can make printer settings for a specific application. To make printer settings for a specific
application, open the [Printing Preferences] dialog box from that application.
The settings displayed in the [Printing Preferences] dialog box opened from the [Devices and Printers]
window are applied as the default in the [Printing Preferences] dialog box opened in an application.
When printing from an application, modify the settings as required.
The screens displayed may differ depending on the application.
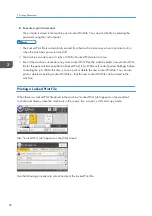
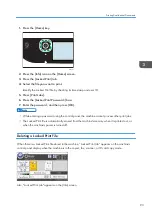
Displaying the printing preferences dialog box in an application when using
Windows
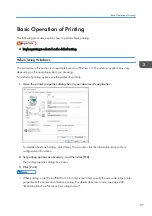
The following procedure explains how to print documents from an application using WordPad in
Windows 10 as an example.
Displaying the Printing Preferences Dialog Box
85
Summary of Contents for M C251FW
Page 2: ......
Page 23: ...3 2 1 ECC105 Interior ECC106 4 3 2 1 Guide to Components 21 ...
Page 45: ...Deleting characters 1 Press to delete characters Entering Characters 43 ...
Page 48: ...1 Guide to the Machine 46 ...
Page 82: ...2 Paper Specifications and Adding Paper 80 ...
Page 100: ...3 Printing Documents 98 ...
Page 124: ...4 Copying Originals 122 ...
Page 170: ...5 Scanning Originals 168 ...
Page 216: ...6 Sending and Receiving a Fax 214 ...
Page 270: ...7 Configuring the Machine Using the Control Panel 268 ...
Page 346: ...6 Close the ADF cover 9 Maintaining the Machine 344 ...
Page 360: ...Main unit DUE292 1 3 2 1 DUE288 2 DUE289 10 Troubleshooting 358 ...
Page 361: ...3 DUE290 Waste toner bottle ECC168 Paper feed unit DUE320 1 Removing Paper Jams 359 ...
Page 440: ...12 Appendix 438 ...
Page 445: ...MEMO 443 ...
Page 446: ...MEMO 444 EN GB EN US EN AU M0EQ 8504A ...
Page 447: ......
Page 448: ...EN GB EN US EN AU M0EQ 8504A 2021 2022 Ricoh Co Ltd ...

