Chapter
4 - 4
3.
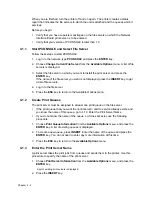
Press the ENTER key to display the Available Queues list for the printer.
4.
Select the queue you want and then assign a priority level from 1 to 10. It is
recommended that you accept the default priority level.
5.
Press the ENTER key.
The queue appears on the list for the printer.
6.
Press the ENTER key again to assign additional queues.
7.
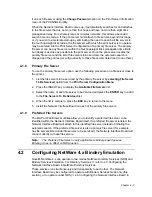
When you finish assigning queues, press the ESC key and then save your changes.
Continue to press the ESC key to return to the Print Server Configuration menu.
If you want to set Notify options, go to Section. 4.1.6. If you are finished, continue to
press the ESC key and then save your changes.
4.1.6
Set Up Notify Options for the Printer (Optional)
To enable the print server to notify users or user groups if a problem occurs with the
printer, set up the Notify options. The print server supports the enhanced NOTIFY options
for printers, including informing users when the printer:
Ÿ
Is the printer opened or off-line, paper jammed, or out of paper
Ÿ
Requires a manual paper feed or a form change
Ÿ
Has had an engine failure
1.
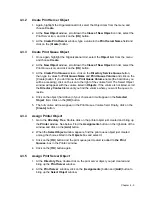
Choose Notify List for Printer on the Print Server Configuration menu.
2.
Select the printer from the Defined Printers list.
The screen appears (which is blank for an initial installation).
3.
Press the ENTER key to view a list of Notify Candidates.
4.
Select the user or group from the list.
5.
Set the First and Next intervals in the Notify Intervals screen.
It is recommended that you use the defaults.
è
The First interval is the number of seconds the network waits before it notifies
candidates about a print job problem.
è
The Next interval specifies how often in seconds candidates are notified. Enter
a number for each interval and press the ENTER key.
6.
Press the ESC key and then choose Save Changes. Press the ESC key at each
screen until you reach the Print Server Configuration menu. If you have finished the
configuration, press the ESC key and then save the changes.
4.1.7
Installing the Print Server on Multiple File Servers
To install the print server on more than one file server, perform the procedures described
in Sections 4.1.1 through 4.1.6 for each file server. You must use the same name and
password for the print server (or no password) on all file servers. You set the password
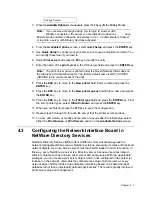
for the Network Interface Board using the MAP program (
ð
refer to 4.3 Configuring the
Network Interface Board in NetWare Directory Services ). If you use a password, specify
Summary of Contents for NIB 450-E
Page 3: ......
Page 8: ......
Page 14: ......
Page 18: ......
Page 40: ......
Page 44: ......
Page 46: ......
Page 86: ...2 ...
Page 106: ...Dynamic Host Configuration Protocol DHCP 22 4 ...
Page 112: ...Windows NT Configuration 28 5 ...
Page 118: ...34 UE USA A855 ...
Page 119: ...Copyright 1998 ...


