background image

NWSetup:NetWare Print Server Configuration

7

2

C

Click on 

[Next]

 to continue.

The “Port 1” screen appears.

Creating and Adding the Print Queues

Most of the fields will be configured automatically.
Edit the following fields with the appropriate information.

 Refer to online help for additional information about the fields on this screen.

A

From the Port 1 screen.

Enable Printer

Click to place a check in this box. If it is not checked, the remaining screens
will not be enabled.

Printer Name

The name of the printer.

Note

This is a read only field.

Queues Serviced by Printer

This field contains a list of queues that are serviced by the printer.

B

Click on 

[Add Queue]

 to add a queue.

The Add Queue to Printer screen appears.

Connection/Server

This list menu is used to select a server connection.

Context

This field allows you to specify an NDS context for the queue.

Queue

Lists all of the queues available on the currently selected connection.

C

Click on 

[Create Queue]

 to create a new queue.

The Create Queue screen appears.

Queue Name

Input the name of the new queue.

File Server Volume

The volume in which the queue will be created.

NDS Context

The context in which the queue will be created.

Summary of Contents for NIB 450-E

Page 1: ...Network Interface Board NIB 450 E For Novell NetWare Apple Talk and TCP IP Networks Owner s Manual ...

Page 2: ...mark of Apple Computer Inc Ethernet is a registered trademark of Xerox Corporation HP LaserJet III HPLaserJet IIISi HP LaserJet 4Si are registered trademarks of Hewlett Packard Corporation HP UNIX is a trademark of Hewlett Packard Corporation PSIO is the copyrighted property of Peerless Systems Corporation DPO Card is a registered trademark of Osicom Technologies Inc DPI Print Server Division Micr...

Page 3: ......

Page 4: ...e to radio communications Operation of this equipment in a residential area is likely to cause harmful interference in which case the user will be required to correct the interference at his her own expense Canada This digital apparatus does not exceed the Class A limits for radio noise emissions from digital apparatus set out in the Radio Interference Regulations of the Canadian Department of Com...

Page 5: ... 4 1 Configuring NetWare 2 15 and 3 1 4 1 4 1 1 Start PCONSOLE and Select File Server 4 2 4 1 2 Create Print Queues 4 2 4 1 3 Enter the Print Server Name 4 2 4 1 4 Configure the Print Server 4 3 4 1 5 Assign Print Queues to the Printer 4 3 4 1 6 Set Up Notify Options for the Printer Optional 4 4 4 1 7 Installing the Print Server on Multiple File Servers 4 4 4 1 8 Primary File Server 4 5 4 1 9 Pref...

Page 6: ...hapter 5 Windows Peer to Peer Printing 5 1 5 1 Windows Peer to Peer Printing 5 1 5 1 1 Introduction and Preparation 5 1 5 1 2 Installation and Operation 5 2 5 2 Windows IP Peer to Peer Printing 5 2 5 2 1 Introduction and Preparation 5 3 5 2 2 Installation and Operation 5 3 Chapter 6 AppleTalk Configuration 6 1 6 1 Choosing the Printer 6 1 Chapter 7 TCP IP Configuration 7 1 7 1 Installation in a Wi...

Page 7: ...uages 7 19 7 6 4 Enable Disable Network Protocols 7 21 7 6 5 Reset Unit 7 21 7 6 6 Restore Factory 7 21 7 6 7 Change Password 7 21 7 6 8 Exit Telnet 7 21 Chapter 8 Operation and Troubleshooting 8 1 8 1 LED Status Indicator 8 1 8 2 Status Report 8 2 8 3 Resetting the Print Server to Factory Default 8 4 8 4 How to Diagnose Problems 8 4 8 5 Troubleshooting Checklists 8 5 8 5 1 Troubleshooting Network...

Page 8: ......

Page 9: ...nd without using IP Ÿ Novell NetWare PSERVER on both bindery based and Novell Directory Services NDS Ÿ lpr lpd over TCP IP for UNIX platforms and Microsoft s Windows Ÿ Raw sockets support over selectable TCP IP port with filters for selected UNIX environments Ÿ IP and IPX SNMP support of MIB 2 and proprietary NIC MIB Ÿ SNMP support of standard MIB and proprietary printer MIBs on compatible printer...

Page 10: ...PX Peer to Peer Windows Redirector IP Peer to Peer Windows Redirector NetWare and Print Server Configuration Program NWSetup The MAP directory contains the programs BOOTPL16 for Windows 3 1x and BOOTPL32 for Windows 95 98 and Windows NT 4 0 to assist entering IP parameters in a Windows environment Each directory may contain a README file containing the latest information about the installation and...

Page 11: ...95 or Windows 98 The MAP utility requires Windows NT 4 0 or later Windows 95 or Windows 98 MAP also requires a browser such as Microsoft Internet Explorer later than 3 02 or Netscape Navigator AppleTalk printing requires printer PPD appropriate to the printer TCP IP setup and maintenance may be done with Telnet Monitoring and maintenance with HTTP requires a suitable internet Web Browser program s...

Page 12: ... When referring to keys on the keyboard that need to be pressed all caps are used e g Press the ENTER key Dialog boxes that appear on the screen are referred to using square brackets e g Click on the OK button References are made to the ENTER key this is the same as the RETURN key on some keyboards ...

Page 13: ... Network Interface Board 1 Plug in the power cord 2 Turn on the power and wait for the printer to warm up The Network Interface Board provides a print job to the printer which contains the Network Interface Board status information ð Refer to 8 2 Status Report for more information 3 Check the Network Interface Board status report Record the serial number and the Network address or save the status ...

Page 14: ......

Page 15: ...L based monitoring and maintenance capabilities An IP Web Browser also provides access to this capability directly Either program allows you to Ÿ Configure your network protocols for the Network Interface Board Ÿ Reset the Network Interface Board remotely to either clear an error condition or return the print server to its factory default settings Ÿ Troubleshoot problems in the Network Interface B...

Page 16: ... program The path default is C Program Files MAP You can change the path or use the default The installation begins 3 3 Using the MAP Program When you start MAP program from the Start menu the program will automatically enters Microsoft Internet Explorer Netscape Navigator or your default browser and prompt you with a list of IPX print servers listed by their SAP identification and IP print server...

Page 17: ...enerate Once the search parameters and a hop count is entered click on OK 3 5 Web IP Browser Once you have assigned an IP address to your Network Interface Board you may use an IP browser such as Netscape to access the HTTP Server and the HTML code allowing Network Interface Board monitoring and maintenance To access the HTTP Server screens from your browser do the following 1 Open up your browser...

Page 18: ......

Page 19: ...e Print Server for NetWare Ÿ Using NetWare Utilities explains how to use standard Novell NetWare utilities to make changes to the configuration of the Print Server function Ÿ NWSetup NetWare and Print Server Configuration Program describes how to install the program and how to configure the Network Interface Board and NetWare file servers without using Novell NetWare utilities 4 1 Configuring NetW...

Page 20: ... 5 Press the ESC key to return to the Available Options menu 4 1 2 Create Print Queues The print server must be assigned to at least one print queue on the file server Ÿ If the print queue that you want the print server card to service already exists and you know the name of this queue go to 4 1 3 Enter the Print Server Name Ÿ If you do not know the name of the queue or it does not exist use the f...

Page 21: ...tle of Printer 0 5 If you choose to change default in the Name field on this form to something that helps you identify the printer for example LASER_PRINTER The print server uses this name in its message back to the users on the Notify list Select Name enter a name and then press the ENTER key 6 Select Type and press the ENTER key A list of printer types is displayed 7 Choose Remote Other Unknown ...

Page 22: ...t Server Configuration menu 2 Select the printer from the Defined Printers list The screen appears which is blank for an initial installation 3 Press the ENTER key to view a list of Notify Candidates 4 Select the user or group from the list 5 Set the First and Next intervals in the Notify Intervals screen It is recommended that you use the defaults è The First interval is the number of seconds the...

Page 23: ...Be Serviced option from the Print Server Configuration Menu 2 Press the INSERT key to display the Available File Servers list 3 Select the name of each file server to be serviced and press the ENTER key to add it to the File Servers To Be Serviced list 4 When the list is complete press the ESC key to return to the menu 5 Install the Network Interface Board on each of the primary file servers 4 1 9...

Page 24: ...o confirm the server has Bindery Context 1 Go to the 4 x server and at the system console type load install 2 Select Maintenance Selective Install from the menu 3 Select NCF Files Options from the menu 4 Select Edit AUTOEXEC NCF from the menu 5 Search the file to see if you have a statement similar to the following included SET BINDERY CONTEXT 0U ENG Where 0U ENG is an example of a name for the fi...

Page 25: ...y to move to the Printer type field and press the ENTER key From the list of printer types select Other Unknown and press the ENTER key 11 When you are finished press the F10 key to save the configuration 12 Repeat steps 5 through 10 for each file server that the printer server services 13 To view add delete or modify print servers or queues after the initial setup select either the Print Queues o...

Page 26: ...work Interface Board must be set up with NDS Context and Tree See Section 4 4 The steps below describe the use of NWADMIN configuration to create printer print server and print queue objects Then you will assign or associate those objects with each other If you wish to keep Bindery resources on any server you can under NetWare 4 x if you declare a SET BINDERY CONTEXT statement in your AUTOEXEC NCF...

Page 27: ...ndow will appear with the volume listed in Objects If the volume is not listed scroll the Directory Context items until you find the volume where you want the queue to reside 4 Click on the object hard drive of your choice and it will appear in the Selected Object field Click on the OK button 5 The full volume will now appear in the Print Queue Volume field Finally click on the Create button 4 3 4...

Page 28: ...ick on Enable NetWare If it is not selected the NetWare protocols will not come up the Network Interface Board will not appear as an advertised device and the NIB will not be accessible using IPX SNMP 3 The default name for the NetWare Print Server is RDP_123456 123456 is the serial number of the Network Interface Board This is also the name of the printer in peer to peer mode If you want to chang...

Page 29: ... will not support Print Servers on a Bindery file server 10 Once you have selected all desired settings and entered the desired NetWare information you may cause this information to be entered in the Network Interface Board NV RAM by clicking on Accept Settings As with all value changes if you have not entered the Network Interface Board Management Password before you must enter it in the appropri...

Page 30: ...ollowing procedures 1 Start the PCONSOLE utility 2 Select Print Server Information from the Available Options menu 3 Select the print server from the list 4 Select Print Server Configuration from the menu 5 Select Queues Serviced by Printer from the menu 6 Select a printer from the Defined Printers list 7 Press INSERT at the File Server Queue Priority screen The Available Queues list appears 8 Sel...

Page 31: ...onds the network waits before it notifies users about a print job problem è The Next interval specifies how often in seconds users are notified Enter a number for each interval and press the ENTER key 10 Press the ESC key and save all changes 11 Press the ESC key until you see the prompt to exit PCONSOLE 12 Select Yes and then press the ENTER key 4 6 NWSetup NetWare and Print Server Configuration ...

Page 32: ...NWSetup displays a list of all Network Interface Boards available on your network after you initiate the program The Network Interface Board appears with its serial number See screen example below Once you select the Network Interface Board you want to configure the Print Server Settings screen appears This screen lets you set up your version of Novell NetWare for the Network Interface Board See 4...

Page 33: ... at which a Network Interface board will poll print queues for a new print job For example if you place 1 in the field the Network Interface Board should poll for new print jobs every 1 second The minimum value for this field is 1 and the maximum is 250 Print Server Password and Print Server Password Retype Indicates the password for a Network Interface Board which will be used to log into NetWare...

Page 34: ...r typeless Preferred NDS Tree Enter a text string to set the NDS tree which the Network Interface Board will use to login The maximum field length is 48 characters Enable Bindery Mode Determines whether the Network Interface Board should attempt to service the NetWare newtork in bindery mode If this box is checked then Bindery Mode is enabled NOTE If this field is not enabled then the Primary File...

Page 35: ...e enabled Printer Name Displays the name of the printer This is a read only field Queues Serviced by Printer Lists all the queues which are to be serviced by the printer Queues associated with bindery connections are listed in the format bindery server name queue name Queues associated with NDS connections are listed by their distinguished names Example If a printer services the queue YOURPTR_Q on...

Page 36: ... Delete queue buttons to make changes Adding a Queue When the user clicks on the Add Queue button a dialog box appears see above where the user can add a queue to the printer Below is a description of each field Connection Server Use to select a server connection This list includes the NDS connection and all of the bindery file server connections which the user has The NDS connection is always the...

Page 37: ...remove the queue from the file server queue list Create Queue When you click on the Create Queue button on the Add Queue to Printer screen the dialog box below appears Below is a description of each field Queue Name Enter the name of the new queue This field must be completed in order to create a new queue The maximum field length is 48 characters File Server Volume Indicates the volume on which t...

Page 38: ...d or clicks on OK Users Groups Lists all of the user and groups available on the currently selected connection Any entry on this list can be added to a printer s service list The list includes Print job owner which refers to the user who sent the job currently being printed If an NDS connection is selected NWSetup generates a list of all users and groups in the currently selected context and all s...

Page 39: ...description of each field follows the screen example Below is a description of each field Field Description User Group name Indicates the name of the user or group which is being edited This field cannot be changed Delay in minutes for first message Indicates how long the Network Interface Board should wait before sending a notification message to the user that an error condition has occurred The ...

Page 40: ......

Page 41: ...computer you must include the IPX SPX Compatible Protocol If you are not using NetWare you do not need to activate any NetWare Client application This inclusion of IPX SPX can also be done after initial Windows installation by going to the Network setup function under Control Panel To do this you will need the Windows installation disk s Note Because Peer to Peer uses the IPX SPX Protocol Novell o...

Page 42: ...re Click on Yes or No Once the redirector is installed each printer on the network that supports this peer to peer capability will appear as a Port under Printer Properties To use the Peer to Peer connection create a logical printer using the Add Printer Wizard according to the instructions for your printer Set up the printer as a LOCAL printer Use the driver that came with your printer When the A...

Page 43: ... site that had active TCP IP to a site that does not the unit should be reset to factory default to clear the IP Address and other network information 5 2 2 Installation and Operation Install the Windows IP Peer to Peer redirector as follows 1 Put the CD ROM which contains the redirector in your CD ROM drive 2 From the Windows main window click on Start 3 Click on Run 4 From the Run screen select ...

Page 44: ......

Page 45: ... screen Select the device driver type corresponding to your printer from those indicated at the upper left of the screen A list of printers will appear in the display panel at the right of the screen 6 From the display panel at the right of the screen choose the name of the printer from the list of printers The AppleTalk printer name for your printer is printed out on the Status and Configuration ...

Page 46: ......

Page 47: ...or TCP IP networks as well as in a native Microsoft Windows network This flexibility allows various options for setting up the network printing system even though this Network Interface Board does not support NetBEUI If the Windows workstations are connected to a NetWare 2 x 3 x or 4 x network configure the printer interfaces for NetWare and use standard Windows NetWare utilities to provide access...

Page 48: ... 7 1 1 4 Assigning IP Address with ARP The Network Interface Board must be on the same network segment as the workstation that you are using to configure it The TCP IP stack must be installed and operating Use the procedures in 7 1 1 5 Assigning IP Address with BOOTP Lite if you prefer to use BOOTP Lite to configure the IP address instead of ARP 1 From Windows enter the MS DOS box 2 At the command...

Page 49: ... MAC address of the Network Interface Board Hardware Address listed on the Status sheet as Ethernet Address Use colons as delimiters as shown on the status sheet rather than the dashes that Windows uses 6 Click on Go You will get a message that the program is Verifying and then it will tell you whether the unit is active or not 7 Wait for about five minutes for the Network Interface Board to reset...

Page 50: ... Lite program you will also need the BOOTPL32 exe provided with this Network Interface Board on the MAP directory of the CD ROM 7 1 2 1 Loading the lpr Spooler Follow the instructions for the lpr spooler of your choice to set up the spooler on the workstations 7 1 2 2 Setting up the Network Interface Board The Network Interface Board must be given IP address and routing information to be used with...

Page 51: ...ork if the Windows PC is an active DHCP Server This program uses the BOOTP protocol The Network Interface Board must be on the same network segment as the workstation that you are using to configure it The TCP IP stack must be installed and operating 1 Reset the printer Note The Network Interface Board issues the BOOTP request for a finite period of time The print server must be freshly reset for ...

Page 52: ... PORT1 for the Remote Printer Name Note PORT1 must be entered in capital letters 7 1 3 Windows NT Instructions Windows NT version 3 5 or higher does come with TCP IP and lpr capabilities although these must be installed when the unit is configured You must install the TCP IP Protocol Simple TCP IP Services and Microsoft TCP IP Printing prior to entering the network printer on the workstation Note ...

Page 53: ...ss you must use the Telnet facility or the HTML pages accessed by MAP or Web Browser facility to enter the other IP parameters 7 1 3 3 Assigning IP Address with BOOTPL32 You may provide the IP address and other IP parameters to the Network Interface Board on 32 Bit TCP IP Stack Windows NT Windows 95 98 using the BOOTPL32 exe program This program uses the BOOTP protocol The Network Interface Board ...

Page 54: ... changed from the Telnet utility See 7 6 Running Telnet for instructions on using Telnet 1 Telnet to the Network Interface Board the login and password are both sysadm 2 Turn off the protocols that you are not utilizing option 3 3 Setup the subnet mask and default gateway for the Network Interface Board if applicable option 1 4 Exit Save and Reset the Network Interface Board You can also use User ...

Page 55: ...c è If DHCP is enabled the Network Interface Board will make DHCP requests when the Network Interface Board is reset or on power up when the Network Interface Board does not have an IP address stored or when IP Address in NVRAM is OFF These DHCP requests will be in addition to BOOTP requests è If DHCP is enabled and the Network Interface Board had an IP address in NVRAM and IP Address in NVRAM is ...

Page 56: ... 15 or higher will automatically search every connected network this number is not recommended due to the network traffic it would generate IP Port Base The starting port number for the print server The default is 10000 corresponding to a TCP IP port of 10001 but you can change it if you need to Printer Names Lets you select how you can view the printer names in the Windows port list Based on Seri...

Page 57: ... of the printer you want to use A list of printer ports appears IP peer to peer printers will appear in this list 4 Select the IP printer you want to use 5 Complete the remainder of the printer setup procedure as you would normally 7 4 FTP Printing 7 4 1 FTP Printing Using Netscape Connect to the port you wish to send the print job to on your print server For example to print to your print server ...

Page 58: ... Interface Board has its IP information Some UNIX System V systems have restrictions on support of remote lpr lpd printers requiring that the host based lpr lpd approach be used For many operating systems you have the option of using host resident printing or print server resident printing Each mode has certain advantages Ÿ The host resident method can print the username and filename on its banner...

Page 59: ...ateway 7 5 1 1 Using BOOTP The BOOTP daemon is a native TCP IP option for configuring the IP address of a diskless network device To communicate the IP address use the following procedure 1 Turn off the printer 2 Log in as superuser on a host on the same subnet as the print server However if the server resides on another subnet complete this procedure to store the IP address in the print server Re...

Page 60: ...d finishes initializing to allow enough time for the IP address to become known and to be saved in non volatile memory The Network Interface Board should reinitialize itself 10 After the Network Interface Board has reinitialize send a ping command to verify that the print server obtained its IP address For example ping 192 9 200 200 If the print server has the address the result is a confirmation ...

Page 61: ...Check the printer to see that the print server is connected to the network Turn on the printer 8 Wait until the printer powers up and finishes initializing to allow enough time for the IP address to become known and to be saved in non volatile memory The Network Interface Board should then reset itself 9 After the Network Interface Board has reset send a ping command to verify that the print serve...

Page 62: ...s or by its name For example arp d printfast 7 5 2 lpd lpr Printing lpd lpr is an implementation of the standard UNIX line printer daemon which lets you print across a TCP IP network without the need to install software on your workstation with all filtering and banners done by Network Interface Board Remote printing uses the same commands lpr lpq lpc as local printing The process begins when the ...

Page 63: ... send jobs spooled at usr spool lpd printer_name to the printer designated printer_name to be printed at port 1 the internal connection to the printer of the Network Interface Board designated as remote_host 2 Create the spooling directory For example type mkdir usr spool lpd printer_name 3 To print via the spooler use the lpr command Type lpr P printer_name file_name Installation and testing is d...

Page 64: ... defaults and change password Press the number for the parameter you wish to check or change and press the ENTER key The Configuration Utility Unit Serial no 991398 v2 18 Main Menu 1 IP Parameters 2 LPD Printers 3 Protocols 4 Reset Unit 5 Restore Factory Defaults 6 Change Password 7 Exit Enter Selection for Help To end your Telnet session type E at the Main Menu If you have made any changes you ar...

Page 65: ...r is one less than the actual TCP IP port number used by the printer For example to set the port number to 9100 enter 9099 You should specify a port number between 1000 and 65530 for compatibility with HTML based configuration capability which can be accessed via the MAP or a standard Web Browser 7 6 3 Select Printer Languages Selection 2 in the Main Menu allows you to designate which emulations p...

Page 66: ...below will appear The Configuration Utility Unit Serial no 991398 v2 1X LPD Printers 1 Printer 1 2 Banners Please Enter Selection for Help To change the set of emulations type 1 and press the ENTER key The options shown below will appear The Configuration Utility Unit Serial no 991398 v2 18 Printer 1 PCL OTHER 1 PCL 2 PS 3 ASCII 4 OTHER Please Enter Selection for Help 3 To delete an emulation sele...

Page 67: ...The factory default values will not take effect until the Telnet program is exited or the unit is power cycled 7 6 7 Change Password When you want to establish a new password enter 6 from the Main menu Type up to eight characters after the New Password query and press the ENTER key Retype the same characters at the Retype New Password query and press the ENTER key Use the Save Changes and Exit opt...

Page 68: ...d Reset 3 Exit Without Saving Changes Please Enter Selection for Help 2 Choose your option and press the ENTER key For example type 2 and press the ENTER key The program will save your changes and reset the print server so that the changes will take effect ...

Page 69: ...ring normal operation The following table provides the conditions that this LED may indicate LED Patterns And the printer is Then the NIB Operating Condition Green LED is ON solid First powered on Is performing self tests Normal Awaiting print jobs Is functioning properly Normal Green LED blinks 3 times and stays on Finished with self tests Prints out status report Normal Green LED blinks rapidly ...

Page 70: ...erver is powered on For example the report on the next page shows the configuration of the print server immediately after the report is printed Some printers also allow you to use a command from the front panel that will produce a status report It is strongly recommended that you review this report immediately after installation and any time the setup has been changed If the report does not includ...

Page 71: ...ID 370 TCP IP Network Information enabled Frame Type Ethernet II Protocol Address Not Configured Subnet Mask 255 0 0 0 Default Gateway 0 0 0 0 AppleTalk Network Information enabled Frame Type 802 2 SNAP On 802 3 Protocol Address Net Number 65384 Node Number 61 Socket Number 129 Preferred AppleTalk Zone Default Zone Novell Connection Information Printer Name Printer 0 File Server SERVER1 Queue QUEU...

Page 72: ...ng problems 1 Verify that the printer is functioning properly Is the printer printing Make sure the printer is operating properly by causing it to generate a test page See your printer s owner s manual for instructions on generating a test page Is the printer on line Verify that the printer is on line or else nothing will print Does the control panel display an error message Review the printer doc...

Page 73: ...le 8 5 2 Troubleshooting NetWare Protocol It is recommended you use MAP to get the NetWare setup and parameter values If you have not resolved the problem after running MAP go through the checklists in this section 8 5 2 1 NetWare Checklist Is the print server name entered correctly The factory default name is RDP serial number The serial number label is located on the board Did you assign print q...

Page 74: ... If not enable it 8 5 2 4 Network Interface Board Configuration Checklist If all your hardware connections are correct check the following Use MAP to check the status of the print server The Unit Status screen shows the status for the selected network interface card This report includes a status of file servers and queues assigned to a printer along with a description of any problems The printer m...

Page 75: ...the other printer until you can verify the Network Interface Board connected printer setup 8 5 2 7 Network Interface Board Loses Its File Server Connection If the Network Interface Board loses its connection to the file server it can take approximately 5 to 10 minutes to reconnect If the connection is not made after a reasonable amount of time check the error conditions to troubleshoot the problem...

Page 76: ... did you reselect the printer under its new name If you placed the printer in a new zone did you reselect the zone Are there other printers with similar names in the Chooser Make sure you chose the Network Interface Board connected printer ...

Page 77: ...s provide general specifications for the Network Interface Board Size 127 00 mm length x 87 88 mm height 5 in x 3 5 in Weight 200 gm 8 oz Controls and Indicators One green LED and one amber LED Configuration Stored in non volatile memory Connectors Ethernet 8 wire RJ 45 10BaseT 100BaseTX ...

Page 78: ...your 10BaseT 100BaseTX STP cables to connect to the RJ45 connector on the Network Interface Board The cable should be Category Type 5 or better depending on length Pin Number Color Ethernet 8 blue white 7 blue 6 orange white Receive 5 green white 4 green 3 orange Receive 2 brown white Transmit 1 brown Transmit ...

Page 79: ...Interface Board NIB 450 E Option Quick Configuration Guide Read this manual carefully before you use this product and keep it handy for future reference For safety please follow the instructions in this manual ...

Page 80: ... NetWare is a registered trademark of Novell Incorporated Windows is a registered trademark of Mi crosoft Corporation in the United States and or other countries Macintosh is a registered trademark of Apple Computer Incorporated Document Server is a trademark of Ricoh Company LTD All other products referenced are trademarks or registered trademarks of their respective companies Other product names...

Page 81: ... damaged or data might be lost Be sure to read this Note This symbol indicates precautions for operation or actions to take after misop eration Reference This symbol indicates a reference Keys that appear on the machine s panel display Keys and buttons that appear on the computer s display Keys built into the machine s operation panel Keys on the computer s keyboard ...

Page 82: ...municate over an Ethernet network with many different network operating systems including NetWare Macintosh UNIX and Windows The status page of the NIB will be automatically printed in the following cases when the printer is turned on when the NIB is reset This feature can be disabled with the MAP utility or by connecting to the NIB address with a browser To disable this feature check Configure St...

Page 83: ... 3 x Configuration 10 NetWare 4 x Configuration 12 Configuring the IP IPX MAP Utility 14 3 Windows 95 98 Configuration What is Windows 95 98 Peer to Peer Printing 15 Installing Peer to Peer Printing IP 16 Installing Peer to Peer Printing IPX 18 Select the Printer Port 20 4 Dynamic Host Configuration Protocol DHCP Dynamic Host Configuration Protocol DHCP 21 5 Windows NT Configuration Windows NT Con...

Page 84: ...iv 6 UNIX Configuration UNIX Configuration 29 Setting the IP Address 29 Setting Other TCP IP Parameters 30 INDEX 32 ...

Page 85: ...pier Copy Reference Describes the procedures and functions for using this machine as a copier FAX Reference Option Available only for Type450 machine Describes the procedures and functions for using this machine as a fax Printer Reference Describes the system settings procedures and functions for using this ma chine as a printer Document Server Reference Option Available only for Type650 machine D...

Page 86: ...2 ...

Page 87: ...nterface Board NIB 450 E You can select any of the programs listed in the Configuration Programs Configuration Programs The CD ROM includes the following utilities MAP Web based configuration utility IPX Peer to Peer IPX Peer to Peer printing software IP Peer to Peer IP Peer to Peer printing software BOOTP Lite Used to configure the IP parameters of the NIB ...

Page 88: ...appears Note If Adobe Acrobat Reader 3 0 is not installed click on Install Adobe Acrobat Reader 3 0 B Click on CD ROM Contents The CD ROM table of contents screen appears C Click on Installation Configuration Programs The Configuration Programs screen appears P 16 Installing Peer to Peer Printing IP P 18 Installing Peer to Peer Printing IPX ...

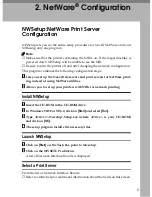
Page 89: ...ervers and print servers for NetWare print ing instead of using NetWare utilities B Allows you to set up your printers with NIBs for network printing Install NWSetup A Insert the CD ROM in the CD ROM drive B In Windows 95 98 or NT4 0 click on Start and select Run C Type Drive Nwsetup Setup exe where Drive is your CD ROM and click on OK D The setup program installs the necessary files Launch NWSetu...

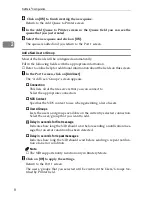
Page 90: ... Board Change Password Clicking on this button brings up a dialog box allowing you to set or change the password B Click on Next to continue The second Print Server Settings screen appears Again most of the fields will be configured automatically Fill in the following fields with the appropriate information Enable NDS Mode Indicates whether or not the NIB supports Directory Services Preferred NDS ...

Page 91: ...name of the printer Note This is a read only field Queues Serviced by Printer This field contains a list of queues that are serviced by the printer B Click on Add Queue to add a queue The Add Queue to Printer screen appears Connection Server This list menu is used to select a server connection Context This field allows you to specify an NDS context for the queue Queue Lists all of the queues avail...

Page 92: ...n This lists all of the file servers that you can connect to Select the appropriate connection NDS Context Specifies the NDS context to use when generating a list of users Users Groups Lists the users and groups available on the currently selected connection Select the user group that you want to add Delay in seconds for first message Indicates how long the NIB should wait before sending a notific...

Page 93: ... for a user or group User Group name This is the name of the current user group This is a read only field Delay in seconds for first message Indicates how long the NIB should wait before sending a notification mes sage that an error condition has been detected Delay in seconds for repeat messages Indicates how long the NIB should wait before sending a repeat notifica tion of an error condition Not...

Page 94: ... queue to be serviced by the NIB and press the EN TER key E Press the ESC key to return to the Available Options screen Define the Print Server A From the Available Options Menu select Print Server Information and press the ENTER key The Print Servers screen appears B Press the INSERT key C Type the NIB Print Server name and press the ENTER key The Print Servers screen appears Note The default Pri...

Page 95: ...press the ENTER key The Printer 0 configuration screen appears G Press the ESC key to exit H Select Yes and press the ENTER key to save the changes I Press the ESC key to return to the Printer Server Configuration menu Assign the Print Queue A From the Printer Server Configuration menu select Queues Serviced by Printer and press the ENTER key The Define Printers screen appears B Select the desired...

Page 96: ...elect the volume you want to use and press the ENTER key You are returned to the Print Queues screen and the new queue is visible F Press the ESC key to return to the Available Options screen Define the Print Server A From the Available Options screen select Print Servers and press the EN TER key The Printer Servers screen appears B Press the INSERT key C Input the NIB print server name and press ...

Page 97: ...is visible E Select the Printer you wish to define and press the ENTER key The Printer configuration screen appears Fill in the fields according to the specifications of the printer Assign the Print Queue A From the Printer configuration screen select Print queues assigned and press the ENTER key The Print Queue screen appears B Press the INSERT key The Object class screen appears C Select the pri...

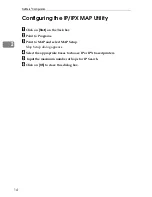
Page 98: ...Click on Start on the Task bar B Point to Programs C Point to MAP and select MAP Setup Map Setup dialog appears D Select the appropriate boxes to choose IP or IPX based printers E Input the maximum number of hops for IP Search F Click on OK to close this dialog box ...

Page 99: ...is installed all NIBs on the network automatically appear in the list of available printer ports The peer to peer printing software can also be used in networks where servers are present however often the server print services are utilized instead Server based print services offer centralized printing management and spooling and do not require software other than the printer driver to be installed...

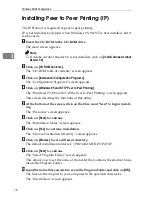
Page 100: ...IP the Peer to Peer Printing screen appears This screen describes the functions of this utility E At the bottom of the screen click on the blue word here to begin install ing The Welcome screen appears F Click on Next to continue The Installation Notes screen appears G Click on Yes to continue installation The Choose Destination Directory screen appears H Click on Browse to set a different directo...

Page 101: ...rating system Windows95 98 or NT 4 0 A Insert the CD in the CD ROM drive B Close all the applications that are currently running C Click on Start on the task bar and click on Run D Type Drive IP p2p Setup exe where Drive is your CD ROM E Click on OK The Welcome screen appears The remaining steps are identical to F K above P 16 Installing Peer to Peer Printing IP ...

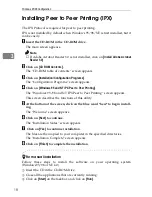
Page 102: ... Peer to Peer Printing The Windows 95 98 and NT IPX Peer to Peer Printing screen appears This screen describes the functions of this utility E At the bottom of the screen click on the blue word here to begin install ing The Welcome screen appears F Click on Next to continue The Installation Notes screen appears G Click on Yes to continue installation The files are then copied to your computer in t...

Page 103: ...er to Peer Printing IPX 19 3 D Type Drive IPX p2p Setup exe where Drive is your CD ROM E Click on OK The Welcome screen appears The remaining steps are idential to F H above P 18 Installing Peer to Peer Printing IPX ...

Page 104: ...inter port A Use the Add Printer Wizard to add a LOCAL printer B Use the drivers that come with the printer C When the Add Printer Wizard asks you to select a port select the name of the printer that you want to use D Select the Print Test Page option when you complete the installation Note The default name for IPX is in the format RDP_ and the serial number of the NIB e g RDP_167532 The default n...

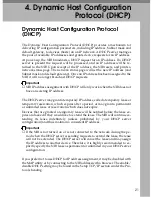
Page 105: ...erver may grant a temporary IP address called a temporary lease or temporary reservation which expires after a period or may grant a permanent or unlimited lease or reservation which does not expire Devices that are granted a temporary lease will be notified before the lease ex pires and asked if they would like to extend the lease The NIB will continue ex tending its lease indefinitely unless pro...

Page 106: ...Dynamic Host Configuration Protocol DHCP 22 4 ...

Page 107: ...nfigure the individual Windows NT or Windows 95 98 workstations to print using a different protocol than the Windows NT server For example a Windows NT server could be con figured to print to a NIB via TCP IP using the instructions in this section The NIB could then be designated as shared on the NT server allowing workstations to print via the NT server using a different protocol such as the defa...

Page 108: ...lick on Network and select the Protocols tab If TCP IP Protocol is not in the list of Network Protocols click on Add to in stall it C Select the Services tab If either Microsoft TCP IP Printing or Simple TCP IP Services is not on the list of Network Services click on Add to install them D Click on Close when all protocols and services have been added If the TCP IP protocol has just been added Wind...

Page 109: ...bnet mask and the first number in the IP address is from 192 to 254 then use 255 255 255 0 as the Subnet mask D Enter the Default Gateway address the router s IP address or leave blank E Enter the Hardware address of the NIB This address is listed on the power up network status page under Network Address for example 00 40 AF 12 34 23 Please enter it as it appears on the status page The status page...

Page 110: ...select Properties C On the Ports tab click on Add Port D Double click on LPR Port in the list of available printer ports E In the Name or address of host providing lpd field enter the IP address of the NIB that was assigned with BOOTPL32 F In the Name of printer or print queue on that server field enter PORT1 and click on OK G Click on Close to close the Printer Ports dialog The NIB IP address is ...

Page 111: ...t access to a shared printer Windows 95 98 In the Printer Properties on the Details tab click the Add Port button and browse the network for the shared printer Windows NT4 0 Add a new printer with Add Printer select Network Printer Server rather than My Computer and choose the shared printer from the shared printers list ...

Page 112: ...Windows NT Configuration 28 5 ...

Page 113: ...th the MAP utility when a NetWare server is present with the UNIX bootp daemon with rarp or with the standard UNIX command line utility arp The following instructions use arp but the other methods may be used instead depending on user preference For directions on using one of the other methods please refer to the NIB Owner s Manual A Turn the printer off and then on and wait for the power up netwo...

Page 114: ...owser For instructions of configuring via telnet refer to the NIB Owner s Manual A In the browser connect to http NIB_IP_address For example http 197 42 211 5 B At the NIB s Home Page click on Network Configuration C Many of the configuration options are password protected The default password is sysadm The password is case sensitive To change the password select Change Password in the System colu...

Page 115: ... changes made to the NIB do not take effect until the unit is reset Click on Reset in the System column and click Reset Unit After a few seconds the screen should report that the unit was reset TCP IP configuration is now complete ...

Page 116: ...indery Mode 6 Enable NDS Mode 6 Enable Printer 7 Ethernet Frame Type 6 Ethernet Interface ii F FAX Reference 1 File Server Volume 7 G Gateway address 25 H Hardware address 25 HTTP ii I IP 3 16 IP address 21 25 29 IP parameters 25 IPX 3 18 L LPR 23 26 M MAP 3 14 Multiple Protocol support ii N NDS Context 7 8 NetBEUI 23 NetWare 5 Network Address 25 Network Interface Board NIB 450 E 1 3 Network Inter...

Page 117: ...ue 7 Queue Name 7 Queues Serviced by Printer 7 S Shared Printer 27 SNMP ii Subnet mask 25 System Settings 1 T TCP IP 21 23 24 U UNIX 29 User Group name 9 Users Groups 8 W Windows 95 98 27 Windows NT4 0 24 26 27 ...

Page 118: ...34 UE USA A855 ...

Page 119: ...Copyright 1998 ...

Page 120: ...Network Interface Board 450 E Option Quick Configuration Guide Printed in USA UE USA A855 8500A ...

Reviews: