Punch Unit
The punch unit is already adjusted in the factory, so you don’t need to adjust it. When you need to
replace the parts of the punch unit, replace the whole unit.
• Do not disassemble the punch unit. This unit is precisely adjusted in the factory.
• Do not drop or give a shock to the unit when you replace it. The unit could be damaged.
1.
Remove the following covers.
• Rear upper cover and rear lower cover (page 7)
2.
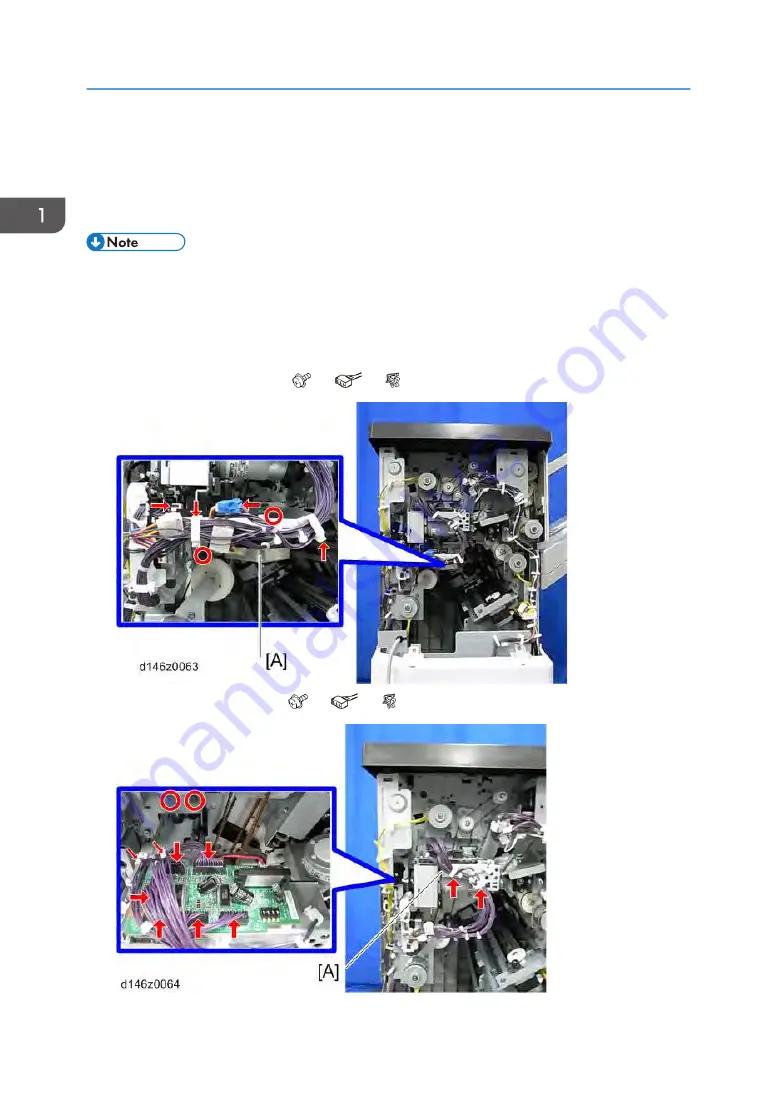
Stepper motor bracket [A] ( ×2,
×2, x2)
3.
Pull out the punch unit [A] ( ×2,
×5, ×4)
1. Replacement and Adjustment
86
Summary of Contents for SR3160
Page 2: ......
Page 18: ...8 End fence A 2 Left Cover D689 Only 1 Upper tray A 1 1 Replacement and Adjustment 16...
Page 19: ...2 Rear mold bracket A 1 3 Front mold bracket A 1 4 Shift tray bracket A 4 Exterior Covers 17...
Page 20: ...5 Left cover A 3 1 Replacement and Adjustment 18...
Page 25: ...7 Pulley A hook 1 8 Screws from the rear side of the finisher 6 Corner Stapling Unit 23...
Page 67: ...7 Disconnect the connectors shown below 2 Booklet Unit D688 Only 65...
Page 75: ...6 Disconnect the connectors shown below 11 Booklet Unit D688 Only 73...
Page 76: ...7 Disconnect the connectors shown below 2 1 Replacement and Adjustment 74...
Page 81: ...3 Fold plate bracket A 2 4 Booklet paper exit guide plate A 4 Booklet Unit D688 Only 79...
Page 87: ...3 Booklet bottom fence HP sensor A 1 1 Booklet Unit D688 Only 85...
Page 89: ...Punch Unit 87...
Page 96: ...MEMO 94...
Page 97: ...MEMO 95...
Page 98: ...MEMO 96 EN...


