T
echnical
B
ulletin
PAGE: 6/6
Reissued:01-Dec-11
Model:
Taurus-C1/P1 (D074/D075/M044)
Date:
13-Sept-2011
No.:
RD074022a
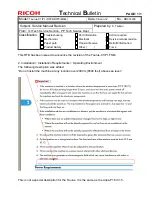
The procedure in the original bulletin as shown below applies ONLY to units of
production prior to December 2011.
Request
Instruct customers to set the value of SP1001-002 in the “Custom paper” settings.
Or, CEs can do this.
Procedures
1. At installation, check the value of SP1001-002.
2. If this value is within the range -0.3 to +0.3, finished. Nothing should be done.
If this value is out of the range -0.3 to +0.3, do the following procedures.
3. Note the value of SP1001-002, e.g. -0.6mm
4. Go into the “Custom Paper” settings as follows.
Log in to “User Tools”
“Paper Setting” > “Custom Paper”, and select “Program/Change”.
5. Select a registered custom paper.
6. Go into “Advanced Settings”.
7. Input the value of SP1001-002, which was noted previously, -0.6mm, to the following
settings.
08 Adjust Image Position of Side1 With Feed Dir
09 Adjust Image Position of Side2 With Feed Dir
8. Repeat steps 5-7 for all registered custom papers
Note
1. SP1001 has 7 adjustments from “Thick1” to “Thick7”. As these values were adjusted within
the 0.2mm range at the factory, check and use only SP1001-002 as the criteria value for
this procedure.
2. There must be some kind of thickness (“Wt” shown on the operation panel) for each
registered custom paper. But, regardless of the thickness of each registered custom paper,
use the value of SP1001-002.
3. Instead of customers adjusting “08 Adjust Image Position of Side1 With Feed Dir” and” 09
Adjust Image Position of Side2 With Feed Dir” by, CEs can do that using SP1950.
Explanation
Although SP 1001s are adjusted at the factory as described above, this affects only the
General Paper settings. Therefore, apply this setting (SP1001-002) to “Custom paper” settings
for the correct image registration.

