background image

Ricoma Quick Start Guide

14

4.3.4  Press  “Camera” to  adjust  the  camera  view  and change the backlight. When you press “Camera”, you 
will see the screen below:

If the  contour  line  shifts,  change  out the blade  for  a  pen  and  move the  carriage head  into  a  blank  
space. Then, click “Backlight” first, then  click  “Adjust”  and  the cutter will  automatically readjust  itself. 
4.3.5  Please DO NOT adjust the “XY  scale” ,”Language”  or  “Burn In  Test” on your cutter. 
4.3.6  Press  the “Lightness” button to adjust  the  brightness of the touch  screen and you will see the screen 
below:

4.3.7  Press  the “Light control”  to control the  LED  light  of  the  cutter. You will see the screen below when 
you press it:

Notice: When doing a Contour cut, we do not recommend opening the light.

Summary of Contents for RCP-3301

Page 1: ...ER QUICK START GUIDE RICOMA INTERNATIONAL CORPORATION 11555 NW 124th St Miami FL 33178 Telephone 305 418 4421 Toll Free 1 888 292 6282 Fax 305 418 5036 Email info ricoma com ricoma com Copyright 2021...

Page 2: ...when the power is on to avoid damage to the machine Make sure your machine is grounded otherwise you may experience an electric shock or a mechanical failure Do not detach repair or reconstruct the ma...

Page 3: ...ay fall and get damaged To unplug the power cable from the outlet please grab the plug instead of the cable Pulling the cable with too much force may result in an electrical shock or fire Any operatio...

Page 4: ...uick Start Guide 4 STANDARD ACCESSORIES Item Part Quantity 1 Power cord 1 2 USB Cable 1 3 Blade holder In machine 1 4 Blade 1pc in machine 3 5 Pen and pen holder 1 6 Dongle or Signmaster Optional 1 7...

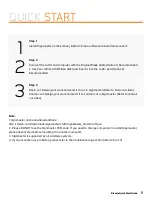
Page 5: ...to cut in Signmaster Refer to basic cut video Contour cut Design your work and send it to contour cut in Signmaster Refer to contour cut video Note 1 Signmaster online download address http fcws6 com...

Page 6: ...M drive on your computer locate the folder drive open the folder and double click USB Driver Setup After that your computer should display the following window After driver installation windows will c...

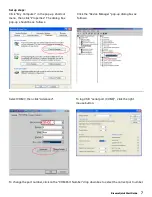
Page 7: ...operties The dialog box pop up should be as follows Click the Device Manager pop up dialog box as follows Select COM 3 then click Advanced To log USB serial port COM3 click the right mouse button To c...

Page 8: ...ower is on to avoid damage to the machine Place the machine on a stable surface otherwise the machine may fall and get damaged CAUTION Don t touch the blade top with your finger to prevent injury 3 1...

Page 9: ...ignmaster Software 3 Follow the Signmaster Operation manual for more details and watch the informational video to learn what a Basic cut and Contour cut are Contour cut Please refer to your Signmaster...

Page 10: ...our choosing then click the Blade Tool and start cutting You can set the offset and overcut setting under the Properties Cut option or through your connection Establishing a connection can be done thr...

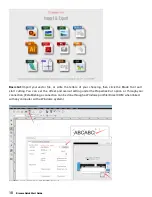
Page 11: ...orking with Templates http iifuture org vmtuts getVMTut php key smc_full_templates r 0 3 3B Computer installation If working with CorelDRAW Note Due to customers using different Versions of CorelDRAW...

Page 12: ...press the arrows to move the carriage head 2 You can click the U Disk button to choose your U disk file for cutting 3 You can recut the same project again by pressing Recut 4 Use the Force Testing bu...

Page 13: ...3 4 3 1 Press Setting and you should see the screen below 4 3 2 Press Speed to set the speed of the cutter and you will see the screen below 4 3 3 Press Cutting Force to set the cutting force and you...

Page 14: ...Backlight first then click Adjust and the cutter will automatically readjust itself 4 3 5 Please DO NOT adjust the XY scale Language or Burn In Test on your cutter 4 3 6 Press the Lightness button to...

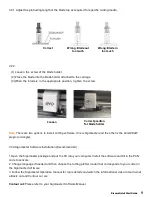
Page 15: ...ot at right angles please set the Sharp angled compensation in the cutting software ATTENTION the offset value can be over or under so follow the image below to properly set the compensation in your s...

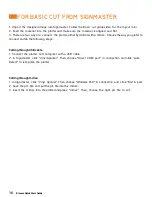
Page 16: ...ay you prefer to connect and do the following steps Cutting through USB cable 1 Connect the plotter and computer with a USB cable 2 In Signmaster click Vinyl Spooler Then choose Direct COM port in con...

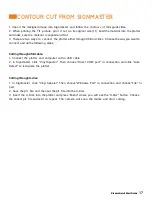
Page 17: ...t and do the following steps Cutting through USB cable 1 Connect the plotter and computer with a USB cable 2 In Signmaster click Vinyl Spooler Then choose Direct COM port in connection and click Auto...

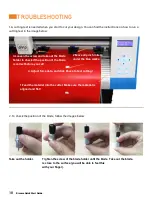
Page 18: ...out the holder 3 Loosen the screw and take out the blade holder to check if the position of the blade is correct before you cut 2 Move all pinch rollers under the blue marks 4 Adjust force data and cl...

Page 19: ...hree blade types available view the image below 4 If the material is shifting when you contour cut like in the picture below please check the instructions on the next page to recalibrate your design N...

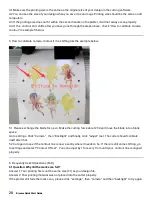
Page 20: ...ase exchange the blade for a pen Make the cutting force about 200 and move the blade into a blank space Go to settings Click Camera then Backlight and finally click adjust last The cutter should calib...

Page 21: ...nd down If you can wiggle it easily it may be too loose 2 Change the Master software if there are some stray or unwanted letters 3 Check if there are any problems on the files you are ready to output...

Page 22: ...er 1 The protruding length of the knife tip may be too long Adjust the length and continue cutting 2 The knife may be dull If it can no longer cut smoothly please replace it 6 9 Question Why does the...

Page 23: ...put and adjust the force to the appropriate level for the material you are using 2 Check whether the knife is dull or whether the top of the knife is broken For new knives the cut is thin in the insta...

Page 24: ...Question Why does the plotter come to a halt Answer The plotter knife may have been vibrating for too long or it may have constantly been used for a long period and you should let the machine rest If...

Page 25: ...USA Ricoma International Corporation 11555 NW 124 Street Miami FL 33178 USA TEL 305 418 4421 FAX 305 418 5036 Toll Free 1 888 292 6282 Website www ricoma com Email info ricoma com Ricoma Factory in C...

Reviews: