(16)
MAINTAINNENCE
TROUBLE SHOOTING
1. Periodically check the tightness of mounting bolts and electrical
connections. Remove all dirt or corrosion and always keep clean.
2. Do not attempt to disassemble the gear box. Repairs should be done by
the manufacturer or an authorized repair center.
3. The gear box has been lubricated using a high temperature lithium grease
and is sealed at the factory. No internal lubrication is required.
RIGGING
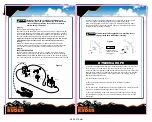
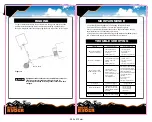
5. Figure 18 illustrate the use of a pulley block to change the direction of the
pull. Mechanical advantage can be obtained by attaching a pulley block to
the nylon sling with a shackle and running the winch rope to the anchor point.
(15)
Figure 18
Equipment such as tackle, hooks, snatch blocks, straps, etc.
should be properly sized and rated and should be
inspected periodically for damage that could reduce their
strength.
Caution
!
Symptoms
Motor runs extremely hot
Motor runs, but with
insufficient power or line
speed
Motor runs but drum
doesn't turn
Winch coasts
Motor operates but stops
1. Allow to cool
1. Excessive load
1. Excessive load/overload
1. Reduce load or double line
Winch runs backwards
1. Clutch not engaged
1. Motor wires reversed
2. Switch wires reversed
3. Battery switch installed
incorrectly
1. Recheck wiring
2. Recheck wiring
3. Check battery
connections
1. Engage clutch
Possible Causes
Corrective Action
Motor will not operate or
only in one direction
1. Switch inoperative
2. Broken wires or bad
connection
3. Damaged motor
1. Long period of operation
2. failed or removed
overload
3. Damaged motor
1. Weak battery
2. Wire from battery to
winch is too long
3. Poor battery connection
4. Poor ground
5. Damaged motor
1. Replace switch
2. Check for poor
connections
3. Replace or repair motor
1. Allow to cool
2. Replace or repair
overload
3. Replace or repair motor
1. Recharge or replace battery
and check charging system
2. Keep winch within distance
allowed by lead wires
3. Check battery terminals for
corrosion and clean as
required
4. Check and clean
connections
5. Replace or repair motor
SNATCH BLOCK
280 x 215mm
Summary of Contents for 341685
Page 1: ...280 x 215mm ...


