background image

6 — English

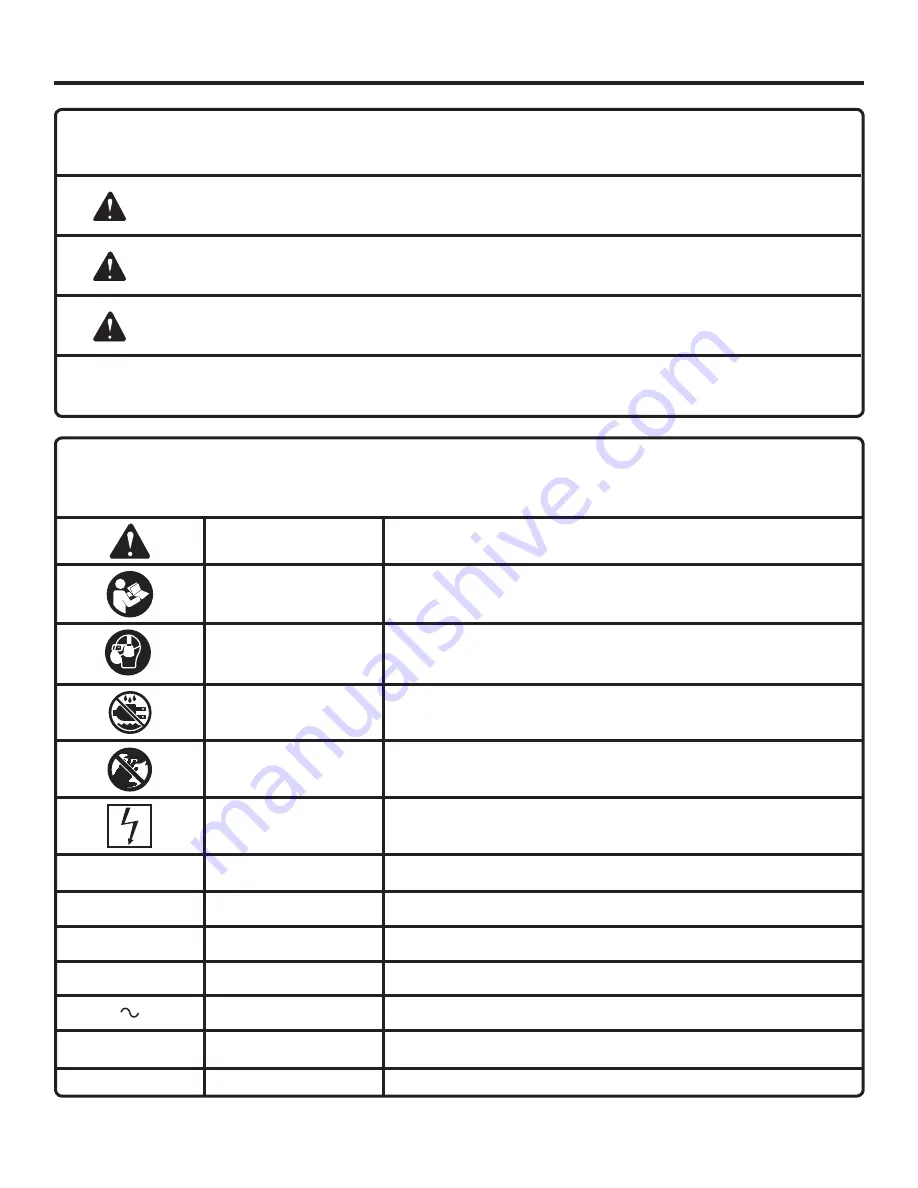
SYMBOLS

The following signal words and meanings are intended to explain the levels of risk associated with this product.

SYMBOL

SIGNAL

MEANING

DANGER:

Indicates an imminently hazardous situation, which, if not avoided, will result 
in death or serious injury.

WARNING:

Indicates a potentially hazardous situation, which, if not avoided, could result 
in death or serious injury.

CAUTION:

Indicates a potentially hazardous situation, which, if not avoided, may result in 
minor or moderate injury. 

NOTICE:

(Without Safety Alert Symbol) Indicates important information not related to an 
injury hazard, such as a situation that may result in property damage.

Some of the following symbols may be used on this product. Please study them and learn their meaning. Proper 
interpretation of these symbols will allow you to operate the product better and safer.

SYMBOL

NAME

DESIGNATION/EXPLANATION

Safety Alert

Indicates a potential personal injury hazard.

Read Operator’s 
Manual

To reduce the risk of injury, user must read and understand operator’s 
manual before using this product.

Eye, Ear, & Breathing 
Protection

Always wear eye protection with side shields marked to comply with 
ANSI Z87.1 along with hearing and breathing protection.

Wet Conditions Alert

Do not expose to rain or use in damp locations.

No Hands

Failure to keep your hands away from the wheel will result in  
serious personal injury.

Electrocution

Failure to properly ground can result in electrocution.

V

Volts

Voltage

A

Amperes

Current

Hz

Hertz

Frequency (cycles per second)

min

Minutes

Time

Alternating Current

Type of current

no

No-Load Speed

Rotational speed, at no load

.../min

Per Minute

Revolutions, strokes, surface speed, orbits etc., per minute

Summary of Contents for R4030

Page 1: ...render el manual del operador antes de usar este producto CONSERVER CE MANUEL POUR FUTURE R F RENCE GUARDE ESTE MANUAL PARA FUTURAS CONSULTAS SAVE THIS MANUAL FOR FUTURE REFERENCE Your saw has been en...

Page 2: ...ge Commande de pi ces et r paration Pedidos de piezas y servicio INTRODUCTION INTRODUCTION INTRODUCCI N This product has many features for making its use more pleasant and enjoyable Safety performance...

Page 3: ...y can get caught and draw you into moving parts Also wear protective hair covering to contain long hair ALWAYS WEAR EYE PROTECTION WITH SIDE SHIELDSWHICHISMARKEDTOCOMPLYWITHANSI Z87 1 WHEN USING THIS...

Page 4: ...3 wire extension cords that have 3 prong grounding plugs and 3 pole receptacles that accept the tool s plug DO NOT MODIFY the plug provided If it will not fit the outlet have the proper outlet install...

Page 5: ...when changing cutting wheels and cleaning d Use tool only with smooth edge cutting wheels free of openings grooves and teeth e Replace damaged cutting wheel before operating f Do not fill water bath...

Page 6: ...ng Proper interpretation of these symbols will allow you to operate the product better and safer SYMBOL NAME DESIGNATION EXPLANATION Safety Alert Indicates a potential personal injury hazard Read Oper...

Page 7: ...ng the same configuration as the plug Do not use an adapter with this product Ground Fault Circuit Interrupter GFCI protection should be provided on the circuit s or outlet s to be used for the tile s...

Page 8: ...water from dripping onto the outlet or plug The operator should arrange a drip loop in the cord connecting the saw to the outlet The drip loop is that part of the cord below the level of the outlet or...

Page 9: ...gonal Capacity tile size 18 in Maximum Depth of Cut 2 1 4 in Rating 120 V 9 Amps 60 Hz No Load Speed 6 500 r min RPM TILE CUTTING WHEEL ON OFF SWITCH MITER GUIDE MAX WATER FILL LINE DRAIN PLUG WATER T...

Page 10: ...ALIGNMENT SYSTEM For more accurate cuts a laser guide is included with the tile saw When used properly the laser guide makes accurate precision cutting simple and easy Simply push the switch to turn...

Page 11: ...or wrench 1 E Wheel wrench 1 F Arbor nut 1 G Outer washer 1 H Cutting wheel 1 I Inner washer 1 J 90 fitting 2 K Water pump 1 L Water tray 1 M Miter guide 1 N Hex nut 5 O Spacer 5 P Socket Head Screw 5...

Page 12: ...damaged or missing please call 1 866 539 1710 for assistance WARNING If any parts are damaged or missing do not operate this tool until the parts are replaced Use of this product with damaged or miss...

Page 13: ...SPACER HEX NUT SOCKET HEAD SCREW UNLOCK LOCK ROLLERS SLIDING TABLE To Install the Sliding Table Grasp the table firmly and set the rollers on the left side of the sliding table on the rails first the...

Page 14: ...turning the lock knob clockwise To adjust angles Loosen the miter knob Rotate to the desired angle by moving the guide left or right Tighten the knob securely before turning on the saw Fig 12 45 MITER...

Page 15: ...hown in Figure 13 with the hose end of the fitting facing the rear of the tray Push back the rubber boot on the electrical cord and plug the pump into the receptacle Pull boot over cord connections to...

Page 16: ...will generate a red line on the work surface This line will assist you in lining up the mark for more accurate cutting of the tile Align the laser line and the mark with the wheel in the cutting posi...

Page 17: ...tended to prevent unauthorized and possible hazardous use by children and others To turn the saw on Lift the switch to turn ON To turn the saw off Press the switch down to turn OFF To lock the saw Wit...

Page 18: ...ke sure the material is clear of the cutting wheel before turning on the saw Turn the on off switch to the ON position Let the cutting wheel build up to full speed and wait for the wheel to get wet be...

Page 19: ...the material TO MAKE AN L CUT See Figure 25 L cuts are cuts that remove a piece of tile to fit in a corner around a cabinet or a piece of molding and are made by two separate cuts NOTE Only overcut o...

Page 20: ...the cuttingwheeltocometoacompletestopbefore removing any part of the material TO MAKE A PLUNGE CUT See Figure 27 Plunge cuts are made by positioning the material directly underneath the cutting wheel...

Page 21: ...checked with a square and made test cuts to be sure adjust ments are necessary Once the screws are loosened these items must be reset Unplug the saw Using a hex key loosen cap bolts on the left rail P...

Page 22: ...DANGER Laser radiation Avoid direct eye contact with light source WARNING Use of controls or adjustments or performance of procedures other than those specified herein can result in hazardous radiati...

Page 23: ...ls will become dirty preventing the table rollers from sliding smoothly It is important to clean the rails often MAINTENANCE CLEANING THE SAW Unplug the saw Using a small brush and or water clean each...

Page 24: ...n either has less than 1 4 in length of carbon remaining Do not replace one side without replacing the other Reassemble using new brush assemblies Make sure curvature of brush matches curvature of mot...

Page 25: ...ite at www ridgid com When requesting warranty service you must present the original dated sales receipt The authorized service center will repair any faulty workmanship and either repair or replace a...

Page 26: ...e sens de rotation de la disque de l accessoire ou de la toupie de pon age NEJAMAISLAISSERL OUTILENFONCTIONNEMENT SANS SURVEILLANCE COUPER L ALIMENTATION LECTRIQUE Ne pas s loigner de l outil avant qu...

Page 27: ...te au sujet de la mise la terre N UTILISER QUE DES ACCESSOIRES LECTRIQUES APPROPRI S Utiliser exclusivement des cordons prolongateurs 3 fils dot d une fiche prise de terre branch s sur une prise triph...

Page 28: ...du nettoyage d Utiliser l outil avec le bord lisse muele de coupe des ouvertures et des rainures e Remplacer endommag muele de coupe avant de op ration f Ne pas remplir le r servoir d eau au del de la...

Page 29: ...et apprendre leur signification Une interpr tation correcte de ces symboles permettra d utiliser l outil plus efficacement et de r duire les risques SYMBOLE NAME DESIGNATION EXPLANATION Symbole d ale...

Page 30: ...l outil sur une borne sous tension Le fil gaine verte avec ou sans traceur jaune est le fil de terre CORDONS PROLONGATEURS Utiliser exclusivement des cordons prolongateurs 3 fils dot d une fiche pris...

Page 31: ...tre chang e ou la protection auxiliaire peut tre obtenue Ces appareils auxiliaires de protection sont disponibles votre d taillant local PLACER DE LA SCIE CARREAUX Voir la figure 2 Afin d viter de mo...

Page 32: ...la taille 457 mm 18 po Profondeur de coupe maximum 57 mm 2 1 4 po Alimentation nominale 120 V 9 A 60 Hz Vitesse vide 6 500 r min RPM INTERRUPTEUR MARCHE ARR T GUIDE D ONGLET L EAU MAXIMUM REMPLIT LA...

Page 33: ...blessures graves SYST ME D ALIGNEMENT LASER R GLABLE Pour des coupes plus pr cises un guide laser est inclus avec la scie Utilis correctement le guide laser permet d effectuer facilement et simplement...

Page 34: ...1 B Table coulissante 1 C B ti d eau 1 D Cl d arbre 1 E Cl de meule 1 F crou d arbre 1 G Rondelle ext rieure 1 H Meule carreaux 1 I Rondelle int rieure 1 J Raccord de 90 2 K Pompe d eau 1 L Plateau d...

Page 35: ...ndommag es appeler le 1 866 539 1710 AVERTISSEMENT Si des pi ces manquent ou sont endommag es ne pas utiliser ce outil avant qu elles aient t remplac es Le fait d utiliser ce produit m me s il contien...

Page 36: ...ILLAGE ROULEAU TABLE COULISSANTE Pour installer de table coulissante Saisirfermementlatableetavoirr gl fermementlescylindres sur le c t gauche de la table coulissante sur les barres alors place premi...

Page 37: ...nglet Tourner l angle d sir en d placant le guide est gauche ou droite Resserrer le bouton assur ment avant d allumer la scie GUIDE D ONGLET BOUTON D ONGLET BOUTON DE VERROUILLAGE FENTE Fig 12 45 ASSE...

Page 38: ...ompe tel qu indiqu la figure 13 en pla ant l extr mit pour tuyau flexible du raccord face l arri re du plateau Fig 14 Faire reculer de la botte de caoutchouc sur la corde lectrique et la pompe de bouc...

Page 39: ...face de travail Le pointill permet de voir la marque trac e sur la pi ce en m me temps que le trait laser ce qui permet d aligner les deux lignes afin d obtenir une coupe plus pr cise Aligner le trait...

Page 40: ...tentes Pour mettre la scie en marche Le relever pour mettre la scie en MARCHE Pour arr ter la scie Abaisser le commutateur en position d ARR T Pour verrouiller la scie Avec la scie teindre retirer la...

Page 41: ...Placer le mat riau sur la table et fermement contre le guide de table coulissante Avant d allumer la scie s assurer que le mat riaux ne touche pas la meule carreaux Mettrelecommutateurmarche arr tenp...

Page 42: ...EFFECTUER UNE COUPE EN L Voir la figure 25 Une coupe en L est une section de la mat riaux q on retire et qu on utilize lorsqu on coupe un morceau de mat riaux afin de l ajuster dans le coin d une arm...

Page 43: ...nt avant de retirer le mat riaux EFFECTUER UNE COUPE EN PLONG E Voir la figure 27 Il est possible d effectuer des coupes en plong e en pla ant le mat riau directement en dessous de la meule et en abai...

Page 44: ...tre certain que les ajustements sont n cessaires Une fois les vis desserr es ces items doivent tre ajust s de nouveau D brancher la scie Utilisation cl hex desserrer le boulon de capuchon le rail gau...

Page 45: ...LASER Voir la figure 31 DANGER Rayonnement laser viter tout contact oculaire direct avec la source du rayon AVERTISSEMENT L usage de contr les de r glages ou de proc dures ne figurant pas dans ce man...

Page 46: ...cilement NETTOYER DE RAILS Pendant l usage la rails deviendra emp cher sale les rouleaus de table du glissement facilement C est important de nettoyer la rails souvent NETTOYER DE LA SCIE D brancher l...

Page 47: ...x balais lorsque la longueur du carbone est de 6 mm 1 4 po ou moins Ne pas remplacer un balai sans remplacer l autre Installer les nouveaux balais S assurer que la courbure des balaiscorrespond celled...

Page 48: ...site Internet RIDGID www ridgid com Le centre de r paration agr corrigera tout d faut de fabrication et r parera ou remplacera notre discr tion gratuitement toute pi ce d fectueuse One World Technolog...

Page 49: ...anto menor es el n mero de calibre mayor es el grueso del cord n V STASE ADECUADAMENTE Evite ponerse ropas holgadas corbatas ni joyas que puedan engancharse y tirar de usted hacia las piezas en movimi...

Page 50: ...de servicio si no ha comprendido completamente las instrucciones de conexi n a tierra o si no est seguro de que la herramienta est bien conectada a tierra USE SOLAMENTE LOS DISPOSITIVOS EL CTRICOS CO...

Page 51: ...iempre desconecte el suministro de corriente antes de realizar su mantenimiento al cambiar las muelas o al limpiar la unidad d Utilicie la herramienta con orilla lisa muela para cortar orificios y mue...

Page 52: ...corte se causar serias lesiones corporales Electrocuci n El incumplimiento de conectar correctamente a tierra puede resultar en electrocuci n V Voltaje Voltaje A Amperes Corriente Hz Hertz Frecuencia...

Page 53: ...ADVERTENCIA Inspeccione los cables de extensi n cada vez antes de usarlos Si est n da ados reempl celos de inmediato Nunca utilice la herramienta con un cable da ado ya que si toca la parte da ada pu...

Page 54: ...cable de extensi n no est en el suelo Si una salida protegida no est disponible no utiliza el sierra hasta que una salida pueda ser cambiada o la protecci n auxiliara puede ser obtenida Estos disposi...

Page 55: ...l corte m xima 57 mm 2 1 4 po Potencia nominal 120 V 9 A 60 Hz Velocidad en vacio 6 500 r min RPM CARACTER STICAS Fig 3 MUELA PARA CORTAR LOSAS INTERRUPTOR DE ENCENDIDO APAGADO GU A DE INGLETES AGUA M...

Page 56: ...ACI N CON L SER AJUSTABLE Para realizar cortes m s precisos se incluye una gu a l ser con su sierra ingleteadora Cuando se usa correctamente la gu a l ser facilita la realizaci n de cortes de precisi...

Page 57: ...zable 1 C Water tray frame 1 D Llave del rbor 1 E Llave de la muela 1 F Tuerca del rbol 1 G Arandela exterior 1 H Muela para cortar 1 I Arandela interior 1 J Conexi n de 90 2 K Bomba de agua 1 L Bande...

Page 58: ...al Si hay piezas da adas o faltantes s rvase llamar al 1 866 539 1710 donde le brindaremos asistencia ADVERTENCIA Si hay piezas da adas o faltantes no utilice esta herramiento sin haber reemplazado to...

Page 59: ...la palanca de fijaci n de la mesa y gira la palanca hacia parte trasera del sierra Para instalar la mesa deslizable Agarre la mesa firmemente y fije los rodillos en el lado izquierdo de la mesa desliz...

Page 60: ...la derecha Ajuste ngulos Afloje la perilla de inglete Gire al ngulo deseado moviendo la gu a izquierdo o el derecho Apriete la perilla firmemente antes el apagado el sierra Fig 12 45 GU A DE INGLETES...

Page 61: ...en el recept culo coloque el protector de agua sobre la conexi n de 90 Coloque la bomba como se muestra en la Figura 13 con el extremo de manguera de la conexi n de Fig 14 Empuje bota de goma en la b...

Page 62: ...e la rueda La bomba se enciende cuando se enciende el motor Deje que la rueda de corte alcance la m xima velocidad y espere que la rueda se humedezca antes de mover la rueda en el material PELIGRO Rad...

Page 63: ...evante de mismo a la posici n de ENCENDIDO Para apagar la sierra Paraapagarla bajedeinterruptoralaposici ndeAPAGADO Para asegurar la sierra Con la sierra apag retire la llave del interruptor ADVERTENC...

Page 64: ...mesa deslizable Aseg rese de que la material est lejos de la muela para cortar losas antes de encender la sierra Coloque el interruptor de encendido apagado en la posici n de ENCENDIDO Deje que la mu...

Page 65: ...CORTES EN L Vea la figura 25 Une corte en L es una secci n que se saca de la material y se una al cortar la material que entrar en un rinc n de un mueble o pieza de moldura y son hechos por dos cortes...

Page 66: ...arte de la material C MO REALIZAR UN CORTE DE PENETRACI N Vea la figura 27 Los cortes de penetraci n se realizan ubicando el material directamente debajo de la rueda de corte y bajando la rueda hasta...

Page 67: ...ra asegurarse de que son necesarios los ajustes Desconecte la sierra Utilizar llave hexagonal afloja el perilla de la tapa en el riel izquierdo Coloqueunaescuadradecarpinterocontralagu adeingletes y p...

Page 68: ...Radiaci n l ser Evite contacto directo de los ojos con la fuente luminosa ADVERTENCIA Todo control ajuste o procedimiento diferente de los especificados aqu puede causar una exposici n peligrosa a la...

Page 69: ...dillos de mesa de deslizar lisamente Es importante limpiar la riel deslizable a menudo utilizando un limpio pa o seco LIMPIEZA EL RIEL Al usarse el riel llegar a ser prevenir sucia los rodillos de mes...

Page 70: ...est limpio Si la bomba no funciona intente las siguientes soluciones Aseg rese de que el cedazo de la entrada no est obstruido Aseg rese de que la manguera de agua no est tapada ni tenga nudos Aseg re...

Page 71: ...a gratuita o dirigi ndose al sitio Web de RIDGID en www ridgid com Al solicitar servicio al amparo de la garant a One World Technologies Inc P O Box 35 Hwy 8 Pickens SC 29671 USA HERRAMIENTAS EL CTRIC...

Page 72: ...ou visite Pour obtenir l adresse du centre de r parations agr le plus proche t l phoner au 1 866 539 1710 ou visiter notre site www ridgid com Le num ro de mod le se trouve sur une plaquette fix e au...

Reviews: