44
ENGLISH
4
MAINTENANCE
4.1
Cleaning
Disconnect from the power supply before carrying out any clean-
ing operation by setting the main switch to "off".
The panelling is to be cleaned with a damp cloth using soap and
water.
If there are stubborn stains, use a cloth with a 50% water and
denatured alcohol mixture, or use speci
fi
c products.
Dry carefully after cleaning.
0
Do not use abrasive products, benzene or trichloroethylene.
4.2
Draining the BAG
Before starting draining operations, set the main switch to "off".
To drain the
BAG
3
:
−
Close the shut-off cocks on the side of the system (if pres-
ent)
−
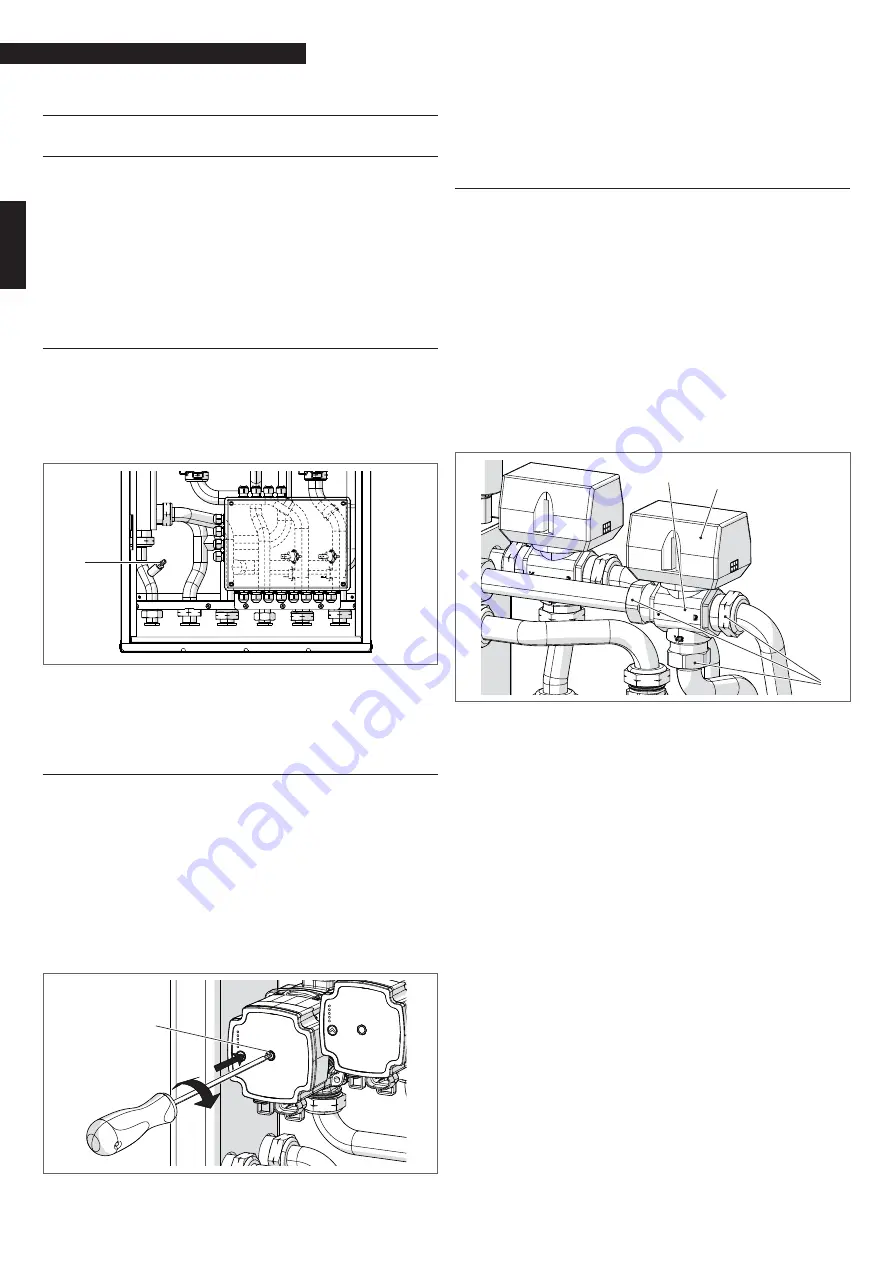
Connect a small pipe to the drain cock (1)
−
1
Using a CH11 wrench, open the cock (1) without unscrew-
ing it completely
−
After having drained the
BAG
3
close the cock (1) again.
4.3
Checking the circulation units
When starting up for the
fi
rst time and at least once a year, it is
advisable to check that the shaft of the circulation units rotate.
This is necessary because, especially after lengthy periods of in-
activity, deposits and/or residue may stop it rotating freely.
Releasing the circulation unit shaft if necessary
To release the shaft, proceed as follows:
−
insert a screwdriver (Phillips no.2) into the hole (1) of the
circulation unit
−
press (a) and turn (b) the screwdriver until the motor
shaft releases
9
1
a
b
Take great care when carrying out this operation so as not to
damage the components.
0
Do not run the circulation unit without water.
4.4
Checking the mixing valves
If the mixing valve is blocked after a long period of inactivity,
manually act on the lever located on the motor to release the
obstruction within the valve itself.
Before starting any replacement operations, set the main switch
to "off".
Replacing the mixing valve motor (1)
To replace the motor:
−
Disconnect the power cable connector from the valve
motor (1)
−
Release the hook located in the lower part of the motor
and turn it in an anticlockwise direction
−
Remove the motor (1)
−
Fit the new motor repeating the operations for its remov-
al but in the reverse order.
1
3
2
Replacing the mixing valve body (2)
To replace the valve body:
−
Remove the motor (1) from the body (2) as described
above
−
Drain the
BAG
3
as described in the section "Draining the
BAG
3
”
−
Unscrew the connectors (3) of the valve body (2) and re-
move it
−
Fit the new valve body repeating the operations for its
removal but in the reverse order
−
Re
fi
t the motor which was removed previously onto the
new valve body which has been installed.


