background image

13 

20146103

GB

Installation

5.1

Notes on safety for the installation

After carefully cleaning all around the area where the burner will
be  installed,  and  arranging  the  correct  lighting  of  the  environ-
ment, proceed with the installation operations.

5.2

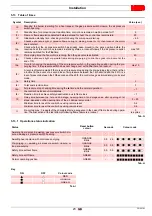
Instructions to avoid burnout or bad combustion of the burner

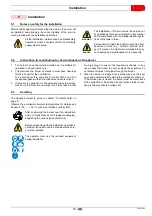
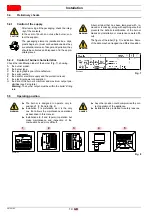
1

The burner can not be installed outside as it is suitable for
operation in closed rooms only.

2

The  premises  the  burner  operates  in  must  have  openings
for the air need for the combustion. 
To be sure about this, you have to control CO2 and CO in

the exhaust gases with all the windows and doors closed.

3

If there are air extractors in the premises the burner works,
make sure that there are openings for air to be taken in that

are  big  enough  to  ensure  the  required  air  change;  In  any
case,  check  that  when  the  burner  stops  the  extractors  do
not draw hot fumes from pipes through the burner.

4

When the burner is stopped, the smoke pipe must be kept
open and a natural draft created in the combustion chamber. 
If the smoke pipe is closed, the burner must be drawn back
till the extraction of blast tube from the furnace. Before oper-
ating in this way take the voltage off.

5.3

Handling 

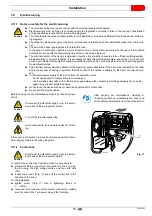
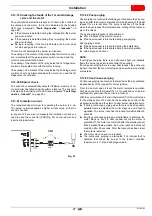
The  transport  weight  is  given  in  chapter  “Technical  data”  on
page 8.
Observe the permissible ambient temperatures for storage and
transport: -20 ..... + 70 °C, with max. relative humidity 80%.

5

Installation

DANGER

All the installation, maintenance and disassembly
operations must be carried out with the electricity
supply disconnected.

WARNING

The installation of the burner must be carried out
by qualified personnel, as indicated in this manual
and in compliance with the standards and regula-
tions of the laws in force.

DANGER

Combustion air inside the boiler must be free from
hazardous  mixes  (e.g.:  chloride,  fluoride,  halo-
gen); if present, it is highly recommended to carry
out cleaning and maintenance more frequently.

After  positioning  the  burner  near  the  installation
point, correctly dispose of all residual packaging,
separating the various types of material.

CAUTION

Before proceeding with the installation operations,
carefully clean all around the area where the burn-
er will be installed.

The  operator  must  use  the  required  equipment
during installation.

Summary of Contents for 40 FS5D

Page 1: ...Installation use and maintenance instructions 20146103 2 09 2018 Forced draught gas burner Two stage operation CODE MODEL TYPE 3758705 RIELLO 40 FS5D 587M GB...

Page 2: ...Translation of the original instructions...

Page 3: ...minary checks 14 5 4 1 Control of the supply 14 5 4 2 Control of burner characteristics 14 5 5 Operating position 14 5 6 Securing the burner to the boiler 15 5 6 1 Hinge installation 15 5 7 Positionin...

Page 4: ...e menu 29 5 14 3 Shut down test 30 5 14 4 Post purging and continuous purging 30 5 14 5 Intermittent operation 30 5 14 6 Setting the opening delay of the 2nd stage 30 5 14 7 Setting a long pre purging...

Page 5: ...and according to the European Directives GAR 2016 426 EU Gas Appliances Regulation MD 2006 42 EC Machine Directive LVD 2014 35 EU Low Voltage Directive EMC 2014 30 EU Electromagnetic Compatibility Suc...

Page 6: ...ed out correctly may cause damage to the ma chine and or injury to people DANGER DANGER LIVE COMPONENTS This symbol indicates operations which if not car ried out correctly lead to electric shocks wit...

Page 7: ...vent of damage to things or injury to people if such damage injury was due to any of the following causes incorrect installation start up use and maintenance of the burner improper incorrect or unreas...

Page 8: ...intenance Only those parts envisaged by the manufacturer can be replaced 3 2 Personnel training The user is the person body or company that has acquired the machine and intends to use it for the speci...

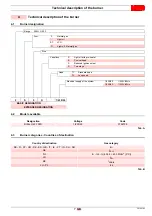
Page 9: ...Fuel Natural gas Light oil LPG Variations Electrical supply of the system 1 230 50 1 230 60 F S 5 1 230 50 BASIC DESIGNATION EXTENDED DESIGNATION 1 230V 50Hz 1 230V 60Hz Light oil Natural gas K Conic...

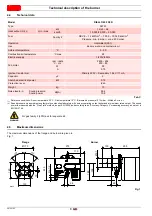
Page 10: ...are given in Fig 1 Model RIELLO 40 FS5D Type 587 M Heat output Hi 1 min max kW kcal h 12 23 58 10 000 20 000 50 000 Fuel Family 2 NCV 8 12 kWh m3 7 000 10 340 kcal m3 Pressure min 8 mbar max 200 mbar...

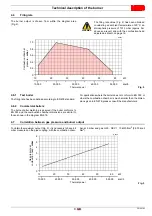
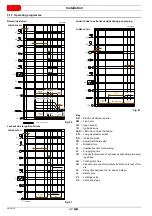
Page 11: ...the manufacturers 4 7 Correlation between gas pressure and burner output To obtain the maximum output Fig 3 it is necessary to have 4 6 mbar measured on the pipe coupling with the combustion cham ber...

Page 12: ...Electrode probe 16 Air damper opening motor 17 4 pole socket for 2nd stage 4 9 Burner equipment Screws with nuts No 4 Insulating gasket No 1 Cover fixing screw No 3 Cable grommet No 1 Hinge No 1 7 pi...

Page 13: ...the control box from the burner it is necessary to Fig 5 disconnect all the connectors connected to it all the plugs the high voltage cables and the earth wire TB unscrew the screw A and pull the cont...

Page 14: ...anner and correctly fix the cover Check the wiring is in order Falls and collisions can negatively affect the safety func tions In this case the servomotor must not be operated even if it displays no...

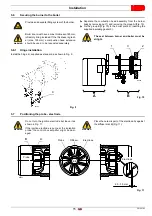
Page 15: ...r If the smoke pipe is closed the burner must be drawn back till the extraction of blast tube from the furnace Before oper ating in this way take the voltage off 5 3 Handling The transport weight is g...

Page 16: ...must not be abandoned as they are potential sources of danger and pollution they should be collected and disposed of in the appro priate places WARNING A burner label that has been tampered with re m...

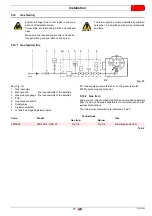
Page 17: ...ner WARNING Boiler door must have a max thickness of 80 mm refractory lining included If the thickness is great er max 105 mm a combustion head extension should be used to be requested separately S739...

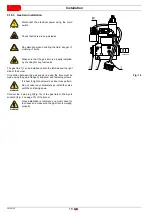
Page 18: ...st proceed as follows Take the burner to the 2nd stage The mobile air damper 1 Fig 14 activated by the motor 2 ensures the suction inlet opens completely Adjust 2nd stage air delivery using the fixed...

Page 19: ...EN 676 and provided separately from the burner Supplied separately for its adjustment see the enclosed instructions The train burner combination is indicated in Tab F Tab F Explosion danger due to fue...

Page 20: ...ig 4 on page 10 of the burner DANGER Disconnect the electrical power using the main switch Check that there are no gas leaks Pay attention when handling the train danger of crushing of limbs Make sure...

Page 21: ...on a cycle arrest must be ensured within 24 hours with the use of a time switch positioned in series with the thermostatic line Refer to the wiring diagrams The electrical safety of the device is obta...

Page 22: ...electrical supply of the burner corresponds to that shown on the identifica tion label and in this manual The section of the conductors must be at least 1mm2 Unless requested otherwise by local standa...

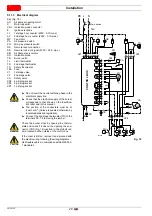
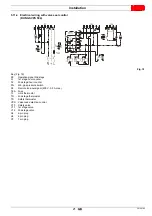
Page 23: ...1st stage hour counter h2 2nd stage hour counter PG Min gas pressure switch S3 Remote lock out signal 230V 0 5A max T6A Fuse TL Limit thermostat TR 2nd stage thermostat TS Safety thermostat VPS Valve...

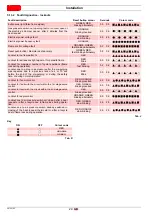
Page 24: ...5 Delay time between the 1st and 2nd stage ts Safety time V1 1st stage valve V2 Valve 2nd stage t2 t1 t3 t4i ts HT FM ID V1 LED P M LED t4l PG P TR P M AD t5 V2 SO SO POWER SUPPLY Signal not requested...

Page 25: ...5 t3r A recycle attempt is made if there is an air pressure drop during the pre purging stage there is then a lockout in the event of a second loss of air pressure between the 16th second and the 29th...

Page 26: ...s flame loss during operation RED fast blinking 0 2 0 2 Lockout due to a drop in air pressure after the pre purging was repeated due to a previous lack of air or 10 sec before the end of the pre purgi...

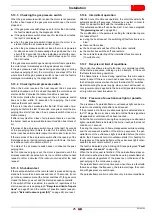
Page 27: ...the flame goes out and the start up sequence restarts If the switch off test is enabled the number of repetitions of the start up sequence see paragraph Recycle and limit of repeti tions on page 25 an...

Page 28: ...paragraph Fault diagnostics lockouts on page 24 The burner restarts when the voltage is exceeds approx 170V or is brought back under 270V If the fault is detected with flame operation the valve is im...

Page 29: ...t for a pre set time The burner switches off the flame when the heat request thermostat opens cutting off the fuel sup ply to the valves The post purging function is not performed after a lockout of t...

Page 30: ...with the operating hours also the number of the burner s first stage valve openings is saved In the menu see paragraph Programming menu on page 29 it is possible to independently reset both the opera...

Page 31: ...the menu Switching off test 5s t 10s 2 blinks RED none none Automatic at the end of the blink Post purging Continuous purging 10s t 15s 1 GREEN blink 1 1 minute 2 2 minutes 3 3 minutes 4 4 minutes 5 5...

Page 32: ...e button GREEN led OFF Press the button 1 time to enable a shut down every hour Press the button 2 times to enable a shut down every 24 hours GREEN led ON and OFF every time press and release After 10...

Page 33: ...setting the programming menu parameters and the lockout log The control box allows you to reset the log and the number of lockouts the operating hours the number of ignitions and recov er the menu s d...

Page 34: ...st or af ter a recycle due to flame loss during operation After 15 seconds the air pressure is too low the head has been poorly adjusted The air pressure switch is defective change it Lockout for loss...

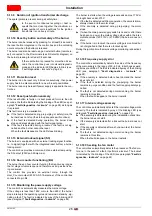
Page 35: ...the knob anticlockwise to an extent that is around 20 of the adjusted value and then check that the burner starts up properly If the burner locks out again turn the knob slightly in an anticlock wise...

Page 36: ...ls or close open position indicator that turn on at the same time as their power supply 7 2 3 Checking and cleaning Combustion Check there are no occlusions or obstructions in the fuel supply or retur...

Page 37: ...P The specified life cycles do not refer to the warranty terms indicated in the delivery or payment conditions Tab P 7 3 Opening the burner If maintenance of the combustion head is required refer to t...

Page 38: ...Adjust them The connections in the control box are wrongly inserted Check and connect completely all the plugs The air pressure switch is changed over to the operational position Replace the pressure...

Page 39: ...mmedi ately and the motor stops The pressure then starts to increase again the pressure switch closes the start up cycle be gins again and so on Lower and set the pressure switch Faults Possible Cause...

Page 40: ...g kit Gas trains in compliance with EN 676 Please refer to manual A Appendix Accessories Burner Standard length mm Long head length mm Code RIELLO 40 FS5D 100 125 3000820 Burner Projection mm Code RIE...

Page 41: ......

Page 42: ......

Page 43: ......

Page 44: ...Subject to modifications RIELLO S p A I 37045 Legnago VR Tel 39 0442 630111 http www riello it http www riello com...

Reviews: