2694
6
GB
4.
WORKING
4.1
COMBUSTION ADJUSTMENT
In conformity with Efficiency Directive 92/42/EEC the application of the burner on the boiler, adjustment and
testing must be carried out observing the instruction manual of the boiler, including verification of the CO and
CO
2
concentration in the flue gases, their temperatures and the average temperature of the water in the boiler.
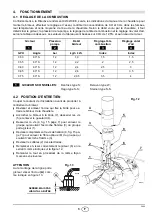
To suit the required appliance output, choose the proper nozzle and adjust the pump pressure, the setting
of the combustion head, and the air damper opening in accordance with the following schedule.
Values in the table refer to 12.5% CO
2
and to sea level.
RECOMMENDED NOZZLES:
Danfoss type S;
Delavan type W;
Hago type S-S;
Steinen type S-S.
4.2
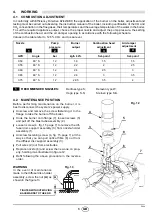
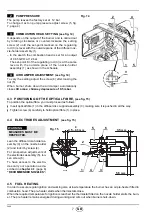
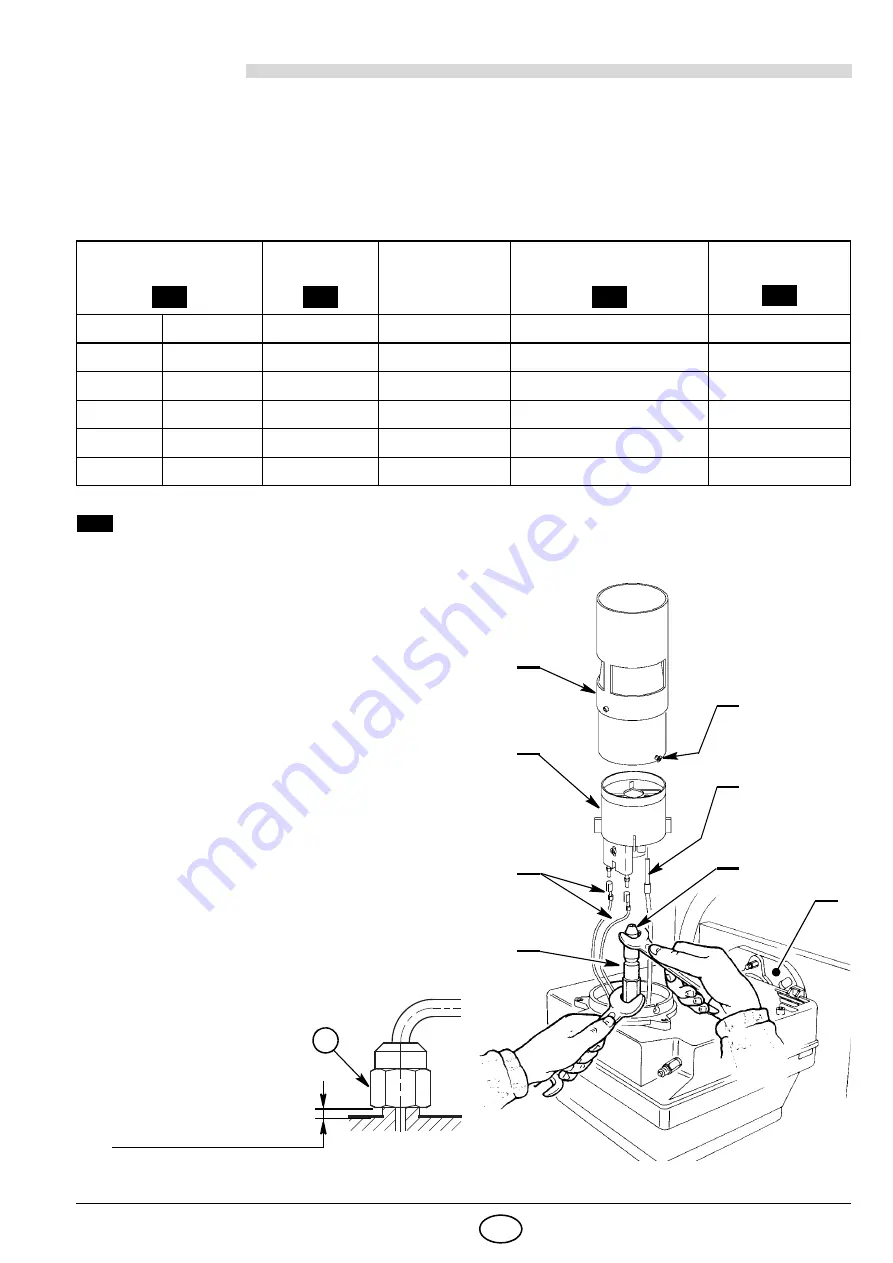
MAINTENANCE POSITION
Before performing maintenance on the burner, it is
best to disconnect the system’s power supply.
Unscrew and remove the screw fastening it to the
flange to take the burner off the boiler.
Hook the burner onto flange (7), loosen screws (5)
and pull off the blast tube assembly (4).
Loosen screw (4, fig. 15 page 7) to remove the dif-
fuser disc support assembly (3) from nozzle-holder
assembly (1).
Unscrew fastening screw (4, fig. 15 page 7) all the
way so that you can pull optical fibre (8) out from
the diffuser disc support assembly (3).
Pull wires (2) out from electrodes.
Replace nozzle (6) and screw the new one on prop-
erly, holding it as illustrated in figure 12.
Refit following the above procedure in the reverse
order.
Nozzle
Pump
pressure
Burner
output
Combustion head
adjustment
Air damper
adjustment
GPH
Angle
bar
kg/h ± 4%
Set-point
Set-point
0.50
80° S
12
1.9
1.5
1.5
0.55
60° S
12
2.2
2
2.5
0.60
60° S
12
2.4
2.5
3
0.65
60° S
12
2.6
3
3.5
0.75
60° S
12
2.95
3.5
4
1
2
3
4
1
4
3
2
5
6
7
S7706
1
Fig. 12
8
A
D5684
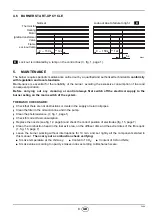
WARNING
In the event of maintenance
made to the diffuser disc-holder
assembly, screw the nut
(A)
as
shown in the figure 13.
Fig. 13
TIGHTEN WITHOUT MOVING
BACKWARDS TO THE END


