background image

2901898

17 

GB

Long combustion head kit

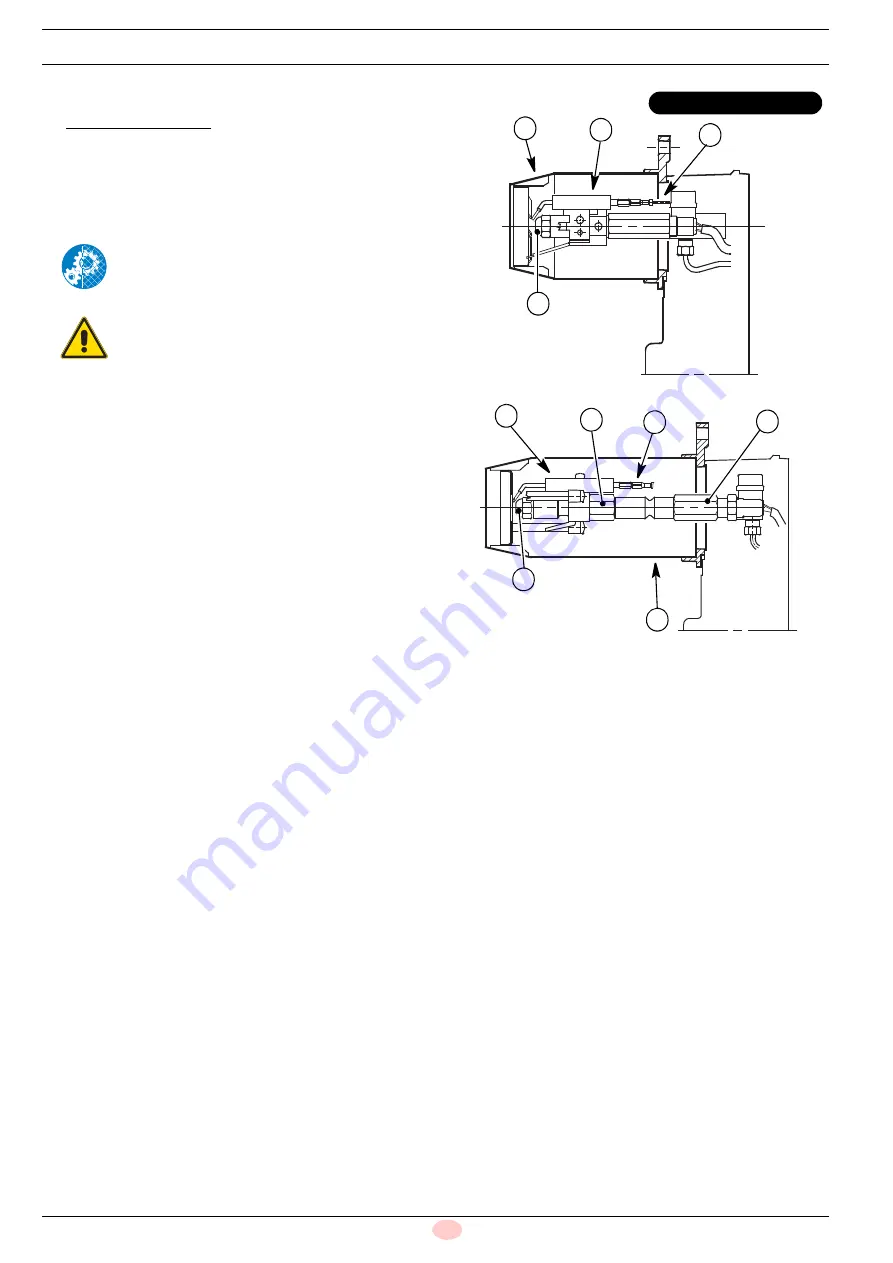
Assemble the diffuser disc-electrodes unit 2) on the exten-
sion 5).

Only for code 3000963

, fix the diffuser disc-electrodes unit

2) on the extension 5) and use the M4 x 12 screws inside the
kit (Fig. 4).

For positioning, see the burner instruction booklet.

Connect the new high voltage cables 4).  

Assemble the new blast tube 6) fixing it using the 2 screws
(Fig. 5). 

After carrying out maintenance, cleaning or
checking operations, reassemble the hood and all
the safety and protection devices of the burner.

WARNING

Check the correct working of the adjustment, com-
mand and safety devices.

 Fig. 4

D6155

8

1

2

3

362T1 - 364T1

 Fig. 5

D6156

8

6

2

5

4

7

Summary of Contents for GULLIVER RG1

Page 1: ...dleiding voor installatie gebruik en onderhoud Instrucciones de instalaci n montaje y funcionamiento Kit testa di combustione lunga Kit f r Flammkopfverl ngerung Kit t te de combustion longue Long com...

Page 2: ......

Page 3: ...a tutte le indicazioni di pericolo e cautela segnalate sulla macchina Il personale non deve eseguire di propria iniziativa operazioni o interventi che non siano di sua competenza Il personale ha l ob...

Page 4: ...llo 8 Fig 2 Sul portaspruzzo 7 avvitare la prolunga 5 e su questa l ugello 8 Fig 3 2 Kit testa di combustione lunga Descrizione Quantit Prolunga 1 Boccaglio 1 Cavi alta tensione 2 Vite M4 x 12 solo pe...

Page 5: ...fare riferimento all istruzione del bru ciatore Collegare i nuovi cavi di alta tensione 4 Montare il nuovo boccaglio 6 fissandolo mediante le 2 viti Fig 5 Effettuate tutte le operazioni di manutenzion...

Page 6: ...sich am Ger t befinden Das Personal darf nicht aus eigenem Antrieb Arbeiten oder Eingriffe ausf hren f r die es nicht zust ndig ist Das Personal hat die Pflicht dem jeweiligen Vorgesetzten alle Probl...

Page 7: ...d die D se 8 Abb 2 aus Schrauben Sie am D senstock 7 die Verl ngerung 5 und darauf die D se 8 Abb 3 ein 2 Kit Flammkopfverl ngerung Beschreibung St ckzahl Verl ngerung 1 Brennerrohr 1 Hochspannungskab...

Page 8: ...wird auf die Gebrauchsanweisung f r den Brenner verwiesen Schlie en Sie die neuen Hochspannungskabel 4 an Montieren Sie mithilfe der beiden Schrauben das neue Bren nerrohr 6 Abb 5 Nach Durchf hrung vo...

Page 9: ...ecter toutes les indications de danger et pr caution pr sentes sur l appareil Le personnel ne doit pas r aliser de sa propre initiative d op rations ou interventions n tant pas de sa comp tence Le per...

Page 10: ...e gicleur 8 Fig 2 Sur le porte gicleur 7 visser la rallonge 5 et sur celle ci le gicleur 8 Fig 3 2 Kit t te de combustion longue Description Quantit Rallonge 1 Buse 1 C bles haute tension 2 Vis M4 x 1...

Page 11: ...ionnement se r f rer aux instructions du br leur Brancher les nouveaux c bles haute tension 4 Monter le nouvel embout 6 en le fixant l aide des deux vis Fig 5 Apr s avoir effectu toutes les op rations...

Page 12: ...manual Personnel must observe all the danger and caution indica tions shown on the machine Personnel must not carry out on their own initiative opera tions or interventions that are not within their p...

Page 13: ...oltage cables 3 and the nozzle 8 Fig 2 On the nozzle holder 7 screw in the extension 5 and on this the nozzle 8 Fig 3 2 Long combustion head kit Description Quantity Extension 1 Blast tube 1 High volt...

Page 14: ...4 For positioning see the burner instruction booklet Connect the new high voltage cables 4 Assemble the new blast tube 6 fixing it using the 2 screws Fig 5 After carrying out maintenance cleaning or c...

Page 15: ...gevaar en voor zichtigheid die op de machine staan in acht nemen Het personeel mag niet uit eigen beweging werkzaamheden of ingrepen uitvoeren die niet tot zijn taak behoren Het personeel is verplich...

Page 16: ...tuiver 8 van de stan daard brander 8 Fig 2 Draai het verlengstuk 5 vast op de verstuiverhouder 7 en daarop deze verstuiver 8 Fig 3 2 Kit lange verbrandingskop Beschrijving Aantal Verlengstuk 1 Monding...

Page 17: ...t verwezen naar de handleiding van de brander Koppel de nieuwe hoogspanningskabels 4 vast Monteer de nieuwe monding 6 en bevestig deze met de 2 schroeven Fig 5 Hermonteer de kap en alle veiligheids en...

Page 18: ...ndicaciones de pe ligro y de precauci n se alizadas en la m quina El personal no deber emplear su propia iniciativa en opera ciones o intervenciones que no sean de su competencia El personal tiene la...

Page 19: ...a tensi n 3 y la boquilla 8 Fig 2 En el porta rociador 7 enroscar la prolongaci n 5 y en esta la boquilla 8 Fig 3 2 Kit cabezal de combusti n largo Descripci n Cantidad Prolongaci n 1 Tubo llama 1 Cab...

Page 20: ...cionamiento consultar las instrucciones del que mador Conectar los nuevos cables de alta tensi n 4 Montar el nuevo tubo llama 6 fij ndolo mediante los 2 torni llos Fig 5 Una vez efectuadas todas las o...

Page 21: ......

Page 22: ......

Page 23: ......

Page 24: ...Con riserva di modifiche nderungen vorbehalten Sous r serve de modifications Subject to modifications Onder voorbehoud van wijzigingen Con la posibilidad de modificaci n...

Reviews: