20096088
40
GB
Maintenance
6.4
Opening the burner
To open the burner proceed as follows:
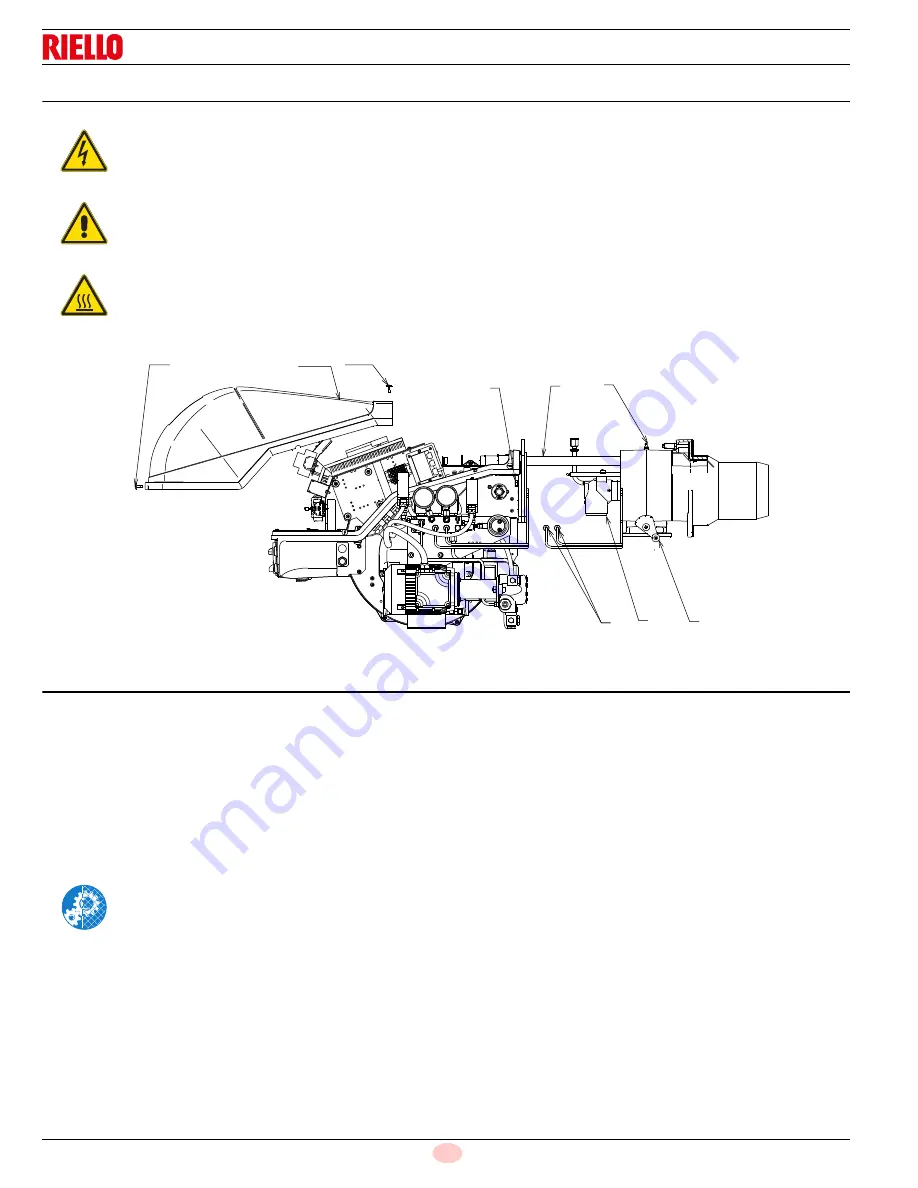
loosen screws 1)(Fig. 54, page 40) and withdraw the cover 2);
disengage the swivel coupling 7) from the graduated sector;
disconnect the light-oil pipes 8);
remove screws 3) and pull the burner back by about 4” on the
slide bars. disconnect the electrode leads.
Install the extension bars 31)(Fig. 5, page 10) and re-screw
the 2 screws and the safety plate Fig. 11, page 18.
Pull the burner fully back.
Now extract the internal part 5) after having removed the screw 6).
6.5
Closing the burner
To close the burner proceed as follows:
push the burner until it is about 4” from the sleeve;
re-connect the leads.
Remove the extension bars 31)(Fig. 5, page 10).
Slide in the burner until it comes to a stop;
refit screws 3)(Fig. 54, page 40) and pull the leads gently out
until they are slightly stretched;
re-couple the swivel coupling 7) to the graduated sector;
reconnect the light-oil pipes.
Re-screw the 2 screws and the safety plate Fig. 11, page 18.
DANGER
Disconnect the electrical supply from the burner by
means of the main system switch.
DANGER
Turn off the fuel interception tap.
Wait for the components in contact with heat sourc-
es to cool down completely.
8
1
2
1
7
5
8
6
4
3
Fig. 54
20098390
After carrying out maintenance, cleaning or check-
ing operations, reassemble the hood and all the
safety and protection devices of the burner.


