20140257
18
GB
Installation
4.4
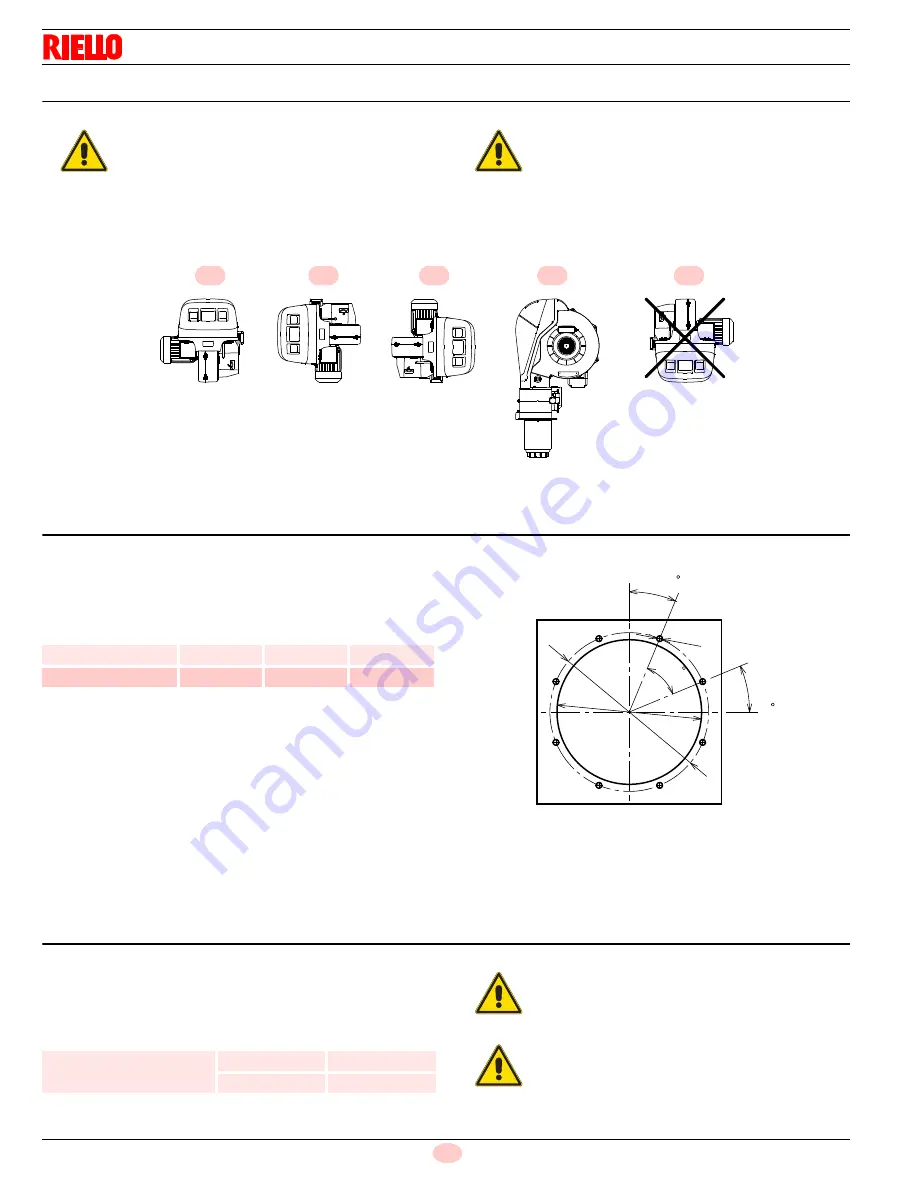
Operating position
4.5
Boiler plate
Make holes in the plate shutting off the combustion chamber, as il-
lustrated in Fig. 11.
The position of the threaded holes can be marked using the ther-
mal insulation screen supplied with the burner.
Tab. I
4.6
Head length
The length of the head must be selected according to the indica-
tions provided by the manufacturer of the boiler, and in any case it
must be greater than the thickness of the boiler door complete with
its fettling.
The range of lengths available, L (mm), is as follows:
Tab. J
WARNING
The burner is designed to operate only in posi-
tions
1
,
2
,
3
and
4
Installation
1
is preferable, as it is the only one
that allows the maintenance operations as
described in this manual.
Installations
2
,
3
and
4
permit operation but
make maintenance and inspection of the com-
bustion head more difficult.
DANGER
Any other position could compromise the cor-
rect operation of the appliance.
Installation
5
is prohibited for safety reasons.
2
3
4
5
1
Fig. 10
D7739
Inch
A
B
C
RX 2500 S/E
20
1
/
2”
22
1
/
16”
23
/
32”
RX 3000 S/E
20
1
/
2”
22
1
/
16”
23
/
32”
A
B
C
22.5
45
2 2 .5
Fig. 11
20122771
Non flame zone
RX 2500 S/E
RX 3000 S/E
13
5
/
8”
13
5
/
8”
WARNING
The burners cannot be used on flame inversion boil-
ers.
WARNING
Do not insert the protection in line with the electrode
unit, as this would compromise its good operation.
Summary of Contents for RX 2500 S/E
Page 2: ...Original instructions ...


