background image

13

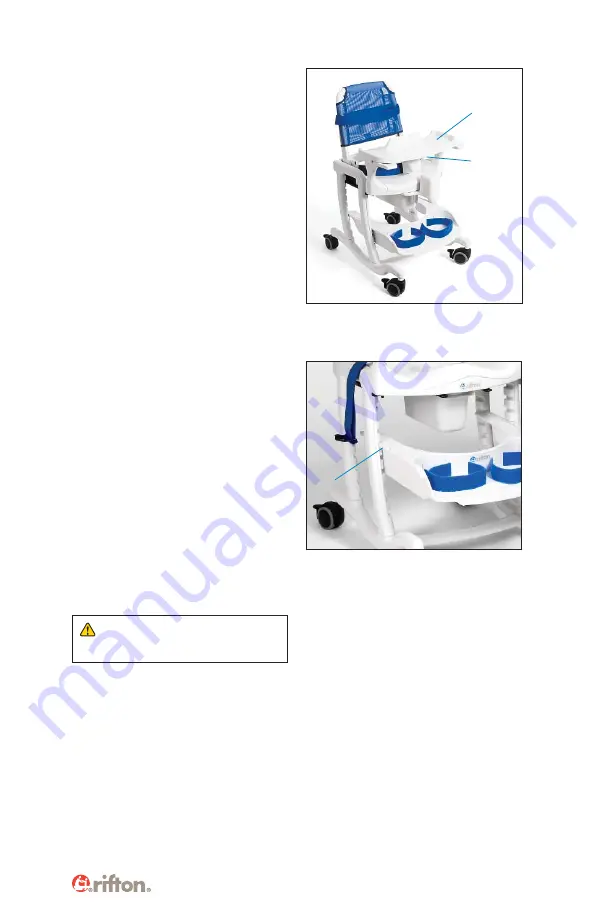
Anterior support

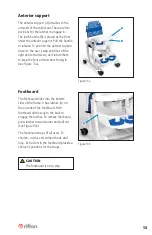
The anterior support (A) attaches to the 
armrests of the toilet seat. There are four 
positions for the latches to engage in. 
The latch handle (B) is placed at the front 
under the anterior support. Pull the handle 
to release. To position the anterior support 
closer to the user, swap positions of the 
right and left armrests, and rotate them 
to keep the four armrest slots facing in 
(see Figure 13a).

CAUTION

The footboard is not a step.

Footboard

The footboard slides into the bottom 
slots of the frame. It has latches (A) on 
the outside of the footboard. Push 
footboard all the way to the back to 
engage the latches. To remove footboard, 
press latches toward center and pull out 
(see Figure 13b). 

The footboard straps fi t all users. To 
shorten, cut the end without hook and 
loop. Extra slots in the footboard provide a 
choice of positions for the straps.

A

A

B

B

A

A

Figure 13b

Figure 13a

Summary of Contents for Blue Wave E806

Page 1: ...Blue Wave Toileting System E806 E808 Product Manual E806 E808...

Page 2: ...our order 6 User and item dimensions 7 Basic item Seat 8 Armrests 9 Hip strap and hip strap clips 9 Frame 10 Casters 10 Mounting bar 10 Accessories Backs 11 Anterior support 13 Footboard 13 Abductor a...

Page 3: ...duct manual apply to you Technical Users For professionals who order and set up Rifton products Home Users For caregivers who use Rifton products on a regular basis Maintenance Personnel For anyone wh...

Page 4: ...t use this product on rough and uneven terrain around swimming pools or near stairways All mobility equipment may become unstable when used improperly Straps and supports are provided for the safety o...

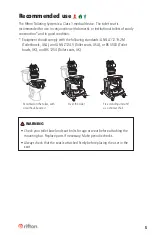
Page 5: ...ndards ANSI A112 19 2M Toilet bowls USA and ANSI Z124 5 Toilet seats USA or BS 5503 Toilet bowls UK and BS 1254 Toilet seats UK WARNING Check your toilet bowl and seat bolts for age or wear before att...

Page 6: ...quire some tool free assembly Follow these instructions to insure that your item is put together and used correctly This product manual is comprehensive and may discuss features not included in your i...

Page 7: ...user s weight does not exceed the maximum weight recommended Item dimensions inches cm small large Frame width 20 52 20 52 Seat height above floor 10 20 25 51 15 20 39 51 Seat width 12 30 front 16 41...

Page 8: ...ing The deflector for the large seat is separate from the seat cover and is inserted into the front of the seat cover It should be removed prior to the user being moved off the toilet see Figure 8b Sm...

Page 9: ...ips under the seat To get more support at the elbows swap and rotate positions of the right and left armrests Keep the four armrest slots A facing in 1 Front 2 Rear Figure 9c Hip strap and hip strap c...

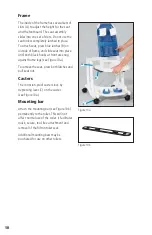
Page 10: ...oks at front are snug against frame legs see Figure 10a To remove the seat press both latches and pull seat out Casters The corrosion proof casters lock by depressing lever C on the caster see Figure...

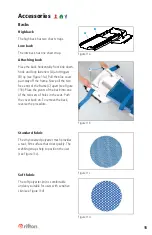
Page 11: ...the frame C apart see Figure 11b Place the pivots of the back into one of the two sets of holes in the seat Push the cover back on To remove the back reverse the procedure Standard fabric The vinyl co...

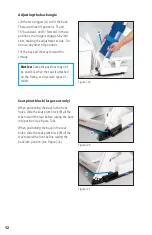
Page 12: ...t pivot block large seat only When positioning the back in the front holes slide the seat pivot block B all the way toward the rear before raising the back into position see Figure 12b When positionin...

Page 13: ...tate them to keep the four armrest slots facing in see Figure 13a CAUTION The footboard is not a step Footboard The footboard slides into the bottom slots of the frame It has latches A on the outside...

Page 14: ...t see Figure 14a Push it in until it engages To release push the triggers C inwards see Figure 14b The pan slides into the same channels from either the front or back When using the abductor slide the...

Page 15: ...tion for the large seat with armrests is the fourth slot from the top The plastic materials used in the Blue Wave toileting system and its compact size make it ideal for use as a shower chair Over the...

Page 16: ...d lid with the bolts going through the holes in the mounting bar the washers and the holes in the toilet Replace the nuts B and tighten firmly see Figure 16a Adjust the Rifton toilet seat back to the...

Page 17: ...ue Wave toileting system Frame Small anterior support Large anterior support Small high back Footboard with straps Abductor Pan Small seat Hip strap Small deflector Mounting bar Armrest Large seat Lar...

Page 18: ...ent parts Order information for replacement parts is provided on the back of this product manual Inspect the toilet seat bolts and nuts when using the mounting bar see pages 4 and 5 for warnings Clean...

Page 19: ...minate Formica Plastic components are typically injection molded from a variety of industrial resins All materials are latex lead and phthalates free User modifications CAUTION Rifton Equipment cannot...

Page 20: ...you call 800 571 8198 for your customer service representative Use only replacement parts supplied by Rifton Equipment We are glad to supply replacement parts Although Rifton makes every effort to su...

Reviews: