background image

21

CHANGING THE BLADE SPEED

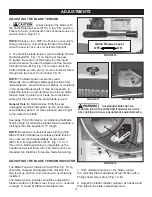
This Bandsaw has two blade speeds, high speed


(2950 ft/min) and low speed (1445 ft/min). 

NOTE: 

The 

bandsaw is shipped in the high speed mode.

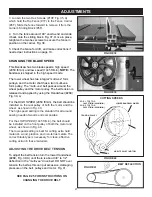
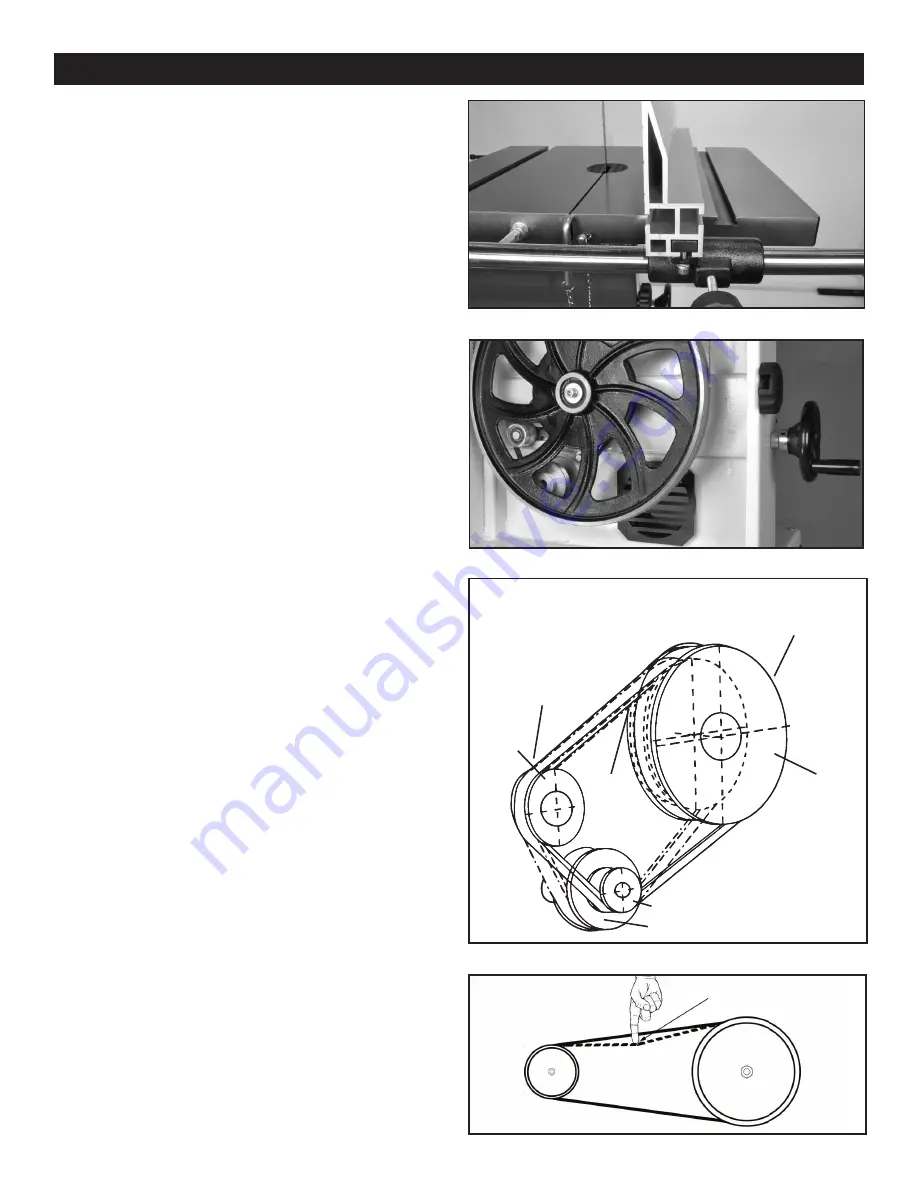
The lower wheel has two integral “multi-vee” form 

pulleys, and the motor shaft has a twin multi-vee 

form pulley. The “multi-vee” belt passes around the 

wheel pulley and the motor pulley. The belt tension is 

released and applied by using the Handwheel (#26E)

Fig. 39, A.

For the 

HIGH SPEED 

(2950 ft/min), the belt should be 

installed on the rear pulley of both the motor and the 

wheel, as shown in Fig. 40. 

The high speed setting is the standard for all around 

sawing needs of woods and composites.

For the 

LOW SPEED

 (1445 ft/min), the belt should


be installed on the front pulley of both the motor and 

wheel, as shown in Fig. 40. 

The low speed setting is best for cutting extra hard 

material - wood, plastics, and non-ferrus metals. The 

correct blade type is necessary for clean, effective 

cutting action in these materials.

CUTTING SPEEDS

TENSION PULLEY

V-BELT PULLEY (MOTOR)

LOWER BANDSAW WHEEL


1

5

4

2

3

POS. 1 TO 3 TO 5:

     1,445 FT/MIN (440 M/MIN)

POS. 2 TO 3 TO 4:

     2,950 FT/MIN (899 M/MIN)

FIGURE 40

FIGURE 39

A

ADJUSTMENTS

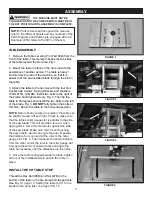
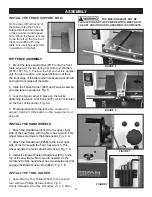
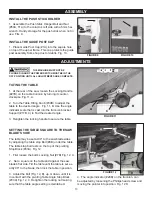
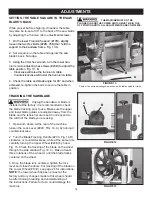
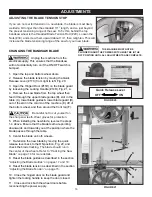
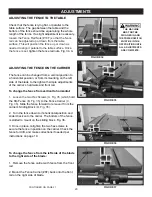
3  Loosen the two Hex Screws (#10F, Fig. 35, A) 

which hold the Rip Fence (#1F) to the Fence Carrier 

(#6F). Slide the fence forward to remove it from the 

carrier’s Sliding Block (#5F).

4.  Turn the fence around 180° end-to-end and slide 

it back onto the sliding block. Fig. 37. Once in place, 

retighten the two hex screws to secure the fence in 

position on the carrier. Fig. 38.

5. Check the fence for drift, and make corrections if 

needed per instructions on page 19. 

FIGURE 38

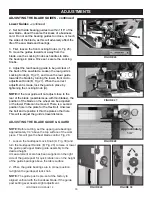
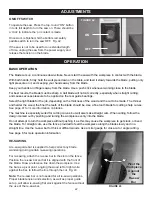
BELT DEFLECTION

ADJUSTING THE DRIVE BELT TENSION

To adjust the belt tension turn the lower Handwheel 

(#26E, Fig. 39, A) until there is about 3/8” to 1/2” 

deflection in the “multi-vee” drive belt. DO NOT over 

tension the belt as this can put excessive, damaging 

pressure on the belt, pulleys and motor. Fig. 41.

FIGURE 41

SEE PAGE 25 FOR INSTRUCTIONS ON

CHANGING THE DRIVE BELT.

Summary of Contents for 10-324TG

Page 1: ...your manual for future reference The serial number can be found on the specification label on the rear of your machine Serial Number _________________________ Date of purchase ________________________...

Page 2: ...ation 22 Maintenance 23 Electricals Wiring Diagram 5 23 Troubleshooting 24 27 Parts Diagrams Parts Lists 28 41 Warranty 41 Accessories 42 How To Guide for all Band Saw Blades 43 Motor 1 5 HP TEFC Moto...

Page 3: ...trical receptacle The 3rd prong is used to ground the tool and provide protection against accidental electric shock DO NOT remove the 3rd prong See Grounding Instructions on the following pages 4 AVOI...

Page 4: ...er cord An undersized cord will cause a drop in line voltage resulting in a loss of power and overheating USE ONLY A 3 WIRE EXTENSION CORD THAT HAS A 3 PRONG GROUNDING PLUG AND A 3 POLE RECEPTACLE THA...

Page 5: ...nel if you do not completely understand the grounding instructions or if you are not sure the tool is properly grounded when installing or replacing a plug USE ONLY A 3 WIRE EXTENSION CORD THAT HAS TH...

Page 6: ...ming jammed in the table insert or lower blade guides 13 Always allow the bandsaw blade to stop before removing scrap pieces from the table 14 Do not remove jammed pieces from the saw until the machin...

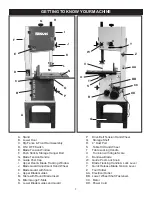
Page 7: ...Blade Guides M Table with Round Blade Insert N Miter Gauge T Slots O Lower Blade Guides and Guard P Drive Belt Tension Hand Wheel Q Storage Shelf R 4 Dust Port S Table Tilt Hand Wheel T Table Locking...

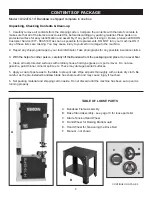
Page 8: ...r any possible insurance claims 3 With the help of another person carefully lift the Bandsaw from the packaging and place it on a level floor 4 Clean all rust protected surfaces with ordinary house ho...

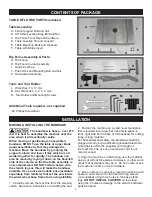
Page 9: ...ide of the column so that the table assembly is not compromised DO NOT install casters onto the stand s legs as this will make the bandsaw unstable Use a universal mobile base available separately fro...

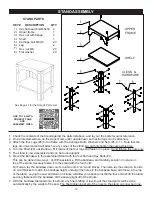
Page 10: ...e on top of the stand Securely fasten it to the stand with the four bolts B If alone lay the bandsaw down on its column onto 4 x4 wood blocks Then also lay the stand on its side on wood blocks to matc...

Page 11: ...aw blade This will provide a true cut when ripping stock Set a thin metal ruler against the side of the saw blade Make sure that it is not touching the saw s teeth which can angle the ruler Measure th...

Page 12: ...RE 6 INSTALL THE HAND WHEELS 1 Attach the Handwheel 31D to the upper right side of the saw frame with the 5mm hex wrench This wheel raises and lowers the blade guard Fig 7 A 3 Attach the Handwheel 26E...

Page 13: ...r scale that is cast into the trunnion bracket Support 17B C to find the desired angle 3 Retighten the locking handle to secure the table FIGURE 11 B A FIGURE 10 C SETTING THE TABLE SQUARE TO THE SAW...

Page 14: ...e factory and any changes made to this wheel should be after thorough reading and understanding of the instructions Failure to do so could damage the machine FIGURE 14 FIGURE 15 ADJUSTMENTS FIGURE 13...

Page 15: ...d up the saw blade should deflect about 1 4 when pressed with a finger to the side of the blade See page 16 for information on Adjusting the Blade Tension Stop for tensioning blades that are welded a...

Page 16: ...moving the quick release lever back to the ON position Fig 20 and check the blade tracking The blade should run in the center of the wheels Refer to Tracking the Saw Blade on page 14 for more details...

Page 17: ...the saw blade about the same thickness of a business card Fig 22 Do not set the bearing guides too close or touching the sides of the blade as this will adversely affect the life of the blade and bea...

Page 18: ...he blade on the wheel can be adjusted or the lower Plate can be moved There is a second position hole in the plate for the Hex Bolt Unscrew the bolt and reposition it thru the plate s other hole This...

Page 19: ...e This will allow the guide post to be shifted angled a bit left or right to correct any positioning issues 5 There are also four Set Screws Fig 31 set in the rear of the guide bracket near the corner...

Page 20: ...are and front rail To change the fence from vertical to horizontal 1 Loosen the two Hex Screws A Fig 35 which hold the Rip Fence B Fig 35 to the Fence Carrier C Fig 35 Slide the fence forward to remov...

Page 21: ...lade type is necessary for clean effective cutting action in these materials CUTTING SPEEDS TENSION PULLEY V BELT PULLEY MOTOR LOWER BANDSAW WHEEL 1 5 4 2 3 POS 1 TO 3 TO 5 1 445 FT MIN 440 M MIN POS...

Page 22: ...blade will not cut correctly especially when straight cutting and causes excess pressure to be applied on the rear guide bearings Select the right blade for the job depending on the thickness of the w...

Page 23: ...he white switch wire lead Tie the brown and black motor leads together with spare wire nut supplied Disregard the wires that lead to the capacitor For 230V wiring DISCONNECT the wires leading to the P...

Page 24: ...properly adjusted 3 Inferior blade REMEDY Check the cable for breakage Contact your local dealer for repair parts Switch off the motor tighten the quick release lever or blade tension handwheel Open t...

Page 25: ...ws with a hex L wrench counter clockwise to lower the insert If the insert is sitting below the table turn the micro screws clockwise to raise the insert level with the table Caution Having the insert...

Page 26: ...oid damaging the machine If the blade is not running true or it is not running on center of the lower wheel but is correct on the upper wheel then an adjustment to the wheel hub on the rear of the ban...

Page 27: ...nsure that it has been welded correctly so that the blade s back is in proper alignment flat if it is laid down on a table surface If the blade is welded true then adjustment to the wheel hub on the r...

Page 28: ...nt Parts For Parts under Warranty the Serial Number of your machine is required PARTS DIAGRAM 15 16 17 18 19 20 21 22 26 25 27 28 29 23 30 34 33 35 36 32 31 37 38 39 41 40 42 43 44 45 46 1 47 48 49 11...

Page 29: ...34A 35A 36A 37A 38A 39A 40A 41A 42A 43A 44A 45A 46A 47A 48A 49A 50A 51A 52A 1 JL28010003 001S 1 JMBS1404011000 117U 1 JL27010005 1 M4GB6170B 1 WSH4GB862D2B 1 JMBS1404010200 076U 1 JMBS1404010400 1 M4X...

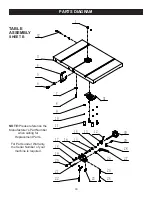
Page 30: ...17 23 21 22 26 30 29 28 27 31 25 24 11 10 9 8 7 3 1 6 5 32 TABLE ASSEMBLY SHEET B NOTE Please reference the Manufacturer s Part Number when calling for Replacement Parts For Parts under Warranty the...

Page 31: ...29B 30B 31B 32B 1 M6X4GB77B 1 JL26050008A 001S 1 JMBS1404030100A 001G 1 JMBS1404030002 1 WSH4GB96D1B 1 M4X10GB818B 1 M8GB6170B 1 M8X25GB5783B 1 WSH8GB97D1B 1 WSH8GB93B 1 M8X20GB70D2B 1 PIN3X18GB879B...

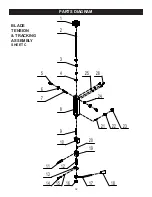
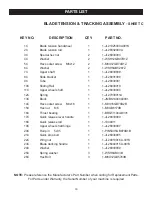
Page 32: ...32 PARTS DIAGRAM BLADE TENSION TRACKING ASSEMBLY SHEET C 1 2 3 4 5 6 7 8 9 10 11 12 13 14 15 16 17 18 19 20 21 22 23 24 26 25...

Page 33: ...13C 14C 15C 16C 17C 18C 19C 20C 21C 22C 23C 24C 25C 26C 1 JL21025000A001S 1 JL28032000A 1 JL28030003 1 WSH12GB97D1Z 1 M6X12GB70D1Z 1 WSH6GB5287Z 1 JL28030008 1 JL28031000 1 JL28030001 1 JL28030010 1...

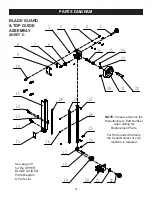
Page 34: ...28 29 33 34 35 36 25 21 NOTE Please reference the Manufacturer s Part Number when calling for Replacement Parts For Parts under Warranty the Serial Number of your machine is required BLADE GUARD TOP...

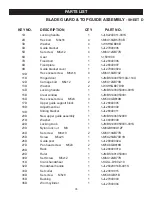
Page 35: ...r 1D 2D 3D 4D 5D 6D 7D 8D 9D 10D 11D 12D 13D 14D 15D 16D 17D 18D 19D 20D 21D 22D 23D 24D 25D 26D 27D 28D 29D 30D 31D 32D 33D 34D 35D 36D DESCRIPTION 1 JL82240011 001S 1 M6X16GB5783B 1 WSH6GB96B 1 JL27...

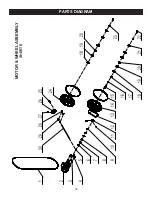
Page 36: ...36 PARTS DIAGRAM 4 3 2 5 6 7 8 13 12 14 15 16 11 10 9 17 18 19 20 21 22 18 19 20 23 25 26 27 28 29 30 24 1 MOTOR WHEEL ASSEMBLY SHEET E...

Page 37: ...k handwheel Set screw M8x35 Set screw M5x8 Set collar Crank 1E 2E 3E 4E 5E 6E 7E 8E 9E 10E 11E 12E 13E 14E 15E 16E 17E 18E 19E 20E 21E 22E 23E 24E 25E 26E 27E 28E 29E 30E DESCRIPTION 1 JL28020001C 2 Y...

Page 38: ...e rail Re saw bar Screw Support shaft Nut M8 Flat washer Flat washer 1 1 1 1 1 1 1 2 2 2 1 1 1 2 4 4 1 1 JMBS1404060001 1 JL93010018 1 JMBS1403061002 1 KTSB 1 A M6X50 1 JMBS1404060003 1 JMBS1601060003...

Page 39: ...ate Cross recessed pan head screw M4X8 Long sleeve Hex socket set screw with flat end M8X10 Upper guide support Upper guide shaft Front and rear positioning support plate Spring washer Long bolt Hex s...

Page 40: ...ad screw M4X5 Washer Lower guide Hex socket set screw M6X6 Rear adjusting spindle Lower guide shaft Base plate Washer Washer 1 1 1 1 2 1 2 1 3 3 2 1 1 1 1 1 1 2 2 3 1 3 2 1 1 1 1 1 KTSB 1 A M6X50 1 JL...

Page 41: ...PTION QTY PART NO 1I 2I 3I 4I 5I 6I 7I 8I Hex flat head bolt M6x50 to attach saw to stand Upper frame Hex nut with flange to attach saw to stand Shelf Carriage bolt M6x16 Leg Hex nut M6 Flat washer 4...

Page 42: ...the slot width so debris or thin cut wood strips will not catch or fall into the thin slot Ideal for use when cutting small pieces on the bandsaw for inlay shims puzzles etc BAND SAW BLADES For a vari...

Page 43: ...43 OPERATION...
Page 44: ...www rikontools com 10 324TGM1 10 324TG For more information 16 Progress Road Billerica MA 01821 877 884 5167 978 528 5380 techsupport rikontools com LINK TO RIKON WEBSITE...

Reviews: