5
SAFETY INSTRUCTIONS
16.
NEVER LEAVE A RUNNING TOOL UNATTENDED.
Turn the power switch to the “OFF” position.
DO NOT
leave the tool until it has come to a complete stop.
17.
DO NOT STAND ON A TOOL.
Serious injury could
result if the tool tips over, or you accidentally contact the
tool.
18.
DO NOT
store anything above or near the tool where
anyone might try to stand on the tool to reach it.
19.
MAINTAIN YOUR BALANCE. DO NOT
extend
yourself over the tool. Wear oil resistant rubber soled
shoes. Keep floor clear of debris, grease, and wax.
20.
MAINTAIN TOOLS WITH CARE.
Always keep tools
clean and in good working order. Keep all blades and tool
bits sharp, dress grinding wheels and change other
abrasive accessories when worn.
21.
EACH AND EVERY TIME, CHECK FOR DAMAGED
PARTS PRIOR TO USING THE TOOL.
Carefully check all
guards to see that they operate properly, are not damaged,
and perform their intended functions. Check for alignment,
binding or breaking of moving parts. A guard or other part
that is damaged should be immediately repaired or
replaced.
22.
DO NOT OPERATE TOOL WHILE TIRED, OR
UNDER THE INFLUENCE OF DRUGS, MEDICATION
OR ALCOHOL.
23.
SECURE ALL WORK.
Use clamps or jigs to secure
the workpiece. This is safer than attempting to hold the
workpiece with your hands.
24.
STAY ALERT, WATCH WHAT YOU ARE DOING,
AND USE COMMON SENSE WHEN OPERATING A
POWER TOOL.
A moment of inattention while operating power tools may
result in serious personal injury.
25.
ALWAYS WEAR A DUST MASK TO PREVENT
INHALING DANGEROUS DUST OR AIRBORNE
PARTICLES
, including wood dust, crystalline silica dust
and asbestos dust. Direct particles away from face and
body. Always operate tool in well ventilated area and
provide for proper dust removal. Use dust collection
system wherever possible. Exposure to the dust may
cause serious and permanent respiratory or other injury,
including silicosis (a serious lung disease), cancer, and
death. Avoid breathing the dust, and avoid prolonged
contact with dust. Allowing dust to get into your mouth
or eyes, or lay on your skin may promote absorption of
harmful material. Always use properly fitting NIOSH/OSHA
approved respiratory protection appropriate for the dust
exposure, and wash exposed areas with soap and water.
26.
USE A PROPER EXTENSION CORD IN GOOD
CONDITION.
When using an extension cord, be sure to
use one heavy enough to carry the current your product
will draw. The table on the following page shows the cor-
rect size to use depending on cord length and nameplate
amperage rating. If in doubt, use the next heavier gauge.
The smaller the gauge number, the larger diameter of the
extension cord. If in doubt of the proper size of an exten-
sion cord, use a shorter and thicker cord. An undersized
cord will cause a drop in line voltage resulting in a loss of
power and overheating.
USE ONLY A 3-WIRE EXTENSION CORD THAT HAS
A 3-PRONG GROUNDING PLUG AND A 3-POLE
RECEPTACLE THAT ACCEPTS THE TOOL’S PLUG.
27.
ADDITIONAL INFORMATION
regarding the safe and
proper operation of this product is available from:
• Power Tool Institute
1300 Summer Avenue
Cleveland, OH 44115-2851
www.powertoolinstitute.org
• National Safety Council
1121 Spring Lake Drive
Itasca, IL 60143-3201
www.nsc.org
• American National Standards Institute
25 West 43rd Street, 4th Floor
New York, NY 10036
www.ansi.org
• ANSI 01.1 Safety Requirements for
Woodworking Machines and the
U.S. Department of Labor regulations
www.osha.gov
28.
SAVE THESE INSTRUCTIONS.
Refer to them
frequently and use them to instruct others.
ELECTRICAL SAFETY
THIS TOOL MUST BE GROUNDED WHILE IN USE TO
PROTECT THE OPERATOR FROM ELECTRIC SHOCK.
IN THE EVENT OF A MALFUNCTION OR BREAKDOWN,
grounding provides the path of least resistance for electric
current and reduces the risk of electric shock. This tool
is equipped with an electric cord that has an equipment
grounding conductor and a grounding plug. The plug
MUST
be plugged into a matching electrical receptacle that is
properly installed and grounded in accordance with
ALL
local codes and ordinances.
Summary of Contents for 50-151
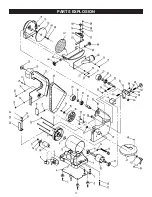
Page 17: ...PARTS EXPLOSION 17...
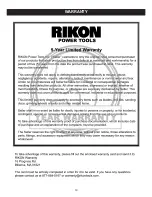
Page 19: ...WARRANTY 19 WARRANTY...


