background image

Fitting the battery: Make sure the battery is the correct way up (as per 5.2) and then slide into
the bower until the battery catch engages. It is essential that the battery catch  is fully locked.

7. Maintenance / Cleaning:
The Blower unit, filter housing and head units must all be regularly cleaned to keep them in
good working order.
For single users, the units can all be cleaned with a cloth moistened with luke warm water and
soap.
For multiple users, the units should be disinfected when passed from one user to another. 
SISAB recommends that ‘Incidur’ from Ecolad GmbH & Co. OHG is used for disinfecting.
Liquids must not be allowed to enter the workings of the blower unit or get on to the element of
the filter.
Parts should be allowed to air dry. Under no circumstances should any solvents or abrasive
cleaning agents be used. The unit must not be dried using hot air or radiant heat.
The unit should continue to provide protection to the designed specification for 2 to 3 years,
when maintained in accordance with these instructions. Prior to each use the user should check
that the unit is free from defects, such as cracks, split filters and hoses, cracked visors and
helmet components as appropriate

8. Fault finding:
If there is a sudden change in air supply while using the CR-2B01/2013 system, it is necessary
to check the following:
· That all parts of the air-supply system are assembled properly.
· The battery and its connector.
· Whether the charger is not faulty or malfunctioning (if so, diodes do not work).
· Filters and their clogging.
· That there is not a hole in the air hose.
· Whether the hood seal is not damaged.
·  Whether the working time after a full recharging of the battery has not decreased (if so, it is

necessary to replace the battery).
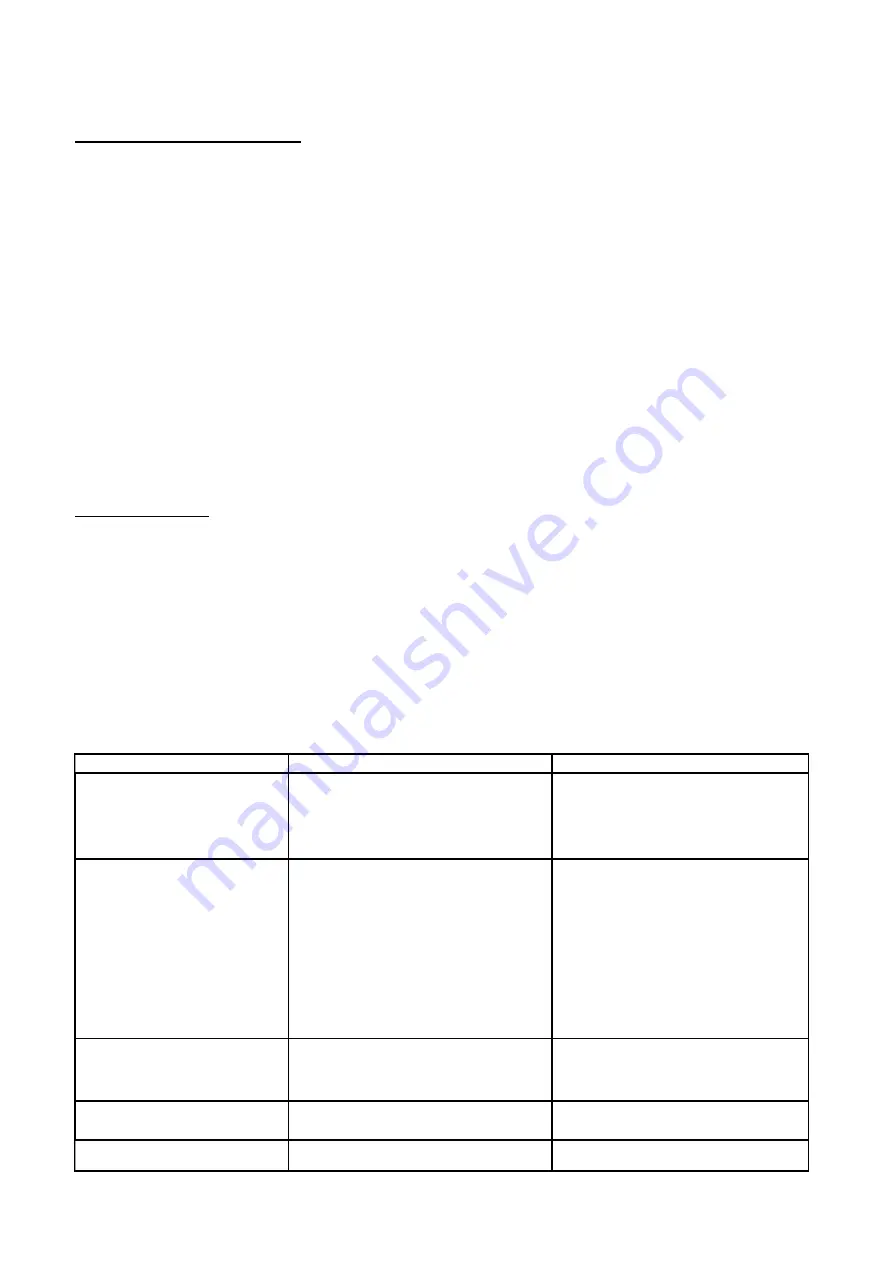
Fault

Probable reason

Recommendation

The blower unit does not work at
all

Entirely discharged battery.

(verify   if   the   blower   unit   works   with

another charged battery)

Faulty motor, circuit board or connector

Charge the battery.

(if problem persists, check the battery)

Contact your supplier.

Low airflow

Blocked air hose or airduct.

Leakage

Battery is not charged enough.

Blocked Filter or Pre Filter

Check and remove blockage.

Check all seals, connectors and the air

hose.   Make   sure   that   air   can   not   leak

through holes or tears.

Charge the battery

(if problem persists, check the battery)

Change   the   Pre   –   Filter.   Then   if   the

problem persists change the main filter.

Short operating time.

Clogged Filter.

Battery is not charged properly.

Change the filters

Charge the battery.

(If problem persists, check the battery)

Battery cannot be charged.

Battery contact is damaged.

Charger is faulty.

Check the battery contact.

Contact your supplier.

Battery   cannot   be   charged
sufficiently.

Battery is worn out..

Install a new battery.

Summary of Contents for CR-2B01/2013

Page 1: ...CR 2B01 2013 Powered Air Purifying Respirator Item number 605813 User Instruction Manual 2 2...

Page 2: ...his leaflet Contents 1 Introduction 2 Approvals 3 Preconditions for use 4 System Overview 5 Unpacking Assembly Usage 6 Before Use 7 Maintenance Cleaning 8 Fault finding 9 Storage and transportation 10...

Page 3: ...switched off little or no respiratory protection is to be expected When the blower unit is switched off a rapid build up of carbon dioxide and depletion of oxygen within the head unit may occur and s...

Page 4: ...unit and seek medical advice 4 System Overview The CR 2B01 2013 unit is a belt mounted powered respirator with a replaceable disposable high efficiency particle filter system The system is certified w...

Page 5: ...6 User Instructions 5 2 Assembly Attach the respiratory unit onto the belt Pass the inner strap through the back of the blower loops The pass through the 3 belt loops and then through the buckle Fit...

Page 6: ...Pre Filter As soon as the warning alarm sounds the pre filter should be exchanged or checked In very dusty area s this can be necessary on a frequent basis The filters must be regularly checked see Ai...

Page 7: ...ilter The pre filter is a sleeve which is fitted over the main filter To remove replace simply pull off the old filter and stretch the new one into position It s important to ensure that the filter me...

Page 8: ...5 3 Usage Switch on the unit by pressing the ON OFF button on the control panel The airflow can be either the low speed 180 l min or the high speed 220 l min The speed denoted buy the lit LED and the...

Page 9: ...r additional suggestions 6 Before use 6 1 Inspection before use Each time before starting work check that all components are in good condition with no visible damage like holes tears etc Replace any d...

Page 10: ...regime and keeps the battery fully charged The charging time is 6 to 8 hours 6 3 1 Battery charging 1 Check that the voltage of the electrical power supply is correct 2 Plug the charger into the sock...

Page 11: ...the CR 2B01 2013 system it is necessary to check the following That all parts of the air supply system are assembled properly The battery and its connector Whether the charger is not faulty or malfun...

Page 12: ...s items Do not store outside the temperature range of 0 C to 40 C or with humidity above 75 RH 10 List of Parts and Assembly Drawing ITEM NUMBER DESCRIPTION PART NUMBER 1 Face seal for GT 2B01 2013 60...

Page 13: ...rate below 170L min Actual Protection Factor APF 20 Noise level 65dBA Operating time greater than 8 hours on minimum flow rate with a new filter and fully charged battery in a clean environment 5 hou...

Page 14: ...This guarantee is subject to The CR 2B01 2013 unit has been used solely for the purpose for which it is intended The CR 2B01 2013 unit has not been subject to misuse accident modification or repair N...

Reviews: