


the microprocessor automatically reduces the airflow to the lower level, if it fails to meet the
lower level, the alarm will still sound. When the airflow falls below the minimum safe operating
level, a second audible alarm joins the first. At this point, the user must stop working at once,
leave the working environment and reach an area nominated to be safe and change the filter or
recharge/change the battery.
To check the battery: When first starting the unit, the battery LED must show red – this shows a
fully charged battery. It is recommended that only a fully charged battery should be used when
starting a work shift.
With a fully charged battery in place, the unit should function normally, but if the audible alarm
still sounds, the user must change the filter. If the problem still persists, see chapter 8 for
additional suggestions.
6. Before use:
6.1 Inspection before use:
Each time before starting work check that:
· all components are in good condition with no visible damage (like holes, tears etc) Replace
any damaged or worn parts. Carefully examine the air hose, seals and the face piece.
· there is a good connection between the air hose and the headpiece as well as the blower unit.
· there is sufficient air flow..(see 6.2.)
· the air is supplied through the whole respiratory system from the blower to the hood.
Charge the battery before the first use. (see 6.3.)
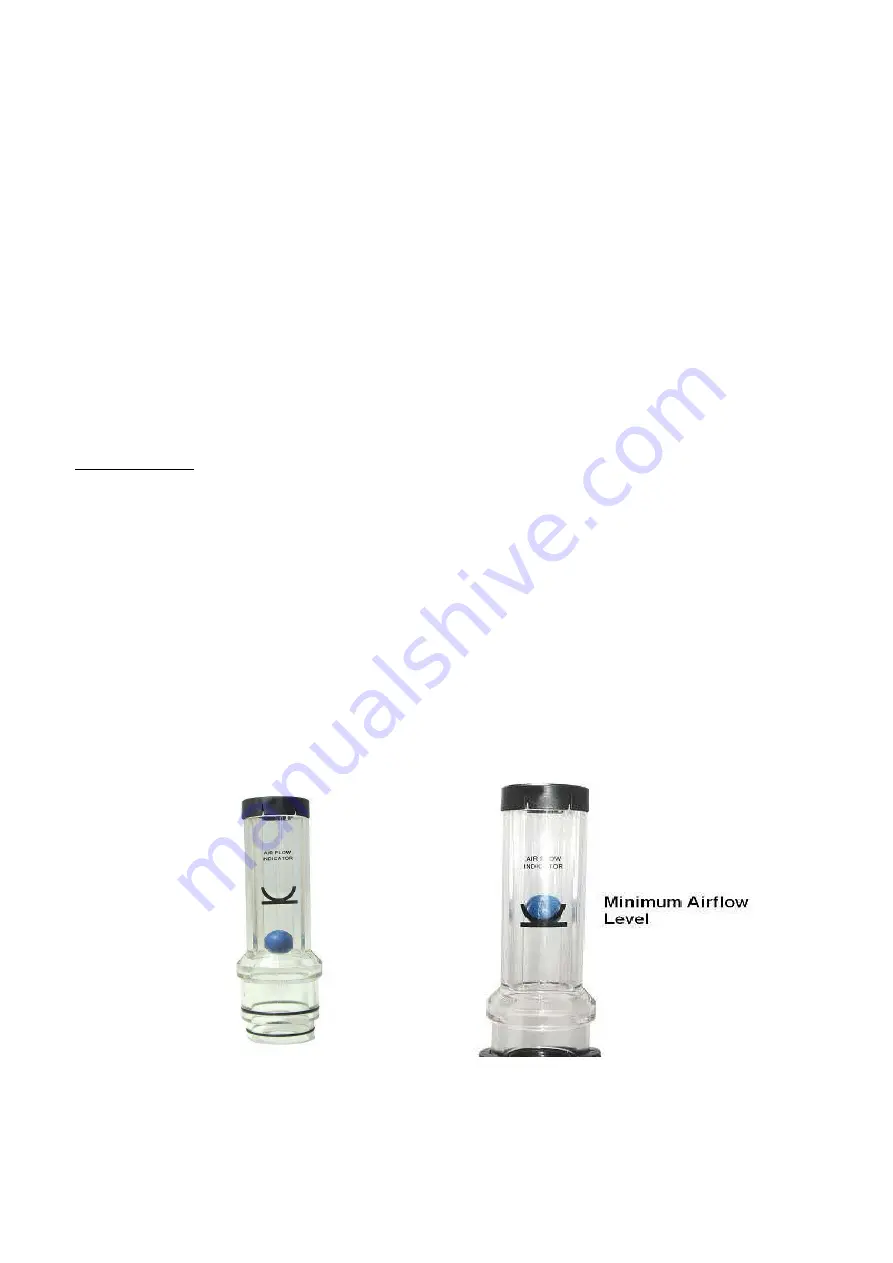
6.2. Air Flow Test:
1. Disconnect the air hose from the Blower unit.
2. Insert the Airflow indicator into the air hose connector and keep the hose in vertical
position at about the eye level.
3. Switch the power unit on. The airflow is sufficient only if the ball indicator reaches the
minimum flow rate level. If the indicator sinks is below the minimum flow rate level, it is
necessary to charge the battery or change the filter. If the problem still persists, see chapter 8


