background image


RTG6 Digital Tyre & tread depth gauge  Instructions for use  

Tyre pressure gauge 

Refer to vehicles handbook to determine the correct pressure for the front and rear wheels. 

Check tyre pressures when tyres are cold.  

Please remove screen protector before use 

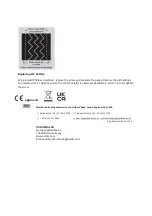
If you are using the gauge for the first time the battery tab protector needs to be removed using a small 

Philips screwdriver remove the screw, separate the batteries and remove the plastic disk. Reassemble 

and do not over tighten the screw. 

Inflate / deflate to correct pressure to use less fuel and reduce CO² emissions.  

The tyre gauge must not be used when the vehicle is moving. Ensure you are parked in a  safe location 

off the road with the car handbrake on and your personal safety is not at risk. 

If used during darkness press the   to illuminate the LED guide light. The light automatically turns off 

after 60 seconds.


Unscrew the valve cap on the tyre, keeping it safe. Press the On button (•) the figure 0.0psi will be 

displayed. To change the pressure setting press the On button to switch among the pressure setting of 

psi,bar, kpa and Kg/cm2.  Push the gauge onto the valve firmly and hold in place for approximately 3-4 

seconds for the pressure reading. To check other tyre pressures connect to the tyre valve and the gauge 

will automatically reset and display the new reading. 

The gauge will automatically turn off approximately 60 seconds after the last reading. 

Replace the valve cap 

Tyre tread depth gauge 

Slide the switch on the front of the gauge to depress the tread depth gauge. 

The UK legal minimum tread depth for cars and light trailers (inc caravans) up to 3500kgs gross vehicle 

weight and or 8 seated passenger vehicles including the driver is a minimum of  1.6mm in a continuous 

band throughout the central  three-quarters of the tread width throughout the whole of the 

circumference  

Summary of Contents for RTG6

Page 1: ...e light automatically turns off after 60 seconds Unscrew the valve cap on the tyre keeping it safe Press the On button the figure 0 0psi will be displayed To change the pressure setting press the On b...

Page 2: ...eassemble and do not over tighten the screw Distributed by Ring Automotive Ltd Gelderd Road Leeds England LS12 6NA Switch board 44 0 113 213 2000 Technical helpline 44 0 113 213 7339 44 0 113 231 0266...

Page 3: ...umi re s teint automatiquement apr s 60 secondes D vissez le bouchon de la valve sur le pneu en veillant ne pas le perdre Appuyez sur le bouton Marche le chiffre 0 0 psi apparait l cran Pour modifier...

Page 4: ...un petit tournevis cruciforme retirez la vis puis sortez le manom tre Retirez les piles usag es et remplacez les par deux piles CR2032 en respectant la polarit Remontez le tout et veillez ne pas serre...

Page 5: ...verwenden dann damit die LED Lichtf hrung erleuchtet Das Licht erlischt automatisch nach 60 Sekunden Schrauben Sie die Ventilkappe des Reifens ab und verstauen Sie sie an einem sicheren Platz Dr cken...

Page 6: ...euzschraubenzieher und nehmen Sie die Lehre auseinander Entnehmen Sie die alten Batterien und ersetzen Sie sie mit 2 x CR2032 Vergewissern Sie sich dass die Polung richtig ist Bauen Sie die Lehre wied...

Page 7: ...ondi Svitare il tappino della valvola del pneumatico facendo attenzione a non smarrirlo Premere il pulsante di accensione Sul display verr visualizzato il valore 0 0psi Per modificare l impostazione d...

Page 8: ...cacciavite a croce piccolo rimuovere la vite e aprire il manometro Rimuovere le batterie esaurite e sostituirle con 2 batterie CR2032 assicurandosi di rispettare la polarit corretta Riassemblare senz...

Page 9: ...LED de gu a La luz se apaga autom ticamente transcurridos 60 segundos Desenrosque el tap n de la v lvula del neum tico y gu rdelo Pulse el bot n On aparecer 0 0 psi Para cambiar la configuraci n de la...

Page 10: ...e o destornillador Phillips retire el tornillo y el medidor Retire las pilas antiguas y sustit yalas por 2 x CR2032 asegur ndose de que respeta la polaridad Vuelva a montar el tornillo y aseg rese de...

Page 11: ...LED A luz apaga automaticamente ap s 60 segundos Desaperte a tampa da v lvula do pneu mantendo a num local seguro Pressione o bot o On e aparecer o valor 0 0 psi Para alterar a defini o da press o pr...

Page 12: ...om uma pequena chave de fendas Philips desaparafuse e separe o indicador Retire as pilhas gastas e substitua por 2 pilhas CR2032 respeitando a polaridade correcta Volte a montar o indicador e n o apar...

Page 13: ...edljuset Lampan sl cks automatiskt efter 60 sekunder Skruva av ventilhylsan p d cket och f rvara den p en s ker plats Tryck p On knappen Texten 0 0psi visas V xla mellan tryckinst llningarna psi bar k...

Page 14: ...hillips skruvmejsel f r att lossa p skruvarna och separera m taren Ta ur de f rbrukade batterierna och ers tt dem med tv CR2032 batterier kontrollera polariteten Dra inte t skruven f r h rt n r du s t...

Page 15: ...op de handrem en dat u persoonlijke veiligheid niet in gevaar is Schroef het ventieldopje van de band en bewaar het goed Druk op de Aan knop waarna de psi waarde 0 0 zal worden weergegeven Om de druki...

Page 16: ...schroef te verwijderen en haal de spanningsmeter uit elkaar Verwijder de oude batterijen en vervang deze met 2 x CR2032 en zorg ervoor dat de juiste polariteit in acht wordt genomen Zet de bandenspan...

Page 17: ...ersonlige sikkerhed Tryk p for at t nde LED guidelyset hvis udf rt i m rke Lyset slukkes automatisk efter 60 sekunder Skru ventilh tten af d kket og opbevar den s du kan finde den igen Tryk p knappen...

Page 18: ...eri Brug en lille stjerneskruetr kker til at fjerne skruen og skille m leren ad Fjern de gamle batterier og udskift med 2 x CR2032 Kontroller at polariteten er korrekt Saml igen og undlad at overstram...

Page 19: ...ti 60 sekunnin kuluttua Avaa renkaan venttiilin korkki ja laita se talteen Paina p lle painiketta ja n yt ss n kyy 0 0 psi Paineasetus voidaan vaihtaa psi bar kpa and Kg cm2 painamalla p lle painikett...

Page 20: ...ihto Avaa ruuvi pienell Phillips ruuvitaltalla ja avaa mittari Poista vanhat paristot ja laita tilalle 2 kpl CR2032 paristoa varmistaen ett ne ovat oikein p in Kokoa mittari mutta l kirist ruuvia liik...

Page 21: ...trykke for tenne LED lyset Lyset sl s automatisk av etter 60 sekunder Skru av ventilhetten p dekket og oppbevar den sikkert Trykk p P knappen og tallet 0 0 psi vises For endre trykkinnstillingen trykk...

Page 22: ...kifte batteri Fjern skruen med en liten stjerneskrutrekker og del m leren Ta ut de gamle batteriene og erstatt med 2 x CR2032 og s rg for riktig polaritet Sett sammen og ikke overstram skruen godkjent...

Page 23: ...ga nie automatycznie po 60 sekundach Odkr ci nakr tk zaworu opony i po o y j w bezpiecznym miejscu Nacisn przycisk On W Na wy wietlaczu wy wietlona zostanie warto 0 0psi W celu zmiany jednostki ci nie...

Page 24: ...y u yciu ma ego rubokr tu Philips odkr ci rub i rozmontowa miernik Wyj zu yte baterie i wymieni je na dwie baterie CR2032 zachowuj c przy tym biegunowo Ponownie zmontowa miernik uwa aj c aby nie przek...

Reviews: