Installation and Operating Instructions for Brake
EV/EH 018/024/028/038 EFM,
Electromagnetically activated- Spring released
E 09.770e
issue: 25.08.2021
version: 2
drawn.: MAYA
checked.: EISF pages: 20
page: 13
pad without adjustment is 0,6 mm. A greater gap will reduce braking force up to a complete loss
of braking force. Consider the maximum permissible wear of the brake pads (see table 11.1).
After the adjustment of the gap between brake disc and brake pad, lock the set screw Pos. 41
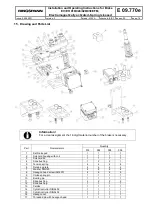
and Pos. 17 with the locking nut Pos. 16 and Pos. 40 (see Fig. 8.1 or 8.2).
Attention!
The gap between brake disc and brake pad on each side should be 0,2 ..0,3 mm.
With a smaller airgap, the braking force cannot be supplied. The maximum allowa-
ble distance between brake disk and brake pad without adjustment is 0,6mm. A
greater gap will reduce braking force up to a complete loss of braking force. Con-
sider the maximum permissible wear of the brake pads (see table 11.1).
Size 018
Residual thickness
1)
Brake disc thickness from 8 …11mm and 16 … 17 mm
9 mm
Brake disc thickness from >11
…
15 mm and >17 … 20 mm
7 mm
Size 024
Residual thickness
1)
Brake disc thickness 10mm and 18
… 19 mm
13 mm
Brake disc thickness
from >10 … 16 mm and >19 … 26 mm
11 mm
Size 028
Residual thickness
1)
Brake disc thickness 10mm and 18
…19 mm
17 mm
Brake
disc thickness from >10 … 16 mm and >19 … 26 mm
13 mm
Size 038
Residual thickness
1)
Brake disc thickness from 22
… 23 mm
17 mm
Brake disc
thickness from 12,5 … 20 mm and >23 … 30 mm
15 mm
1)
Residual thickness
= backplate of the brake pad + residual brake pad
Tab. 11.1
Brake pad replacement:
Before replacing the brake pads Pos. 1, ensure that the mass held by the brake is secured to pre-
vent movement, as parts of the brake must be loosened/removed for replacement.
Switch off the electric current from the brake.
Attention - SIZE 018 !!
Do not remove the cables between the brake and the electronics as long as the
brake is energized, this will destroy the magnet! (see figure 8.3).
Remove all tension springs Pos.5 and one of two retainig plates Pos. 6 each side, see Fig. 11.1
Pull out the old brake pads and screw out the set screws Pos. 17 and Pos. 41, Fig. 8.1, so that
the new brake pads can easily inserted. Take care, that the chamfer on the brake pad is on the
outer diameter of the brake disc and the friction material of the brake pad is on the brake disc
side. Fasten the retaining plates again (tightening torque, see table 11.1).


