13
ELECTRICAL CONNECTION
There is a junction box provided at the front
of the heater for the electrical connection.
WARNING: This appliance must be
properly grounded for your protection
against shock hazard.
Connecting the power supply:
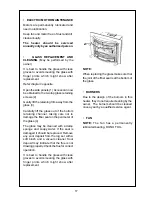
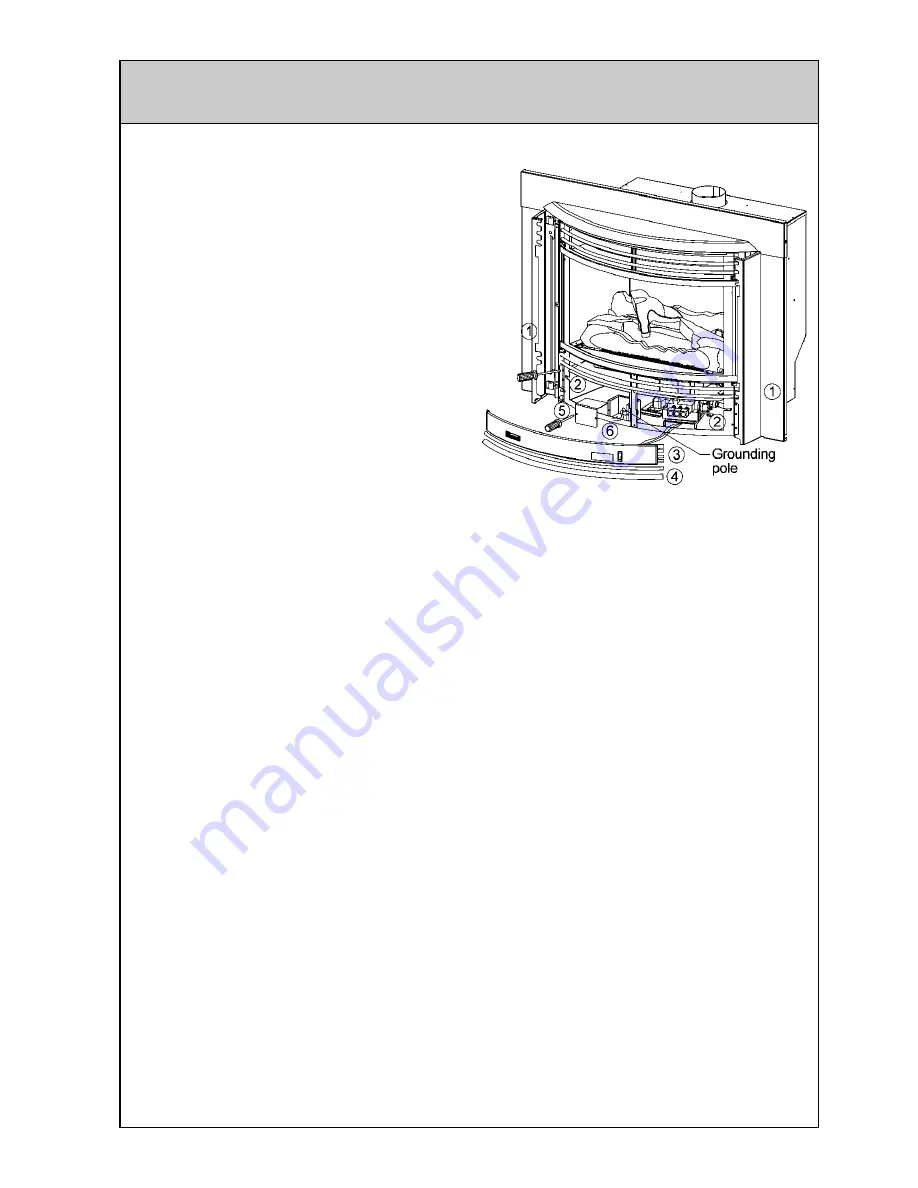
Refer to the diagram opposite,
1 Open the side doors.
2 Loosen the screws holding the front
panel in place.
3 Remove the front panel by sliding to one
side to release it and then sliding back
again to release the other end. Take care
not to place strain on the wires from the
heater to the fan switch on the front panel.
4 Remove the two lowest louvres from the
heater by sliding to one side to release the
end and then sliding back again to release
the louvre completely.
5 Remove the two screws holding the front
cover of the junction box in place and
remove the cover. A hole is provided on
the right hand side of the junction box for a
suitable electrical gland to be attached and
the electrical supply to pass through.
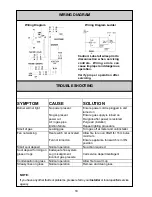
6 There are two wires (one black, one
white) that have been partially bared inside
the box and a grounding (earth) pole with
a green wire attached. It is important that
the power supply is connected to the
correct wires and that the appliance is
properly grounded by attaching a ground
connection to the grounding pole.
Black wire = Hot (115V AC 60Hz)
White wire = Neutral
7 Once all three connections have been
made, make sure that all connections are
safe and that the power connections cannot
come into contact with the appliance
casing.
Replace the cover on the junction box and
reassemble the heater in the opposite
order.
Take care not to trap or damage any wires
when reassembling the appliance.
WARNING: Failure to properly ground this
appliance with affect its operation and may
cause damage to the appliance or
personal injury.


