61
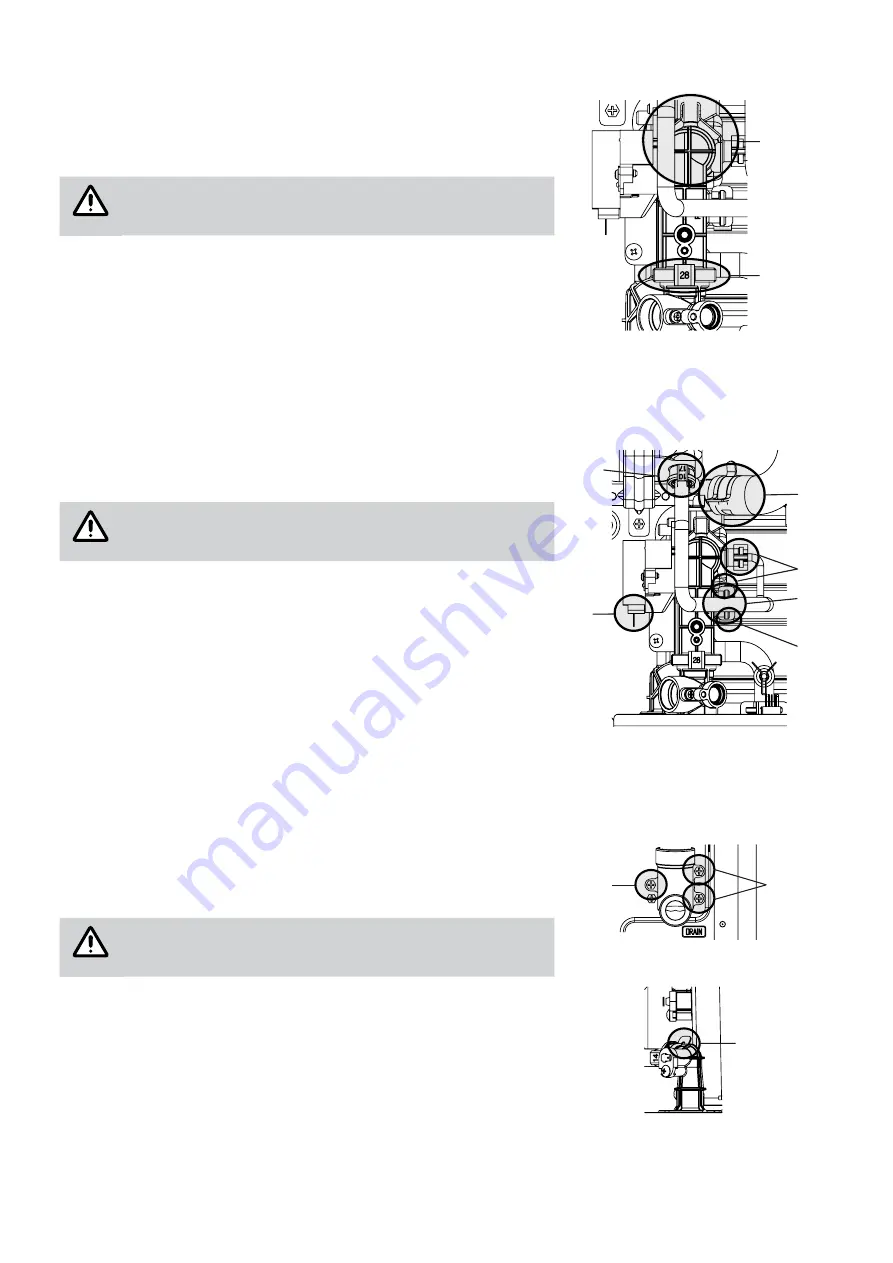
Connection joint - flow
•
Electrically isolate the appliance by disconnecting it from the electrical
socket and closing the cocks of the heating and gas circuit;
•
remove the plastic filter on the delivery nozzle and completely empty
the CH circuit of the boiler;
Empty the exchanger completely so as not to flood the
boiler in the subsequent disassembly phases.
•
remove front panel and pressure gauge;
•
disconnect the fixing clips of the joint (1);
•
remove the joint taking care not to damage the upper and lower sealing
o-rings.
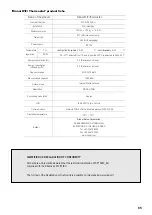
Three-way valve
•
Electrically isolate the appliance by disconnecting it from the electrical
socket and closing the cocks of the heating and gas circuit;
•
remove the plastic filter on the delivery nozzle and completely empty
the CH circuit of the boiler;
Empty the exchanger completely so as not to flood the
boiler in the subsequent disassembly phases.
•
remove front panel, pressure gauge and delivery connection joint;
•
disconnect the three-way valve power cable (1);
•
remove the connection tube to the expansion vessel (2) and the by-
pass (3) by removing the fixing clips;
•
disconnect the fixing clips to the delivery pipe and to the sanitary
exchanger (4);
•
remove the three-way valve taking care not to damage the sealing
o-ring.
Connection joint - return
•
Electrically isolate the appliance by disconnecting it from the electrical
socket and closing the cocks of the heating and gas circuit;
•
remove the plastic filter on the delivery nozzle and completely empty
the CH circuit of the boiler;
Empty the exchanger completely so as not to flood the
boiler in the subsequent disassembly phases.
•
remove front panel and PCB;
•
unscrew the anchor bolts of the return pipe union to the chassis (1);
•
remove the fixing clip to the connection joint to the sanitary exchanger
(2);
•
remove the joint.
1
1
ATTENTION
1
2
2
3
4
4
ATTENTION
Front view
Bottom view
1
1
2
ATTENTION


