Midas
®
Bath-Plating Unit
800.545.6566
www.riogrande.com
Sharing your passion for making jewelry.
Products. Service. Know-how.
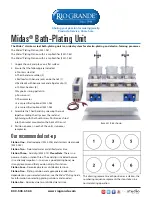
1. Unpack the unit and place on a flat surface.
2. Ensure that the following are included:
a. Stainless steel lid
b. Third-hand assemblies (2)
c. Red lead with banana jacks on both ends (1)
d. Red leads with banana jack and alligator clip (2)
e. 1000mL beakers (6)
f. Magnetic stirring pellets (2)
g. Power cord
h. Thermometer
i. 3-amp rectifier (optional) #331-962
j. 5-amp rectifier (optional) #331-963
3. Assemble the Third-hands by screwing the rods
together, sliding the clips over the rod and
tightening with the thumb screw. Position each rod
into the bracket mounted on the back of the unit.
4. Position a beaker in each of the unit’s six beaker
receptacles.
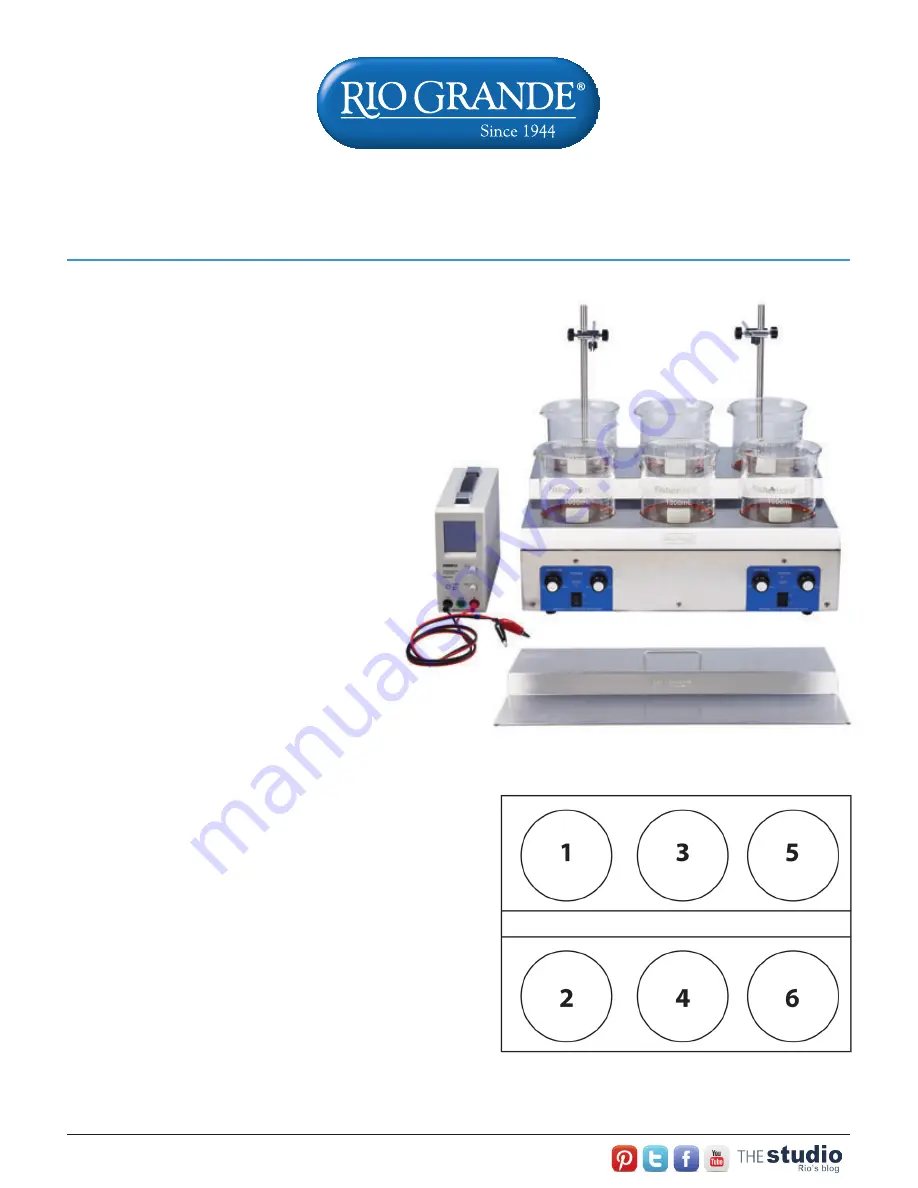
The Midas® stainless steel bath-plating unit is an ideal system for electro-plating and electro-forming processes.
The Midas® Plating Station (#331-961)
The Midas® Plating Station with 3-amp Rectifier (#331-962)
The Midas® Plating Station with 5-amp Rectifier (#331-963)
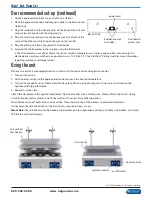
This drawing represents each position as a station; the
numbering sequence represents the steps taken in a
normal plating operation.
Our recommended set-up
Station One—Electrocleaner (#335-076) and stainless steel anode
(#335-042).
Station Two—Deionized water or distilled water rinse.
Station Three—Acid dip (#335-075). Please Note: There is no
power or heat on station three. The acid dip is included because
it is extremely important—to assure a good plating bond, we
strongly recommend that you do not skip this station.
Station Four—Deionized water or distilled water rinse.
Station Five—Plating solution and appropriate anode (this is
dependent on your selected solution; see the
Midas® Plating Guide
for information on selecting plating solutions and anodes).
Station Six—Deionized water or distilled water rinse.
Item 331-963 shown


