2
EcoGrow Assembly Instructions
Introduction
Congratulations on purchasing an EcoGrow. We are certain that it will give you many happy years of pleasure in
your garden.
EcoGrow has been designed to be as easy to put together as it is beautiful to look at. Most of the work can be
done by a single person. Only attaching the roof requires the help of a family member or neighbor for a short
while.
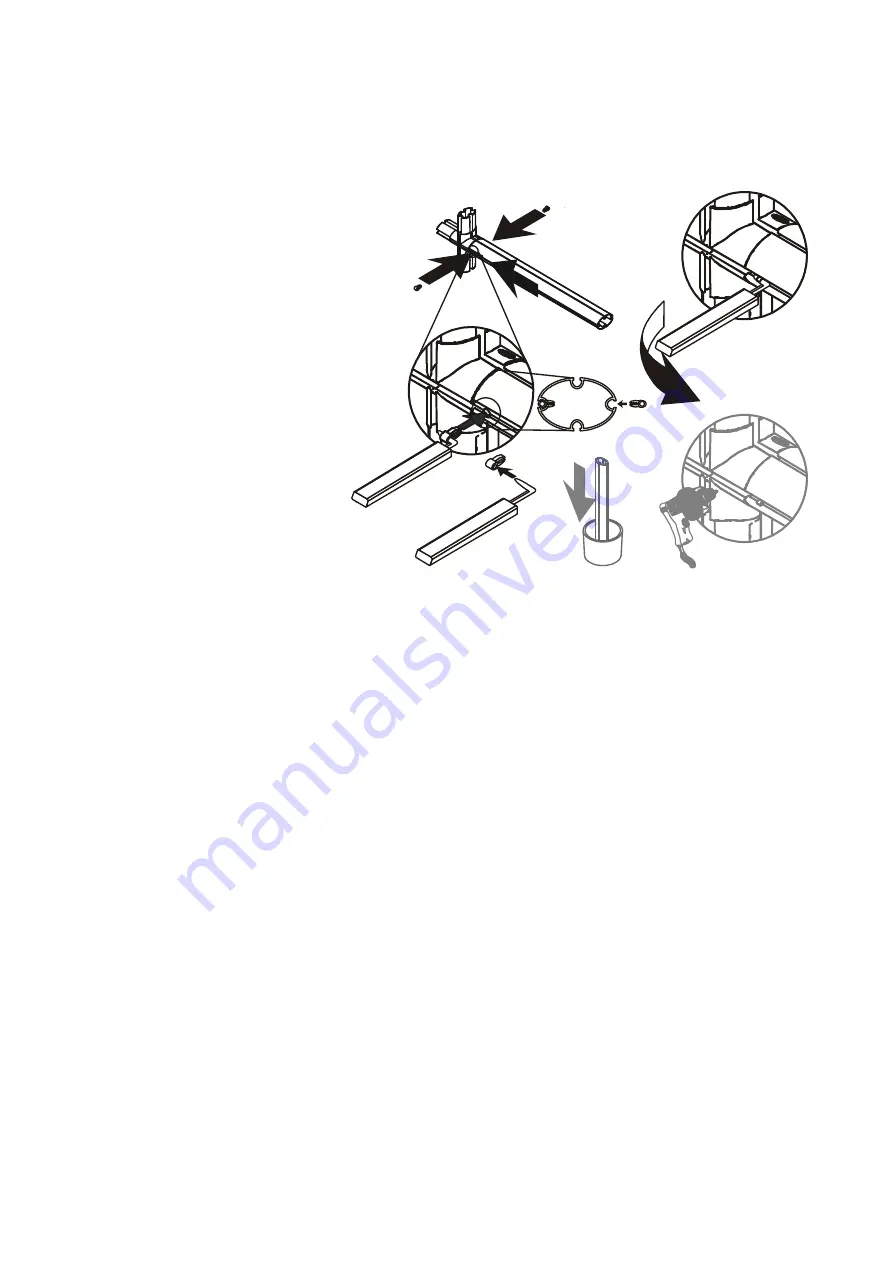
Easy assembly methods eliminate the need
for tools or special expertise.
1
Connect the specified parts.
2
Match the holes in the profiles and the
connectors. Place a pin on the pin tool
and push the pin through the lined-up
holes to lock the parts in place. Many
connections require pins on both sides.
Note:
Extra pins are included.
3
If you wish to disassemble the parts at
any time, remove the pins using the pin
tool. Place the end into the exposed hole
and lever the pin out.
4
If a hole in the connector is missing, drill
a hole with a 6 mm (¼") drill bit through
the assembled profile and then insert the
pin.
5
In extremely rare cases connectors will
not slip into some round or oval profiles.
In this case place the affected part into 10 cm (4”) of boiling water for 15 seconds before connecting.
Greenhouse assembly is done in the following steps:
Prepare a Foundation for Your Greenhouse (page 3)
Identify Greenhouse Parts (page 4)
Prepare Your Parts for Assembly (page 6)
Lay Out the Greenhouse Frame (page 7)
Secure the Frame to Foundation (page 8)
Assemble the Roof Pediments (page 9)
Assemble Roof Framework (page 11)
Cover the Greenhouse Roof (page 12)
1
2
2
3
4
5


