ȱ
Ȭ
1
Ȭ
ȱ
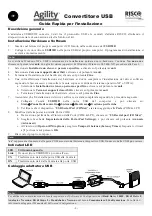
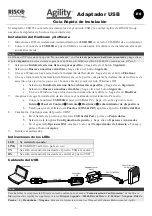
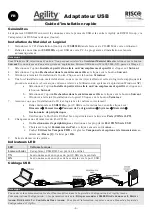
USB Adaptor
Quick Installation Guide
EN
General
The
ȱ
USB
ȱ
232
ȱ
adaptor
ȱ
converts
ȱ
data
ȱ
between
ȱ
the
ȱ
USB
ȱ
protocol
ȱ
and
ȱ
RISCO
ȱ
Group
ȇ
s
ȱ
Agility
ȱ
panel
ȱ
using
ȱ
the
ȱ
suitable
ȱ
local
ȱ
bus
ȱ
adaptor
ȱ
(supplied).
ȱ
Hardware and Software Installation
1.
Insert
ȱ
the
ȱ
USB232B
ȱ
Setup
ȱ
CD
ȱ
(supplied)
ȱ
into
ȱ
your
ȱ
computer
ȱ
CD
Ȭ
ROM
ȱ
drive.
ȱȱ
2.
Connect
ȱ
the
ȱ
USB232B
ȱ
converter
ȱ
to
ȱ
your
ȱ
PC’s
ȱ
USB
ȱ
port.
ȱ
The
ȱ
setup
ȱ
program
ȱ
will
ȱ
begin
ȱ
to
ȱ
run
ȱ
automatically.
ȱ
Note:
ȱȱ
When
ȱ
using
ȱ
Windows
ȱ
XP
ȱ
select
ȱ
the
ȱ
No,
ȱ
not
ȱ
this
ȱ
time
ȱ
option
ȱ
from
ȱ
the
ȱ
Found
ȱ
New
ȱ
Hardware
ȱ
Wizard
ȱ
and
ȱ
click
ȱ
the
ȱ
Next
ȱ
button.
ȱ
On
ȱ
other
ȱ
Microsoft
ȱ
Windows
ȱ
operating
ȱ
systems
ȱ
(Win
ȱ
98,
ȱ
2000,
ȱ
NT)
ȱ
proceed
ȱ
to
ȱ
Step
ȱ
3.
ȱ
3.
Select
ȱ
Install
ȱ
from
ȱ
a
ȱ
list
ȱ
of
ȱ
specific
ȱ
location
ȱ
and
ȱ
click
ȱ
the
ȱ
Next
ȱ
button.
ȱ
4.
Select
ȱ
Search
ȱ
removable
ȱ
media
ȱ
and
ȱ
click
ȱ
the
ȱ
Next
ȱ
button.
ȱ
5.
Windows
ȱ
has
ȱ
finished
ȱ
installing
ȱ
the
ȱ
hardware.
ȱ
Click
ȱ
the
ȱ
Finish
ȱ
button.
ȱ
6.
Once
ȱ
done
ȱ
with
ȱ
the
ȱ
installation
ȱ
of
ȱ
the
ȱ
hardware,
ȱ
you
ȱ
will
ȱ
be
ȱ
prompted
ȱ
to
ȱ
complete
ȱ
the
ȱ
installation
ȱ
of
ȱ
the
ȱ
software
ȱ
according
ȱ
to
ȱ
the
ȱ
following
ȱ
steps
ȱ
(see
ȱ
the
ȱ
above
ȱ
note
ȱ
if
ȱ
you
ȱ
are
ȱ
using
ȱ
Windows
ȱ
XP
ȱ
operating
ȱ
system):
ȱ
a.
Select
ȱ
Install
ȱ
from
ȱ
a
ȱ
list
ȱ
of
ȱ
specific
ȱ
location
ȱ
and
ȱ
click
ȱ
the
ȱ
Next
ȱ
button.
ȱ
b.
Select
ȱ
Search
ȱ
removable
ȱ
media
ȱ
and
ȱ
click
ȱ
the
ȱ
Next
ȱ
button.
ȱ
c.
Windows
ȱ
has
ȱ
finished
ȱ
installing
ȱ
the
ȱ
software.
ȱ
Click
ȱ
the
ȱ
Finish
ȱ
button.
ȱ
7.
Make
ȱ
sure
ȱ
the
ȱ
Driver
ȱ
Software
ȱ
installation
ȱ
is
ȱ
accomplished
ȱ
according
ȱ
to
ȱ
the
ȱ
following:
ȱ
a.
Connect
ȱ
the
ȱ
USB232B
ȱ
unit
ȱ
into
ȱ
the
ȱ
USB
ȱ
port
ȱ
of
ȱ
the
ȱ
computer
ȱ
and
ȱ
then
ȱ
click:
ȱȱ
Start
ȱ
Æ
ȱ
Settings
ȱ
Æ
ȱ
Control
ȱ
Panel
ȱ
Æ
ȱ
System
ȱ
Æ
ȱ
Hardware
ȱ
Æ
ȱ
Device
ȱ
Manager
ȱ
b.
Verify
ȱ
that
ȱ
the
ȱ
USB
ȱ
Serial
ȱ
Port
ȱ
is
ȱ
listed
ȱ
at
ȱ
Ports
ȱ
(COM
ȱ
&
ȱ
LPT).
ȱ
8.
Changing
ȱ
the
ȱ
COM
ȱ
Port
ȱ
Settings:
ȱ
a.
From
ȱ
Device
ȱ
Manager,
ȱ
select
ȱ
the
ȱ
USB
ȱ
serial
ȱ
port
ȱ
COM
ȱ
option.
ȱ
b.
Choose
ȱ
the
ȱ
Port
ȱ
Settings
ȱ
tab,
ȱ
and
ȱ
then
ȱ
click
ȱ
Advanced.
ȱ
ȱ
c.
Under
ȱ
the
ȱ
BM
ȱ
options,
ȱ
choose
ȱ
Latency
ȱ
Timer.
ȱ
Set
ȱ
the
ȱ
timer
ȱ
to
ȱ
[1]
ȱ
and
ȱ
click
ȱ
the
ȱ
OK
ȱ
button.
ȱ
9.
Reboot
ȱ
your
ȱ
system.
ȱ
USB LED Indications
LED
ȱ
Turns
ȱ
ON
ȱ
when:
ȱ
Link
ȱ
The
ȱ
USB
ȱ
RS232
ȱ
is
ȱ
ready
ȱ
for
ȱ
use
ȱ
TX
ȱ
Data
ȱ
is
ȱ
being
ȱ
sent
ȱ
from
ȱ
the
ȱ
USB
ȱ
port
ȱ
to
ȱ
the
ȱ
panel
ȱ
RX
ȱ
Data
ȱ
is
ȱ
being
ȱ
sent
ȱ
from
ȱ
the
ȱ
panel
ȱ
to
ȱ
the
ȱ
USB
ȱ
port
ȱ
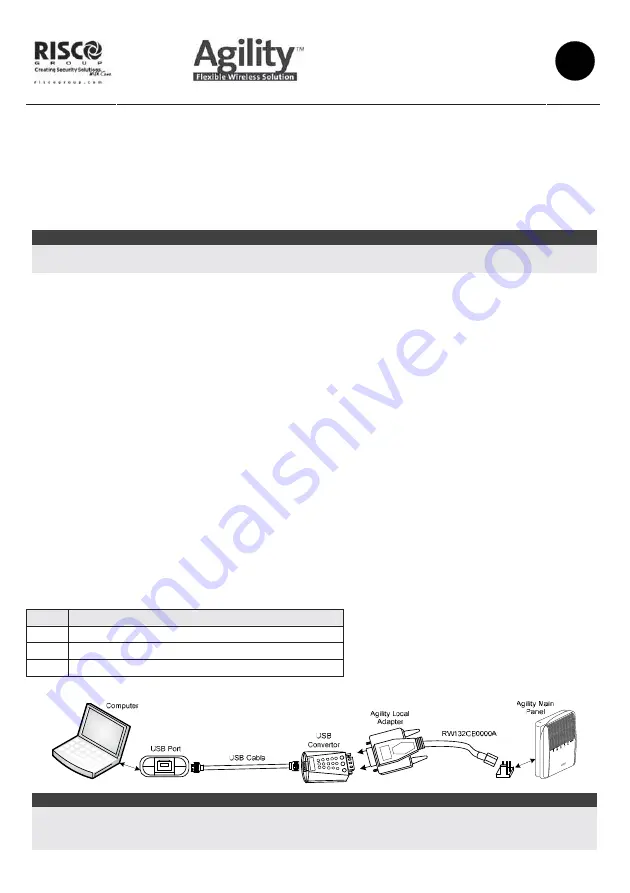
USB Wiring
Note:
ȱȱ
To
ȱ
enable
ȱ
local
ȱ
communication
ȱ
set
ȱ
the
ȱ
Baud
ȱ
Rate
ȱ
to
ȱ
38400,
ȱ
Data
ȱ
Bits
ȱ
to
ȱ
8,
ȱ
Parity
ȱ
to
ȱ
None,
ȱ
Stop
ȱ
bits
ȱ
to
ȱ
2
ȱ
and
ȱ
Handshake
ȱ
to
ȱ
None
ȱ
in
ȱ
the
ȱ
Agility
ȱ
Configuration
ȱ
Software
ȱ
under
ȱ
the
ȱ
Communication
Æ
Configuration
ȱ
menu.
ȱ
For
ȱ
more
ȱ
information
ȱ
refer
ȱ
to
ȱ
the
ȱ
Agility
ȱ
Configuration
ȱ
Software
ȱ
Manual.
ȱ
Summary of Contents for Agility USB RS232
Page 5: ...ȱ Notes ȱ ...
Page 6: ...ȱ Notes ...


