7 - 0
CZ80 / CV860 Rev. .0
CHAPTER 7: PAPER EJECTION SECTION
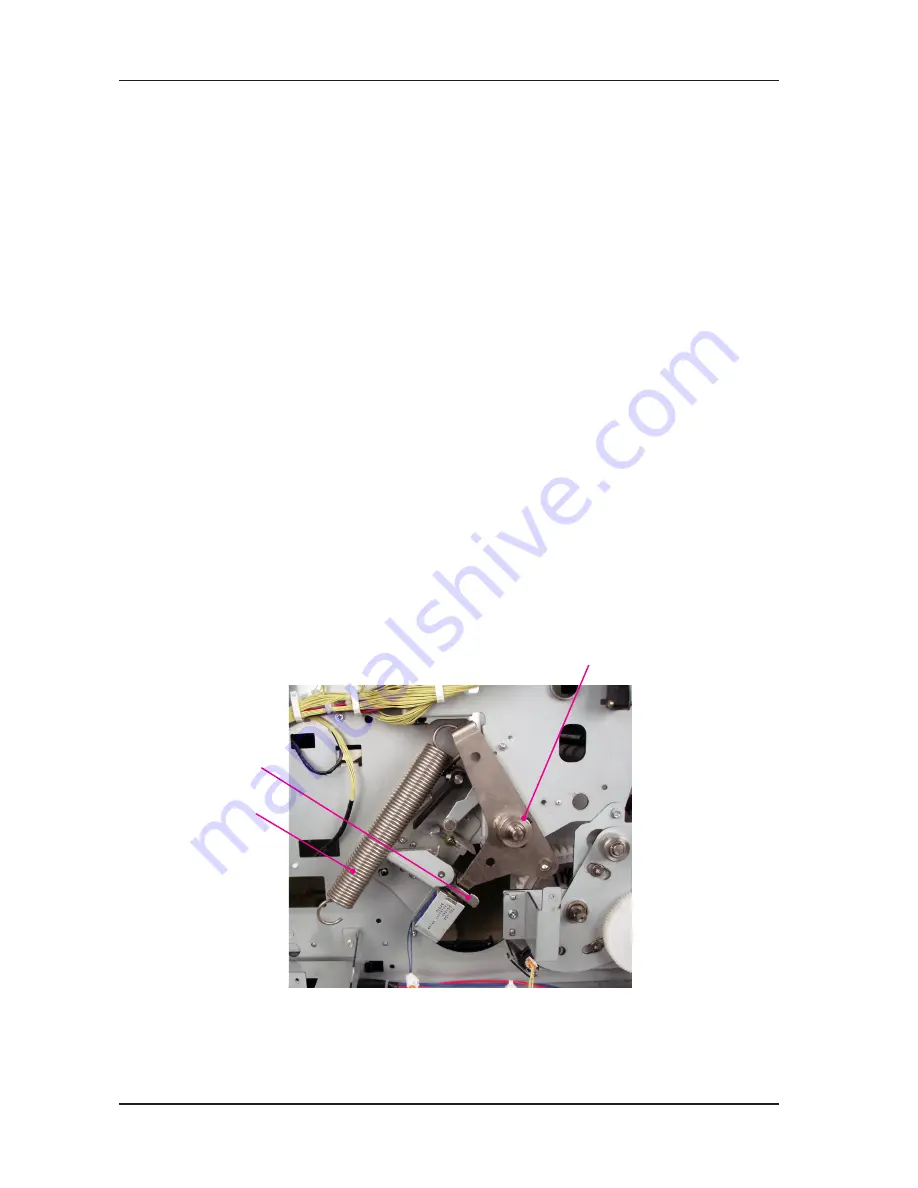
Pressure lever assembly
Hook
Pressure spring
9. Separator
REMOVAL
) Pull the Print drum out of the machine, turn OFF the machine power and remove following parts.
Front cover (M3x8 screws; 6 pcs)
Rear cover (M3x8 screws; 5 pcs)
2) Open the PCB bracket on the rear of the machine.
3) Carefully, using hand, push the Pressure lever assembly and Solenoid lever down to disengage
from each other.
4) Carefully, remove the Pressure spring.
5) Detach two Separator springs.
6) Remove E-ring on the front end of the Separator shaft, and remove the Metal bushing. (6mm dia.
E-ring; pc)
7) Slide the Separator shaft to the rear, and remove the mounting screw of Separator lever, and
detach the Separator lever. (M4x8 screw; pc)
8) Remove the Separator shaft out from the machine by sliding it towards the front of the machine.
9) Remove mounting screw of Release arm, and detach it from Separator shaft. (M3x0 screw;
pc)
0) Remove mounting screw of Separator, and detach it from the Separator shaft. (M3x0 screw;
pc)
Precaution in Assembly
) Mount the Release arm by hooking it on the Release lever.
Adjustment after the Assembly
) Separator position adjustment
RISO Inc. Technical Services & Support
US.RISO.COM


