Replacing and Disposing Consumables
Removing and Installing the Print Drum (Cylinder)
62
Removing and Installing the Print Drum (Cylinder)
When replacing with a color drum (cylinder) or dealing with paper jams, remove the Print Drum (Cylinder), take a nec-
essary procedure, and then install the drum (cylinder).
B
Caution:
• Make sure to place and keep the removed Print Drum (Cylinder) horizontal. If vertically placed, the floor may be
contaminated with ink.
Important!:
• For the Print Drum (Cylinder), use the products specified by RISO.
• Before removing and installing the Print Drum (Cylinder), turn the machine on.
• Make sure to place the replaced Print Drum (Cylinder) in the drum (cylinder) case and keep it horizontal.
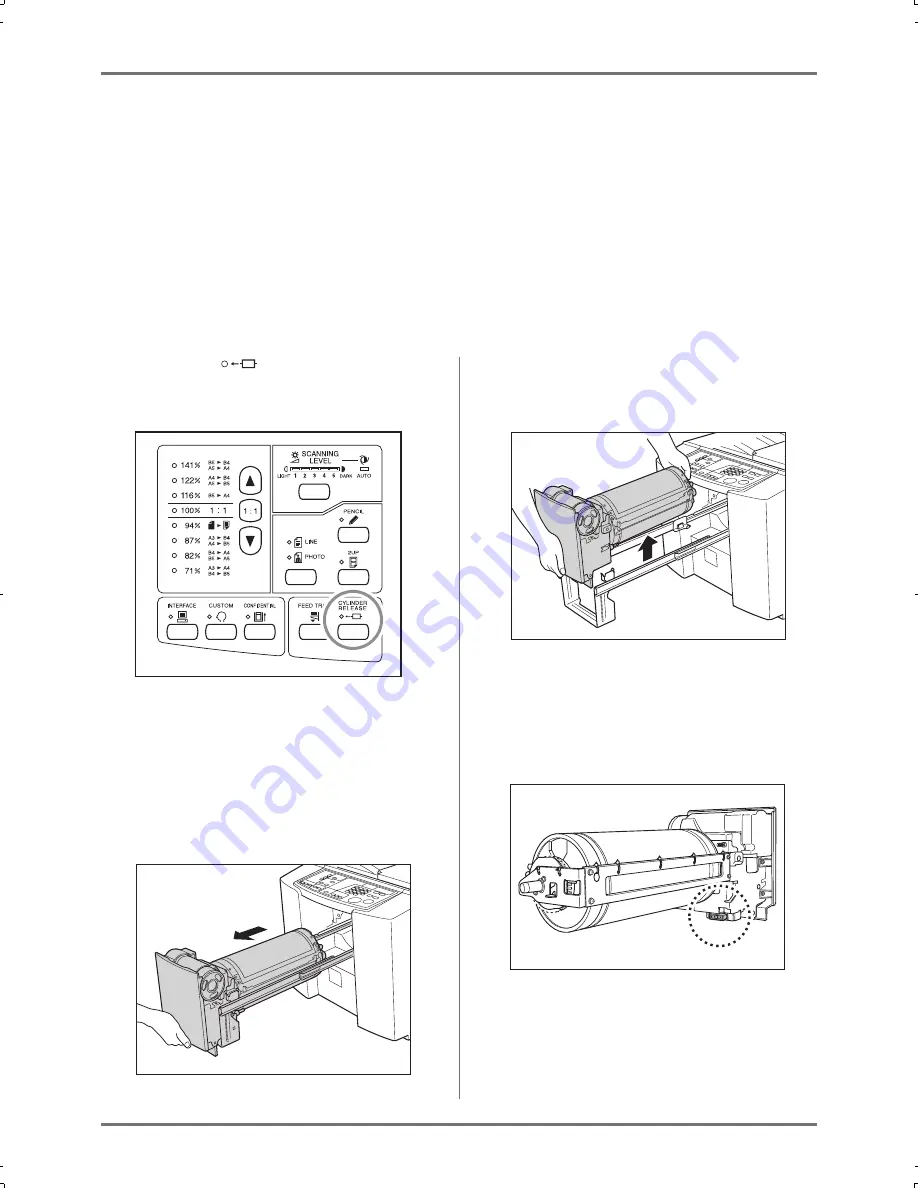
1
Press the
key.
Make sure that the Print Drum (Cylinder) Pullout
indicator is tuned on.
Important!:
• If you forcibly pull out the Print Drum (Cylinder)
when its release indicator is tuned off, the Print
Drum (Cylinder) may be damaged.
2
Pull out the Print Drum (Cylinder).
Grasp the Print Drum (Cylinder) Handle and pull
out the Print Drum (Cylinder) until it stops.
3
Remove the Print Drum (Cylinder).
Lift the Print Drum (Cylinder) with both hands to
remove it from the guide.
B
Caution:
• Do not touch the connector on the Print Drum
(Cylinder).
Neglecting this may result in malfunction of the
Print Drum (Cylinder) because of static electric-
ity or other factors.
CZ180_UG.book Page 62 Wednesday, October 31, 2007 6:19 PM
Summary of Contents for CZ180 Series
Page 19: ...Before Starting to Use Basic Process 19...
Page 27: ...Basic Operations Printing Data You Have Created on a Computer Optional Kit Required 27...
Page 39: ...Functions for Printing Changing the Print Speed Print Speed Adjustment 39...
Page 83: ...Troubleshooting Troubleshooting Tips 83...
Page 89: ...Appendixes Specifications 89...
Page 92: ...Index 92...


