Replacing Consumables
Replacing the Print Drum (Cylinder)
211
Replacing the Print Drum (Cylinder)
When replacing with a Color Print Drum (Cylinder) to change colors, or when removing jammed paper, follow the
steps to remove Print Drum (Cylinder). Be sure to use a Color Print Drum (Cylinder) specifically designed and
approved for use with this machine.
B
Caution:
• Do not stand the Print Drum (Cylinder) upright. Doing so may stain the floor, etc.
Important!:
• Use only Print Drums (Cylinders) specifically designed and approved for use with this machine.
• Keep the power ON while removing or replacing the Print Drum (Cylinder).
• Make sure to place the changed Print Drum (Cylinder) into the Print Drum (Cylinder) case and store horizontally.
Removing the Print Drum (Cylinder)
1
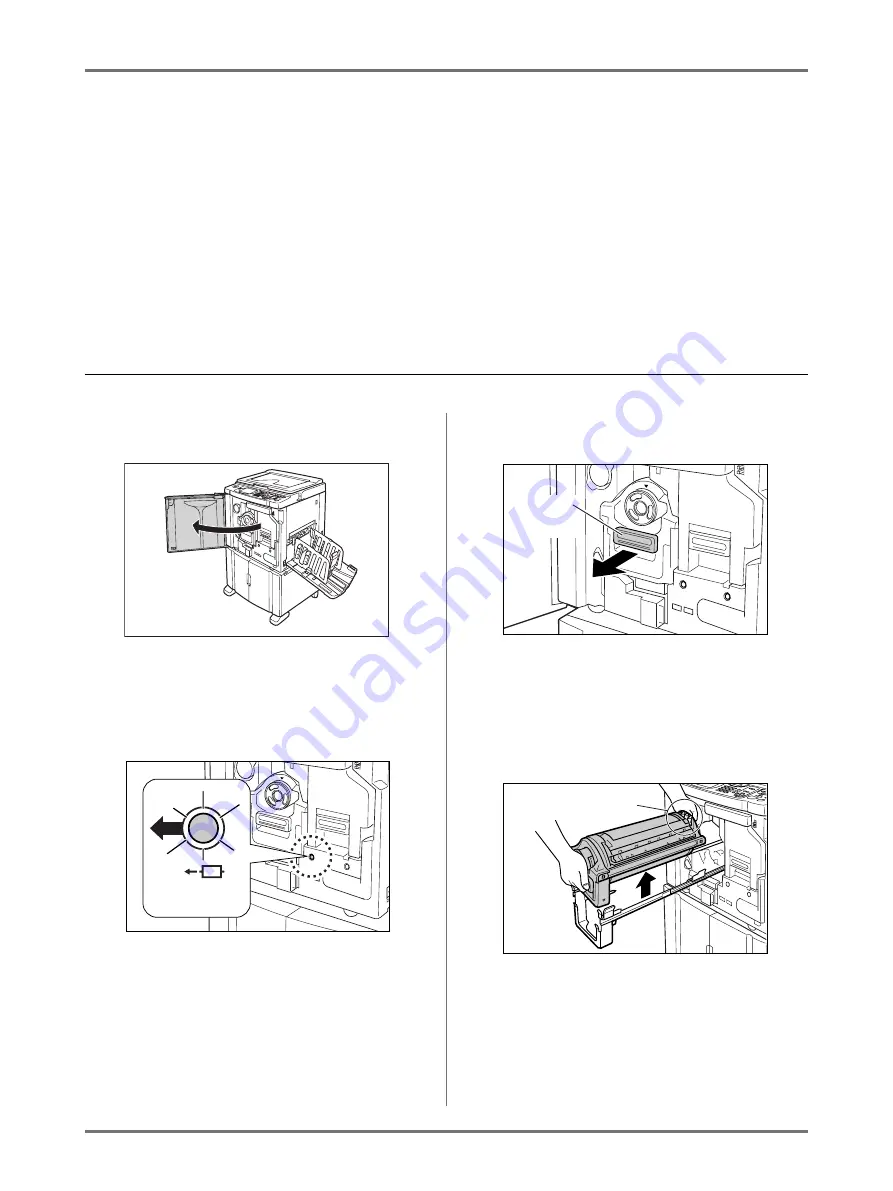
Open the Front Cover.
2
Check that the indicator of the Print
Drum (Cylinder) Release Button is
ON.
If the indicator is off, press the Print Drum (Cylin-
der) Release Button to turn it on.
Important!:
• When the Master Making Unit is out, the Print
Drum (Cylinder) cannot be pulled out. Return
the Master Making Unit into position and press
the Print Drum (Cylinder) Release button.
3
Pull out the Print Drum (Cylinder).
Grasp the Print Drum (Cylinder) Handle and
slowly pull until the Print Drum (Cylinder) is com-
pletely extended.
4
Remove the Print Drum (Cylinder).
Use both hands to lift the Print Drum (Cylinder)
straight up to remove from the rail.
Proceed with replacing the Print Drum (Cylinder),
removing the paper jam, etc..
Print Drum (Cylinder)
Release Button
Print Drum
(Cylinder)
Handle
Firmly grasp
the Green Handle
Summary of Contents for SE 9380
Page 1: ......
Page 2: ......
Page 97: ...Functions for Master Making Checking the Print Image Prior to Making Master Preview 95...
Page 203: ...Storing Original Data and Use Method Copying Moving Stored Data 201...
Page 223: ...Maintenance Cleaning 221...
Page 257: ...Troubleshooting Troubleshooting 255...
Page 263: ...Appendix Specifications 261...
Page 268: ...266 056 36003 001...


