background image

between the frame and valve cover must be filled with liquid to create a protective seal from cold winter air 
getting to the valve. 

P. Install Side Access Panel – 

Once all water line connections have been checked for leaks and electrical hook-

up is complete, the side access door may be installed.

Q. Children should be supervised to ensure that they do not play with the appliance – 

This appliance is not

intended for use by persons (including children) with reduced physical, sensory, or mental capabilities, or lack of

experience and knowledge, unless they have been given supervision or instructions concerning use of the

appliance by a person responsible for their safety.

R. Cleaning Your Fountain 

–  To clean your watering fountain you will need a good stiff bristled brush.

Remove the cover then brush the water seal groove to remove any build-up then brush the tank.  Remove the plug

that is located at the end of the trough to drain out the water and debris. You can shut off the water with the shut-

off valve located under the unit or by holding the float in the up position.  After the water and debris has drained

reinstall the plug and let the tank refill.  Now is a good time to readjust the float if needed.  Reinstall cover and

you are done.

Ritchie Valves 

Ritchie valves come in two sizes and three pressure ratings – green for high supply line pressure, red for moderate 

supply pressure, and white for low-pressure applications. Differences in the size  of trough also impacts valve 

choice. Although different pressure rated valves may be used in a fountain, each fountain will only accommodate 

one size and configuration of valve. Your individual situations may require a change from the standard valve 

supplied with your fountain, see your Ritchie Dealer if this is needed. 

3/4” 

Part # 

GPM 

Pressure Range 

White  16697 

33 

Low, 5-40 psi  

 (34-275 kPa) 

Red 

11101 

20 

Moderate, 40-60 psi    (275-414 kPa) 

Green  15377 

16.5 

High, 60-80 psi 

  (414-552 kPa) 

NOTE:  Maximum inlet water pressure for each valve is shown above. If water pressure is 

extremely high, and if the valve does not shut off, a pressure-reducing valve may be needed. 

Product Specifications 

Product Name 

CM480 

CM840 

CM10T 

CM1440 

Part # 

18248 

18235 

18700 

18252 

Drink Height - 

in/cm


16/41 

16/41 

25/64 

16/41 

Width - 

in/cm


23.5/59.7 

23.5/59.7 

32/81 

23.5/59.7 

Length - 

in/cm


51/129.5 

86/218.4 

120/305 

146/370 

Shipping Weight - 

lbs/kg


90/41 

123/56 

235/107 

186/84 

Operating Capacity - 

gal/liter 

20/76 

35/133 

50/189 

60/227 

Herd Capacity - 

head


200 beef, 

100 dairy 

300 beef, 
150 dairy 

400 beef, 
200 dairy 

475 beef, 
240 dairy 

CattleMaster Series Instruction Manual

4

August 13, 2022

Summary of Contents for 18235

Page 1: ...watering fountain on the market This unit is built to give you excellent service when properly installed and maintained Please follow instructions carefully Read and understand all instructions before...

Page 2: ...n be installed below frost level to drain water when unit is not in use Vertical supply line must be centered in riser tube to provide an air space between the line and frozen ground outside of tube F...

Page 3: ...fountain G Anchoring Fountain CattleMaster Fountains have mounting pockets molded into the base Use of Ritchie part 16555 stainless steel anchor bolts not included is recommended Once you have verifie...

Page 4: ...desired temperature first fill the trough to proper water level then check the water temperature with a thermometer The next morning check the water temperature again If the water is warmer than desir...

Page 5: ...if needed Reinstall cover and you are done Ritchie Valves Ritchie valves come in two sizes and three pressure ratings green for high supply line pressure red for moderate supply pressure and white fo...

Page 6: ...ered in riser tube Check that riser tube is free of water and mud that may freeze Check that flexible hose does not touch side of casing or frame Check casing for air leaks Check for air gaps between...

Page 7: ...CattleMaster Series Instruction Manual 6 August 13 2022...

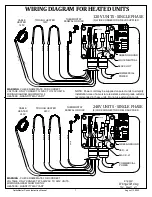
Page 8: ...e of a moisture resistant exterior grade outlet is recommended in these units Do not use extension cords CABLE HEATER 240V TROUGH HEATER 240V THERMOSTAT FENWAL OR DISC WARNING CHECK NAMEPLATE FOR CORR...

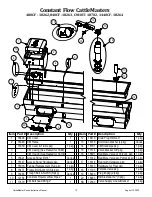
Page 9: ...SS pkg 1 pkg 21 18849 Ritchie 2 Plug pkg 1 pkg 18320 O Ring Fenwal 6 pkg 1 pkg 22 18852 CM Drain Assembly w Plug 1 pkg 18074 Nut Brass Fenwal 6 pkg 1 pkg NS 12583 Valve Supply Line w Bracket 1 pkg 8...

Page 10: ...at SS pkg 1 pkg 21 18849 Ritchie 2 Plug pkg 1 pkg 18320 O Ring Fenwal 6 pkg 1 pkg 22 18852 CM Drain Assembly w Plug 1 pkg 18074 Nut Brass Fenwal 6 pkg 1 pkg NS 12583 Valve Supply Line w Bracket 1 pkg...

Page 11: ...t SS pkg 1 pkg 21 18849 Ritchie 2 Plug pkg 1 pkg 18320 O Ring Fenwal 6 pkg 1 pkg 22 18852 CM Drain Assembly w Plug 1 pkg 18074 Nut Brass Fenwal 6 pkg 1 pkg NS 12583 Valve Supply Line w Bracket 1 pkg 8...

Page 12: ...t SS pkg 1 pkg 21 18849 Ritchie 2 Plug pkg 1 pkg 18320 O Ring Fenwal 6 pkg 1 pkg 22 18852 CM Drain Assembly w Plug 1 pkg 18074 Nut Brass Fenwal 6 pkg 1 pkg NS 12583 Valve Supply Line w Bracket 1 pkg 8...

Page 13: ...pkg 5 16621 Access Panel 6 x14 Varies 11142 Red Male Valve w o Petcock pkg 1 pkg 6 18147 Access Panel Hardware pkg Varies 17 18314 Float with Hardware pkg 1 pkg 7 18316 Fenwal Replacement Plug pkg 1...

Page 14: ...or to any product that is installed and or used contrary to Ritchie Industries installation instructions and instructions for use The limited warranty shall also not apply to any product whose exterio...

Page 15: ...This page intentionally left blank CattleMaster Series Instruction Manual 14 August 13 2022...

Page 16: ...Part 17873 August 13 2022...

Reviews: