background image

L.


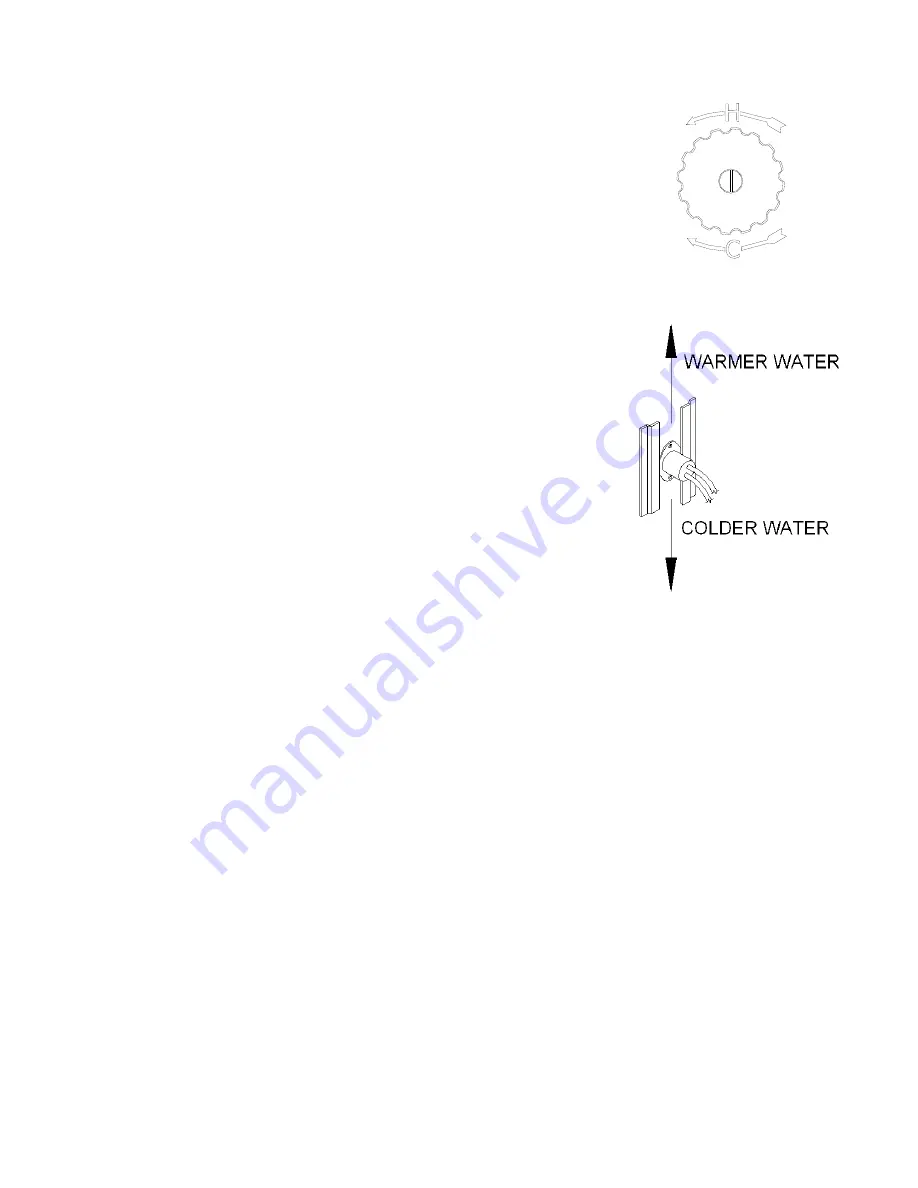
Fenwal Thermostat 

(Cattle Fountains and Combination) - The adjustable range 

is from 0

o

. F (-18

o

 C) to 100

o

 F (38

o

 C). Thermostat is not preset at factory. Fill the 

trough to proper water level. Check the water temperature with a thermometer. The next 

morning, check the water temperature again. If the water is warmer than desired, turn 

the thermostat down. If there is ice forming on the surface of the water, turn the 

thermostat up. Only slight adjustments should be made to the thermostat at any time. A 

1/16 turn on the thermostat will change the water temp. 7

o

 F (4

o

 C).  44

o

 F (7

C) in the 

trough represents the most economical operation. Counter clockwise raises the 

thermostat setting.  

M.


Disc Thermostat 

(AC Series) – The disc thermostat is mounted in a 

bracket under the trough, which allows it to be moved relative to the heater. To 

ease movement of thermostat turn ¼ turn. To lock in position after adjustment 

turn ¼ turn back. As the thermostat is moved toward the heater, the water 

temperature in the trough is lowered. The best location is determined by 

checking the trough temperature several times during the heating season. 

N.


Drain Plug 

– Insert the drain plug firmly into the drain hole in the center of 

the trough. 

O.


Float Adjustment

 – Open water-supply shut-off valve, check for and fix 

any leaks. Adjust float for a water depth of 2 inches below top of trough or 

overflow pipe by adjusting the thumbscrew or wing nut. 

P.


Install Side Access Panel and Cover – 

Once all water line connections have been checked for leaks and 

electrical hook-up is complete, the side access door may be installed. With the valve functioning properly and the 

water level set at the proper level, you may install the valve cover.


Q.


Children should be supervised to ensure that they do not play with the appliance – 

This appliance is not 

intended for use by persons (including children) with reduced physical, sensory or mental capabilities, or lack of 

experience and knowledge, unless they have been given supervision or instructions concerning use of the 

appliance by a person responsible for their safety. 

R.


Cleaning Your Fountain 

– To clean your watering fountain you will need a good stiff bristled brush.  

Remove the cover then brush the  valve area to remove any build-up then brush the tank.  Remove the plug that is 

located in the valve chamber area under the float to drain out the water and debris. You can shut off the water 

with the shut-off valve located under the unit or by holding the float in the up position.  After the water and debris 

has drained reinstall the plug and let the tank refill.  Now is a good time to readjust the float if needed.  Reinstall 

cover and you are done.  

Cattle, Combination, and AC Series 

Fountains Installation Instructions

5

17 October, 2012

Summary of Contents for 1AC

Page 1: ...Congratulations you have just purchased the finest watering fountain on the market This unit is built to give you excellent service when properly installed and maintained Please follow instructions c...

Page 2: ...fore connection to fountain Water supplies with foreign material such as sand rust etc may require a filter to keep fountain valve working properly C Electric Supply It is usually most cost effective...

Page 3: ...concrete to keep air from leaking under fountain H Final Water Connection Connect the top of the supplied hose to the valve cut hose to proper length and slip onto the barb fitting of the valve assemb...

Page 4: ...t be made and maintained in strict conformity with National Local plumbing codes and National Local electrical codes CSA in Canada The applicable provisions of these codes take precedent Failure to ma...

Page 5: ...d If you are using solid wire then you will be able to just push the wire into the slot Stranded wire will require you to press the button down HEATER 240V FENWAL THERMOSTAT CABLE HEATER TERMINAL BLOC...

Page 6: ...nd fix any leaks Adjust float for a water depth of 2 inches below top of trough or overflow pipe by adjusting the thumbscrew or wing nut P Install Side Access Panel and Cover Once all water line conne...

Page 7: ...rmal service or handling and to any products altered or repaired with other than original equipment or manufacturer s parts This warranty gives you specific legal rights and you may also have other ri...

Page 8: ...of water and mud that may freeze Check that flexible hose does not touch side of casing or frame Check casing for air leaks Check for air gaps between casing and concrete floor Valve won t stop drippi...

Page 9: ...kg Optional 1 PKG 18320 O Ring Fenwal 6 pkg 1 pkg NS 12583 Valve Supply Line pkg 1 pkg 18074 Nut Brass Fenwal 6 pkg 1 pkg NS 13830 Cable Htr 120V 48W 1 pkg 1 pkg 8 15154 Screw 1 4 x5 8 TC SS 10 pkg 1...

Page 10: ...kg Optional 1 pkg 18320 O Ring Fenwal 6 pkg 1 pkg NS 12583 Valve Supply Line pkg 1 pkg 18074 Nut Brass Fenwal 6 pkg 1 pkg NS 13830 Cable Htr 120V 48W 1 pkg 1 pkg 8 15154 Screw 1 4 x5 8 TC SS 10 pkg 1...

Page 11: ...11515 Valve Bracket 1 2 w screws 1 pkg 9 18114 Trough Bolt Nut 5 pkg 1 pkg 28 12575 Red Valve 1 2 1 pkg 10 18628 Drain Plug 2 pkg 1 pkg 29 13613 Float with Short Arm 1 pkg 11 11419 Heater 120V 250W 1...

Page 12: ...Optional 1 pkg 7 11885 Disc Thermostat pkg 1 pkg NS 13830 Cable Htr 120V 48W 1 pkg 1 pkg 8 15158 J Bolt Nut ZP 10 pkg 1 pkg NS 18323 2AC Accessory pkg 1 pkg 9 17500 Drain Pipe Guard 1 NS 15652 2AC Ca...

Page 13: ...2 pkg Optional 1 pkg 7 11885 Disc Thermostat pkg 1 pkg NS 13830 Cable Htr 120V 48W 1 pkg 1 pkg 8 15158 J Bolt Nut ZP 10 pkg 1 pkg NS 18323 2AC Accessory pkg 1 pkg 9 17500 Drain Pipe Guard 1 NS 18059 2...

Page 14: ...Htr 120V 48W 1 pkg 1 pkg 7 11885 Disc Thermostat pkg 1 pkg NS 18323 1AC Accessory pkg 1 pkg 8 15158 J Bolt Nut ZP 10 pkg 1 pkg NS 15651 1AC Casing Insulation pkg 1 plg 10 18628 Drain Plug 2 pkg 1 pkg...

Page 15: ...Fountain Model Part Hole to Hole Location 3 Cattle Fountain 16743 15 1 2 x 30 5 Cattle Fountain 16745 18 1 8 x 38 1 2 3 Combination Fountain 16769 15 1 2 x 30 1 AC 18034 8 1 2 x 18 2 AC 18033 8 7 16...

Reviews: